Strategy on the Jousting Matrix

“Jousting in Chainmail is like playing rock-paper-scissors.”

The analogy is as oft cited as apt. In Chainmail (3rd ed., Tactical Studies Rules, 1975), opposing knights each choose, in secret, an aiming point and a defensive position. Each aiming point is then compared against the other’s defensive position on the Jousting Matrix to determine results of one “ride.”

Jousting
 

Results range from a miss to breaking a lance to being injured or unhorsed. Based on the results, points are awarded for each ride. Unless one is unhorsed, the knight with the most points at the end of three rides is declared the winner, awarded the laurels, and gets his or her dance partner of choice at the after party.

Playing the hand game, probabilities for a win, loss, or tie are exactly equal. Your choice of three forms—rock, paper, or scissors—versus your opponent’s choice is either weaker, stronger, or equally matched.

Winning at Even Odds

Deprived of any rationale, strategies for winning rock-paper-scissors often involve being quick—watching the opponent’s hand to see what shape is forming, sneaky—waiting till the last possible instant to form your own shape, or tricky—calling out one shape just prior to forming another. These are denied us in Chainmail jousting, where we write our choice of aiming point and defensive position on a hidden sheet—outside of learning the rhythm of your opponent’s pen marks on a hard table, which is sneaky.

For more complexity, we might play rock-paper-scissors-Spock-lizard, which adds two more choices. Since each choice defeats half the remaining choices, no one is superior to another. Five choices does, though, reduce the odds of a tie to one-in-five.

The French play the game with four choices. In pierre-papier-ciseaux-puits, the rock and scissors fall into the well (puits), while the paper covers it as well as the rock. Here we have two options that outperform the others, which gets closer to jousting in Chainmail.

But Chainmail jousting is different from all those. Instead of one choice, each player in a joust has two: the attack (aiming point) and the defense (defensive position). But this only doubles the complexity, effectively playing the same game twice at one go—once as attacker, once as defender—without necessarily reducing the chance for a tie. Although we’ll see that a draw in Chainmail jousting is improbable.

Where Chainmail differs from the hand games is in the options. Instead of three, four, or five, each player has eight options for the attack and six for the defense. This, again, only complicates the matter, though by magnitudes.

“Results can vary from both opponents missing to both being unhorsed, as a study of the Jousting Matrix will reveal” (26).

To figure any strategy out of the Jousting Matrix, our study must go further than the range of results. More careful examination shows the attack options differ in their probability of success and limit the attacker’s possible defense options. As well, the defense options have differing probabilities of success. One successful defense result, “B,” ensures a favorable end to the joust in the next ride. A frequent occurrence, a “B” also subtracts 1 point from the attackers score, making a tie unlikely, though not impossible, in even a single ride. At this point, we see that the analogy is less apt, even if it isn’t entirely inapplicable either.

At this point, we see that the analogy is less apt, even if it isn’t entirely inapplicable either.

Evaluating Options

Point System

To evaluate the strength of each attack and defense, we use a simple point system.

Result Points
(U)nhorsed 1
(H)elm Knocked Off ½
(B)reaks Lance (without unhorsing) −½

Miss and Glance Off results are equivalent: no effects, no points. A glancing blow only lends dramatic effect.

We give and take ½ point for Helm Knocked Off and Breaks Lance, because once either is accomplished, the next ride ends in an Unhorsing. For if a defender’s helm is knocked off or an attacker’s lance breaks, he or she must take a Steady Seat the next ride. Knowing this, the opponent aims FP. The other can only hope to achieve an unhorsing as well.

Because a Breaks Lance with Unhorsed (B/U) result penalizes the attacker only 1 point while it wins the joust, we don’t subtract any points in the evaluation system when they occur together. Similarly, the Injured result with Unhorsed (U/I) awards extra points to the attacker but does not impact our assessment. We use these results—and the combination B/U/I—to break any ties in the evaluation.

  Defensive Positions  
Aiming Point Lower Helm Lean Left Lean Right Steady Seat Shield High Shield Low Total
Helm       +1   +1½
DC +1 −½   −½ −½   −½
CP +1 +1   −½ +1 +1 +3½
SC     −½     +1
DF −½ +1   −½   −½ −½
FP +1   −½ +1 +1 −½ +2
SF     +1       +1
Base −½   +1 −½ +1 −½
Total +2 +1½ +1 −½ +3½  

Aiming Points

Counting up the total points for each attack reveals the optimal aiming points assuming random defensive positions.

Aiming Point Score
CP +3½
FP +2
Helm +1½
SF +1
SC
Base
DC −½
DF −½

The tie between SC and Base might be broken in favor of Base due to the extra points for an Injury versus Shield High. We’ll see below, however, that Shield High ranks low on the defensive positions list, so the Injury is unlikely. More likely is the Breaks Lance result, which comes up three times when aiming at Base versus only once at SC.

The tie between DC and DF is broken by a lance which suffers in the later case against the Lean Right position.

“Aim pale; avoid dexter.”

This might be part of initial jousting instruction. For we see that CP is by far the best aiming point, with FP coming in second. While DC and DF are the worst.

Defensive Positions

To evaluate each defense, we apply the same point system. In defense, the lower score is better.

Defensive Position Score
Steady Seat −½
Shield Low
Lean Right +1
Lean Left +1½
Lower Helm +2
Shield High +3½

“Steady in the seat; don’t raise the shield.”

Steady Seat is the best defensive position, with Shield Low next. Lower Helm ranks above Shield High, which is by far the worst defensive position. In the best case, your opponent Breaks Lance against Shield High, but only when aiming DC. Plus, we see above that dexter is not a favorable side for the aim. In the worst case, your opponent aims Base, and you won’t be up for much dancing at the after party.

In Play

Now that we know the best and worst attacks and defenses, we might think it’s that simple and mumble the analogy under our breath as we turn the page to the fantastic parts of the book without first tilting. But unlike rock-paper-scissors, we only experience the interaction of rules and human psychology seated opposite an opponent. In that sense, it’s more like Diplomacy—to exaggerate the point in the opposite direction. We discover its virtues in play.

Simple to Teach and Learn

The rules consist of a few lines of text and the Jousting Matrix, which, once we learn to read it, contains the essentials of play. A few minutes and a couple demonstration rides and we’re off to the lists. Best if each player has a copy of the Matrix before them.

Change It Up

Once the players understand how the game works, it isn’t long until everyone is aware of the best and worst attacks—if that wasn’t the final instruction of their tutelage. Of course, we all use two or three best attacks and defenses. But we have to change it up with middle-ranked options for both from time to time to keep the opponent guessing.

Note Attacks and Defenses

To play, each player makes a secret note of his or her aiming point and defensive position. This done, both players reveal their choices, and results are read from the table.

Know Your Opponent

I recommend keeping a record not only of your own but of your opponent’s aiming points and defensive positions as well. For a single joust of three rides, it probably doesn’t matter as there isn’t much chance for patterns to emerge. But in a jousting tournament, they do, and it’s difficult to see the patterns in memory.

With a quick look at previous rides, you might notice that your opponent favors a particular attack. You might see also that he or she intersperses a second favorite every third ride. Thereby, you gain an advantage.

Know Thyself

Take a look at your own previous choices too. If you see a pattern in your attacks or defenses, your opponent may see it as well. Use any patterns in your opponent’s defense to choose a different aiming point, likewise for the defensive position.

The Jousting Matrix in Fiction

I used the Chainmail Jousting Matrix to add strategy to a fictional jousting scene. In The First Story of Littlelot, the hero must joust against the villain to rescue Gwenevere. If Lancelot wins, Maleagant frees the queen from his tower prison. If Maleagant wins, Lancelot becomes a prisoner too. Those familiar with the Matrix might decipher the knights’ aiming points and defensive positions in each ride. All action in less than two pages, “The Joust” is a quick read.

Range of Results

Examining the Matrix, we see the results of aiming points against defensive positions. In play, we see the myriad combinations of two aiming points and two defensive positions in a series of rides combined with a series of jousts.

May well Gygax and Perren mention the range of results as a selling point. Even in the not infrequent case of a broken lance: We are constrained to a defensive position, certain to be unhorsed in the next ride. In our final effort, should we aim pale to increase our chances to unhorse the opponent as well? Or will she expect that strategy and lean left. In that case, we aim sinister fess… But maybe she’s expecting that too?

The best strategy depends on knowing the opponent. Look for the pattern in your record.

Within a Scenario

As a stand-alone game, Chainmail jousting rejoins the hand games in the list of games you play once and never pick up again. There must be consequences to winning and losing a joust.

Simple stakes are built in to OD&D’s wilderness exploration (Vol. III, 15). If we wander too close to a castle, its lord might challenge us to a joust. Win, and the after party goes on for a month. Lose, and we continue our exploration of hostile territory sans armure.

We might build an entire scenario around a tournament, but the scenario should include high stakes on the tournament’s outcome. Since winners and losers are determined at the end, the stakes might propel the story into the next scenario—in one direction with a win, another direction with a loss.

Conclusion

So, while some may yet liken it to a simple game of blind choice and even odds, I think the analogy an exaggeration that unjustly discredits the game. For, while it is easy to learn, Chainmail jousting is complex, its outcomes diverse, and its judicious use can enhance our role-playing and wargame scenarios.

…while it is easy to learn, Chainmail jousting is complex, its outcomes diverse, and its judicious use can enhance our role-playing and wargame scenarios.

If you have any strategies for winning the game, ingenious uses for Chainmail jousting, or other comments about it, please leave a note in the comments. I’m always looking for ways to up my game.
Death Rides to Mortal Combat

Gygax and Perren describe the jousting event: “Knights in ‘friendly’ combat, armed with lance and sheild, and mounted upon mighty destriers” (Chainmail, 26).

The original quotation marks imply irony. Indeed, in the context of our scenario, this is no amicable tournament but mortal combat. The objective is to slay the opponent.

Start

The 24 victors of the man-to-man combat phase mount horses and face each other across the central arena. Each figure competes in one joust of three rides. Victors go on to the final phase of Champions of Chaos.

Notes on Jousting

Follow Chainmail’s Jousting rules (26-7, 42) considering the following notes.

  1. By now it is understood: one does not yield nor give quarter in the presence of Solon Theros.
  2. When a rider is unhorsed, combat continues on the Man-to-Man Melee Table (41).
  3. The other rider is not obliged to dismount. These are not knights; they follow no code. This is Chaos.
  4. Consider each rider to wear plate mail and helmet, carry a shield and lance, as well as a sword—all provided by Solon Theros.1
  5. Mounts, also provided by the super hero, are not barded.
  6. See the section on Mounted Men (26), including the table on the chances for an unhorsed rider to be stunned.
  7. A combatant injured as a result of a joust (an “I” result) subtracts 1 from any dice rolls—on the Melee Table, for instance.2
  8. If neither combatant is unhorsed after the third ride, both continue to the final phase.

Knights Among Us

A rider who unhorses the opponent on the first ride may have had significant training. Mark the figure for a mounted hero. Should he or she succeed the final phase, consider treating the figure as a Knight (not from Religious Orders of Knighthood) under Historical Characteristics (18).

Lists at Aldefane
Lists at Aldefane.
Twenty-four riders compete for the right to become heroes.

Figures

Miniatures are not at all necessary for the jousting phase. There is no difference from one rider to the next. In my case, having only one horsed figure and it without a lance, putting miniatures on the table adds nothing to the spectacle.

I do find one purpose for their use. As one of the competitors is a favorite—Pal Hargrane has some background developed through play—I plant two additional figures of the same likeness among them. By so doing, I triple Hargrane’s chances to continue to the final phase.


Notes

1 The Jousting Matrix assumes combatants are properly equipped.

2 I’m making this up. Other than losing 10 points, Chainmail includes no consequences to a jousting injury.

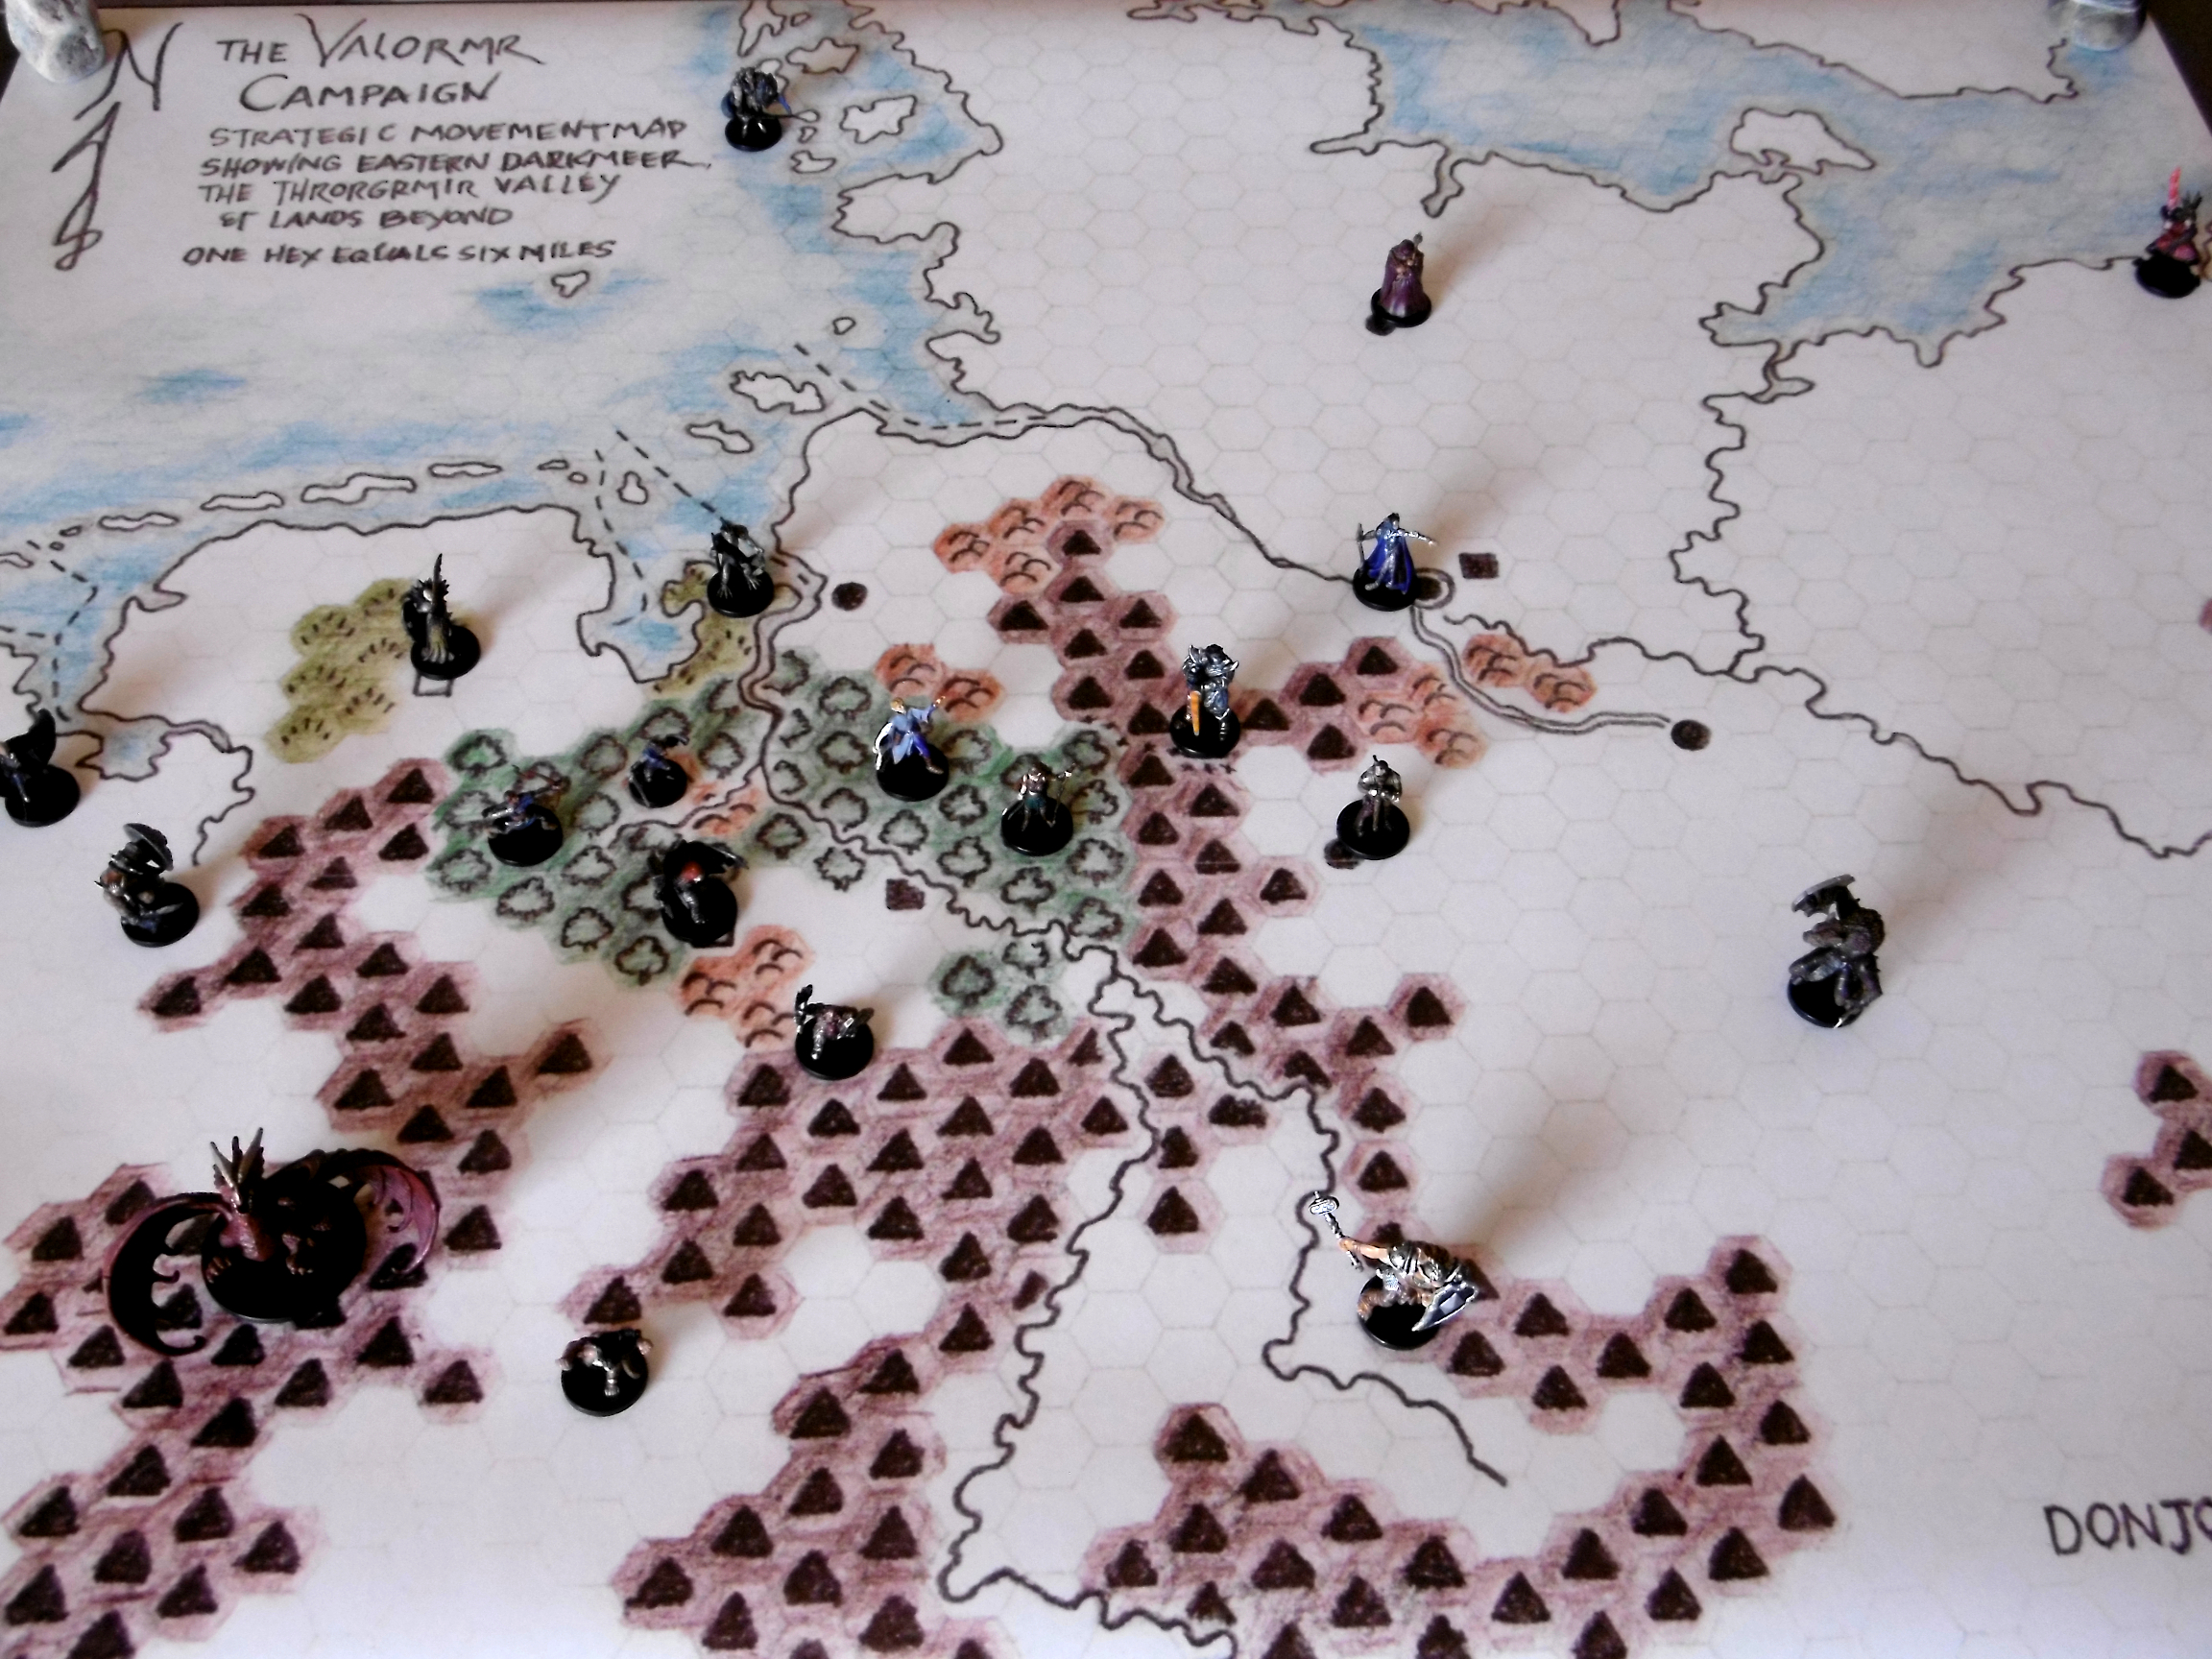
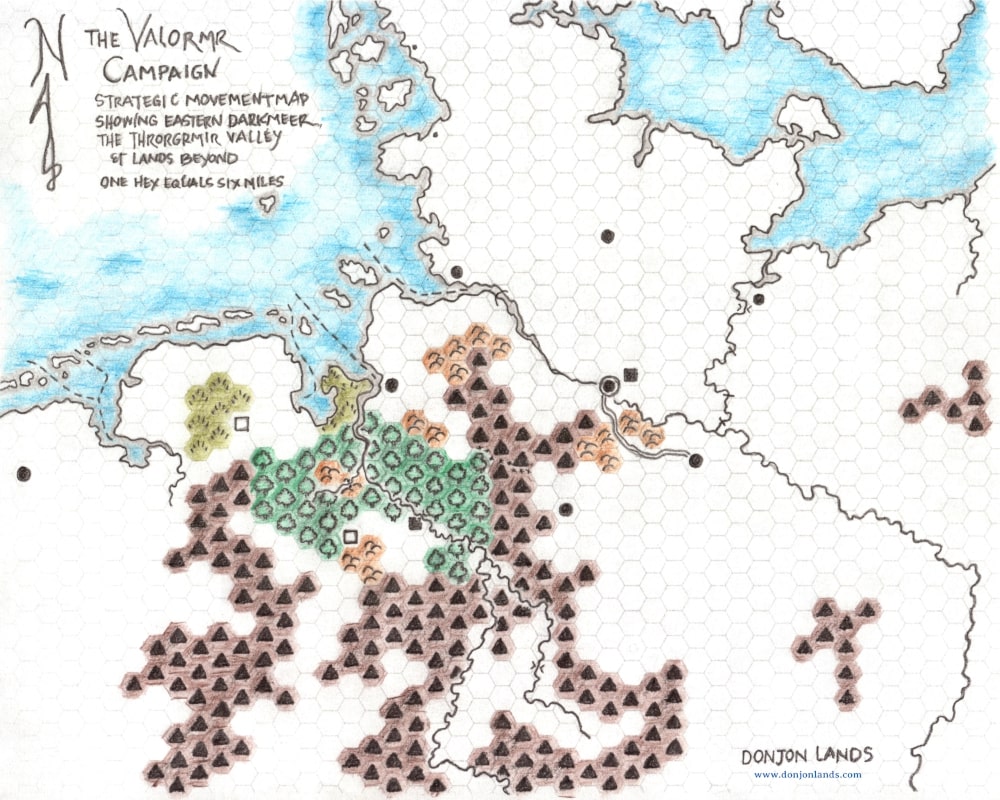
The Valormr Campaign Strategic Movement Map

Some thousands of years prior to the beginning of Wyrmwyrd, the Throrgrmir dwarves defended their subterranean civilization against the red dragon Anax Archondas.

While in Viggo Eskilsson’s day, we refer to the battle as Valormr, at the time it was known as the Battle of Throrgrmir. Later historians would call it the Second Wyrm War. The first was the Battle of Throrgardr.

In the Valormr Campaign, we simulate events and engagements leading up to the Battle of Throrgrmir and the battle itself.

Valormr Strategic Map (100 dpi)
The Valormr Campaign Strategic Movement Map.

Legend

Terrain Population Centers
Clear Clear City City
Coast Coast Town Town
Forest Forest Settlement Settlement
Hills Hills Infrastructure
Mountains Mountains Bridge Bridge
River, Major River Major Channel Channel
River, Minor River Minor Ferry Ferry
Sea Sea Ford Ford
Swamp Swamp Road Road
Fortifications Track Track
Castle Castle    
Ruins Ruins    
Tabletop Valormr
War Room Map.
In Setting Up a Wargames Campaign, Tony Bath mounts the strategic map for his years-long Hyboria campaign on a wall with pins to mark army movement. For the summertime Chainmail campaign, wanting to get maximum use out of the pre-painted plastic, I prefer the tabletop. Printed at four times the size, the strategic movement map fits on the dining-wargames table. Army commanders occupy hexes, which are six miles across, a half day’s marching.

To the strategic map, I added two towns, cataracts, fords, a ferry, and a bridge. The map image at top is updated. In addition, I appended a legend to this article. The map in higher resolutions, 100, 300, and 600 dpi, is available on the Downloads page. [08:10 15 August 2021 GMT]

Four Without Country

The voice of Solon Theros boomed in the arena. “Your enemy is your enemy…”

Pal Hargrane adjusted his grip on the sword and raised the shield again. Solon Theros called a halt to the battle, but his tone forebode ill comings.

Hargrane’s wooden shield, painted with Ternemeer’s three white stars on a blue field, separated him from the Dracken Deep soldier opposite, who raised his flail. The spiked ball dangled above blood-spattered dirt. A moment before, the spikes gouged Hargrane’s shield, and his blade nicked the Drackean’s cheek. The mark trickled red into the man’s dark beard above his own shield, which bore a dragon head, black on dark green.

“Allies You Have None”

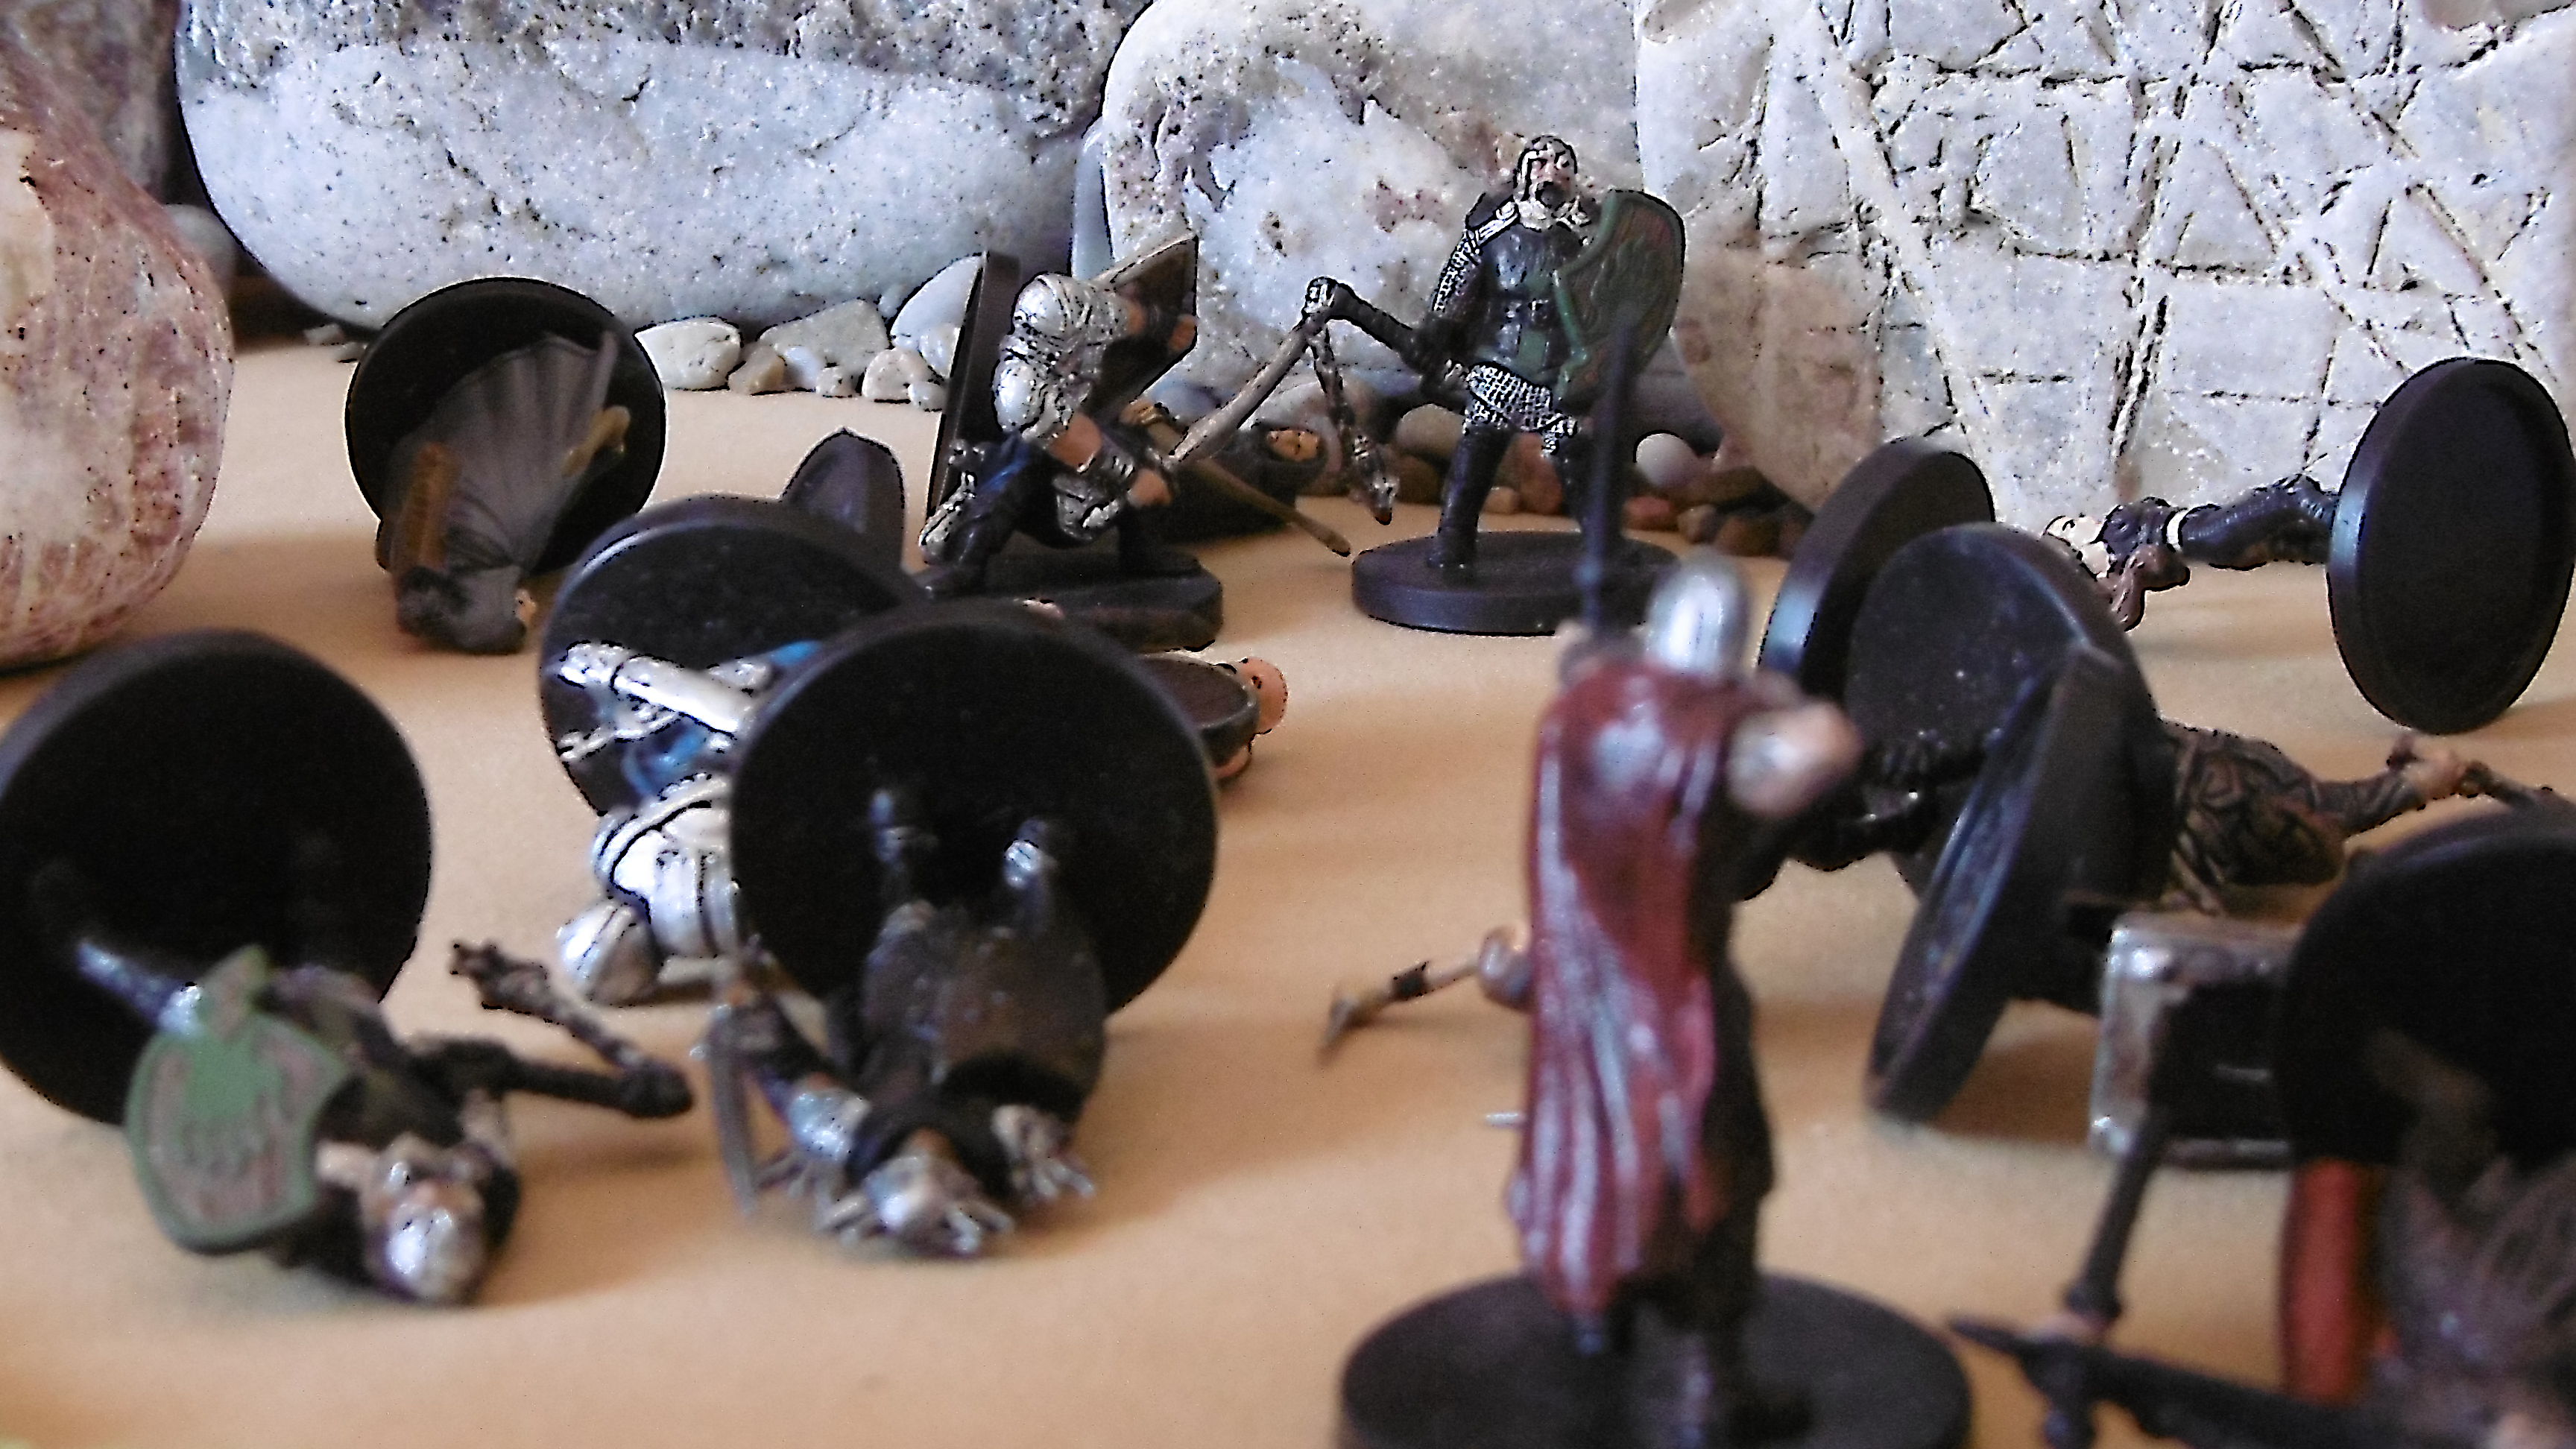
The scene depicted here was played on the wargames table. The scenario and setup is described in “‘Allies You Have None’,” the man-to-man combat phase of Champions of Chaos.

“Your countryman is your enemy…”

Hargrane looked to his left and right. Ternesmen along the line, few remained, did the same.

Hargrane’s true countrymen were far away—across the sea, his mother told him. Vikings killed his father and sold his mother, the babe Pal in arms, to Darkmeer traders, who brought them to the Low Countries. Pal grew up starving as a slave, working beside his mother in the mud fields of the Lionsgate Wards, until Ternemeer raiders captured them. Pal was in his twelfth year.

In Ternemeer, they were better treated. They weren’t slaves to the Ternes but bonded laborers, indentured for an indefinite period to pay their own ransom. Such were the customs in Darkmeer. But Pal and his mother had good food, comfortable quarters, and not so long work days. The Ternes protected them from raids by the Warders as well as the Drackeans. Now, years later, his mother was treated as any other Terneswoman, and Pal Hargrane fought alongside Ternesmen and loved them.

With pride he carried the shield with their coat of arms. The blue field was the Ternemeer, a lake after which the surrounding territory was named. The three white stars were reflections in its surface, representing hearth, family, and the protection of one’s neighbors. Ternemeer was his country. The Ternes were his countrymen, indeed.

“Allies you have none—Fight!”

The command echoed between the walls. Three hundred warriors stood, brows furrowed, heads cocked. Pal Hargrane struggled to make sense of the words. Blood pumped hot in his ears. His head spun.

Before the echo faded, a cry of rage rose up from behind Hargrane’s recent opponent. The red mark on the cheek was replaced by a spiked ball and a splash of blood. 

Nostrils filled with the smell of copper, Hargrane braced the shield and rushed the new enemy. His blade separated the life from the Drackean’s body, as battle cries again filled the air over the arena at Aldefane.


“Fight!” echoed in Jarl’s ears. To his right, a Ternsman loosed an arrow into the back of a footman, another Ternesman. As quickly, Jarl drew the string of his own longbow and put an arrow into the first. As cries rose up from the battlefield, warriors fell upon it. The nearest target was a Ternemeer swordsman, back turned, eighty yards away.


While Solon Theros spoke, Theodoard got to his feet. He stood knee-deep in running water where he almost drowned. Crossing the stream with his company of armored flail men, he tripped. A man in plate mail is not quick to rise from prone. Soaked with water, he is less quick. Face down in a foot-deep stream, he doesn’t breathe.

Theodoard picked the flail and shield from beneath the rippling surface, grumbling under his breath. He missed the entire battle. For that, he would be ridiculed. There was a Drackean footman now, turning toward him with a smug look.

“Allies you have none—Fight!”

Or maybe it wouldn’t matter so much. Theodoard charged.


Gareth Tor dropped his bow and drew his sword. Any archer who did not would be the first target of any other archer who did not. A Ternemeer armored warrior charged toward him. Another warrior, a Drackean archer like himself, sword drawn, charged the Ternesman from the flank.

When the Ternesman went down, Gareth Tor charged the Drackean, who he recognized. Tor feigned a cut but thrust instead, as he had done in a dozen sparring matches against Seitse Baack. Seitse never did learn to avoid the feint.


Pal Hargrane turned to face his next opponent. None were near. Fallen bodies lay around him. Sixty yards distant, a Ternesman raised a bloody sword. His eyes met Hargrane’s. Then he stopped. The eyes grew round, and the Ternesman fell forward, an arrow in his back.

Hargrane followed the arrow’s fletching to a Ternemeer longbowman. The Ternesman nocked another arrow. Shield leading, Hargrane moved toward the Ternesman. Another warrior, a Drackean flail man, moved in the same direction with the same purpose in his step. The bowman aimed and, as quickly, shot. But the arrow was for neither warrior.


Crouching to pick up the fallen Ternesman’s shield, Gareth Tor looked up in time to see the profile, a steady vertical line and a diminishing horizontal—a receding elbow—a hundred thirty yards distant. He raised the shield and ducked behind it. The arrow’s steel head slammed into the wood, which shuddered at the impact.

Tor grabbed his bow from the dirt and drew an arrow, while he stood. Two armored warriors moved to engage the Ternemeer longbowman, but they were two shots away. 

Tor’s first shot went wide. The Ternesman’s next arrow plowed into the ground at Tor’s feet.

While the Ternesman was at the far end of bow range, Tor was well within reach of the other’s longbow. As the Ternesman drew again, Tor let fly another. It too went wide.

The warriors charged the Ternesman, who turned his draw on the swordsman, twenty yards away. Tor nocked and drew, steadied his aim, and released the arrow.


Pal Hargrane charged. The longbowman nocked a third arrow and drew it back. Then he pivoted. Hargrane looked into the Ternesman’s eyes. They were blue. He covered the eyes with his shield, still charging. The arrow rang his helmet like a bell.

An instant later, Hargrane and the Drackean flail man closed on the longbowman, as the last drew a sword. Three weapons raised. Battle cries pierced the air, and an arrow slipped between the two armored men to strike the longbowman’s chest.


While the swordsman checked his swing, Theodoard allowed the flail to follow through. The sword would be quicker, but, now that one bowman was down, the more imminent threat to both warriors was the other bowman. Panting under chest plate, Theodoard yanked the ball from flesh and turned on the Drackean across the field. It was a long way to run. Flying arrows made it longer.

But the Drackean bowman held the missile weapon straight out to one side. Then he dropped it. Relieved that he wouldn’t have to run again, Theodoard raised the flail, but the sword was quicker.


The Drackean bowman, now armed with sword and a Ternesman’s shield, fought well, but Pal Hargrane saw the feint. He avoided the thrust and planted a blade in his opponent’s ribcage. The bowman slumped to the ground. The shield lay across the body. Hargrane’s eyes fell to three white stars on a blue field.

Again, the command echoed between walls. “Halt!”


After Jarl Falls to an Arrow  Pal Hargrane and Theodoard Turn to Face the Archer Gareth Tor
After Jarl Falls to an Arrow, Pal Hargrane and Theodoard Turn to Face the Archer Gareth Tor.

“Missiles cannot be fired into a melee” (Chainmail, 16).

I allowed it. Though the melee phase follows missile fire, opponents in contact are considered to be engaged in melee. But, having no allies in the fight, Gareth Tor didn’t care if he missed the intended target.

While rolling the attack, I thought of a couple ways to handle a miss. Fond of neither, I was glad the bowman hit the mark.

“Allies You Have None”

“Instead of using one figure to represent numerous men, a single figure represents a single man. Use this system for small battles and castle sieges. When using the Man-to-Man Combat system all preceding [mass-combat] rules apply, except where amended below” (Chainmail, 25).

Figures

At the end of the skirmish phase (previous), Solon Theros excuses the commanders and allows the peasants to slink off the field. Remove those figures from the arena.

Champions of Chaos

“Allies You Have None” is the man-to-man combat phase of Champions of Chaos, an introductory wargame scenario, in which Solon Theros chooses champions to fight for Chaos.

Replace each standing unit, no matter how many figures remain, with two figures of its type. Place one where the unit stood, the other some distance away to avoid like-armament melee. For each unit without a standing figure, add one of its figures to the field where the unit met its end.

Each figure represents a warrior equipped as the figure, allowing for exceptions for variety in armor and weapon class.

Allies You Have None
“Allies You Have None. Fight!”
Solon Theros so begins the melee.

Using my own field as an example, one figure of Meine’s Light Foot remains. I replace it with two figures. I allow one Light Foot, normally unarmored, to wear leather armor as the miniature wears. The other I designate to wear no armor. Another example, the same figure wields two daggers. To differentiate the figures—who are now “characters” after all—I give one a sword. I want to see how well an underdog performs, so the sword goes to the leather armored figure, while the unarmored figure begins with a pair of daggers.

Twelve to Twenty

If you have less than a dozen or more than a score of figures on the field, add or subtract some. Barring simultaneous combat, where opponents might slay each other, the number of melees you’ll fight is equal to the number of figures less one.

Scales

Although the figure scale is now 1:1, Gygax and Perren do not indicate any change in either the ground or time scales using the man-to-man system. This strains my imagination, but for the moment, I’ll leave it.

Exercising Chainmail

The intent of Champions of Chaos is to learn the Chainmail rules as written and use them at the table. Thereafter, armed with better understanding of their working, we may make adjustments in later scenarios of the Valormr Campaign.

Terrain

The only note concerning the terrain is that columns, in addition to blocking movement, line of sight, and field of fire, may be used as cover versus missile fire. Chainmail says, “Cover subtracts from dice scores” (41), without stipulating the penalty. I suggest subtracting 1 or 2, depending on the attacker’s angle, allowing that full cover makes the target impervious.

Acquiring Shields and Additional Weapons

A victor may pickup the shield and weapons of the vanquished. Multiple weapons may be carried within reason. A dagger, sword, shield, and spear may be carried, for example, but if you don’t fight with the spear, it—or the shield—must be discarded. It comes to the same though, because you can pick up the spear after the melee if you aren’t bleeding out next to it.

To exercise the full range of weapon-versus-weapon and weapon-versus-armor classes, you might allow other weapon types to be picked up. At the end of a melee, roll a d12 on the weapon class list (Man-to-Man Melee Table, 41). A result of 1 to 8 indicates the corresponding weapon is nearby, in addition to the arms of the vanquished; 9-12 indicates no additional weapon is found.1

Record-Keeping Reduction

Allow the combatants to reduce by half your record keeping. Make no notes on armament until the end of a melee.

In a one-minute turn, picking up or discarding a shield or weapon takes no appreciable time, as does sheathing and drawing a weapon prior to engagement. A combatant who draws a weapon in melee, however, is treated as being attacked from the rear (25). You can do it, but you shouldn’t.

Additional weapons in one’s arsenal allow for choice in subsequent melees. As he approaches, consider your opponent’s weapons and armor compared to your own on the Melee Table (41) and the “first blow” rules (25). Don’t draw too soon. Given time, a clever opponent might, after you’ve drawn, drop one weapon and draw another before closing.

Missile Weapons

A combatant using a missile weapon attracts a charge from one to three of the closest opponents in missile range. This because every fighter knows that, even if they aren’t the first target, they might be the next.

Missile weapons are most judiciously used after the field is thinned. A stationary bowman fires at a range from 150 (bow) to 210 yards (longbow) twice per turn, but the second shot is taken at the end of the turn. Consider the number of targets and range before nocking an arrow.

Move, Missile, and Melee

Following the Turn Sequence (9), move each figure—charging whenever possible, take any missile fire, then resolve melees. By my reading of the rules, a man-to-man melee is resolved in its entirety within a single one-minute turn. For simplicity’s sake, conduct one melee at a time.

Because it would too onerous to roll first move (Turn Sequence, step 1) for a dozen figures, on the first turn assume movement is simultaneous but don’t write orders. Dice for first move at the beginning of a melee to determine which figure is the attacker and which the defender. The field should be considerably thinned by the second turn.

One Hit, One Kill

Modern adventure gamers might scour the Man-to-Man Combat section for how many hits a figure takes before it falls. The answer, though unwritten, is one. Hit points haven’t been invented yet.

“Halt!”

In this series of melees, a story unfolds. One warrior is victorious over all opponents. Pit figure against figure until only one remains.

When Solon Theros calls the halt, your figure stands over the prone form of his or her last opponent. Scattered around the silent battlefield, a score of others, enemies and former comrades, stand over prone forms.


Notes

1 Weapons of classes above 8 are unwieldy in man-to-man combat. Just for fun though, pit a dagger against a two-handed sword.

Killing Field at Aldefane

Annemie Tacx drew the killing field. She knew her enemy. Minke Meine was an aggressive commander.

Tacx’s longbows formed across the space between a pillar and the north wall. Their arrows could reach into the bog, south, and across the stream, east. Between the longbows, heavy foot interspersed themselves. A troop of peasants skulked thirty yards behind. Opposite the pillar, two units of armored foot in a column filled the narrow stretch of firm ground beside the bog.

Dracken Deep vs. Ternemeer

Find the scenario and setup for the skirmish here described in “Dracken Deep vs. Ternemeer.”

Meine positioned her archers along the stream, just beyond longbow range. Likewise, her armored foot, three units in a column, between the two eastern pillars. Her light troops lined up along the north wall.

Then the doors closed, and Solon Theros, after promising cruel death for cowards, began the battle.

Start Positions

Meine’s armored troops advanced, lead elements crossing the stream. The longbows let fly the first volley as, on Tacx’s right, her own column advanced. The forward unit skirted the field.

The following unit halted at the field’s edge, and Meine’s light foot charged them. The intent surely was to mask the longbowmen’s fire. But the charge was repulsed, and Meine’s main body entered the field under a hail of arrows.

End Turn 3

Meine’s lead element charged Tacx’s right. The right withstood the charge. Then, under fire from across the stream, the right pressed the attack, charging Meine’s main body.

The light foot, recovered, charged the firing line. A volley of arrows cut down their first rank. The second rank charged on. The longbows refused combat, falling back to the line of peasants, while the heavy foot halted the charge.

In the killing field, the fight was on. Armored troops clashed. Having dispatched the light charge, Tacx’s heavy foot flanked the line’s left, while Meine flanked the right. In the general melee that followed, both sides were diminished.

With no targets, Meine’s archers advanced, crossing the stream. Tacx’s longbows also advanced, putting the enemy archers in range of indirect fire.

In the loggia above, red eyes blinked. “Halt!” said Solon Theros.

The last swords clanked. Shields lowered. Remnants of armored troops were on the right. The killing field was colored in blood. On opposite sides, longbows and archers. Between them, Tacx’s few remaining heavy troops stood, chests heaving.

For the space of a heart beat, all was silent. Solon Theros began to speak. “Your—”

Arrows whisked the air. The heavy troops fell. Silence again.

Another beat, another volley of arrows from the other direction. Archers fell. Stillness followed. A crow swooped over the field to light atop a fallen pillar. It ruffled its feathers.

Solon Theros began again. “Your enemy is your enemy. Your countryman is your enemy. Allies you have none. Fight!”

Champions of Chaos

So begins the man-to-man combat phase of Champions of Chaos.

Score

Annemie Tacx leads Ternemeer to victory over her rival Dracken Deep’s Minke Meine. Both will go on to lead troops against the forces of Law in the Valormr Campaign.

Scores include the two figures felled after the halt. This is Chaos.

Score   Dracken Deep   Ternemeer  
Troop Type Cost Figures Total Figures Total
Peasant 0.5        
Light Foot 1     4 4
Heavy Foot 2 3 6 2 4
Armored Foot 2.5 7 17.5 9 22.5
Additional Weapons          
Bow 3     2 6
Longbow 4        
Total   10 23.5 15 36.5

End Positions

Dracken Deep vs. Ternemeer

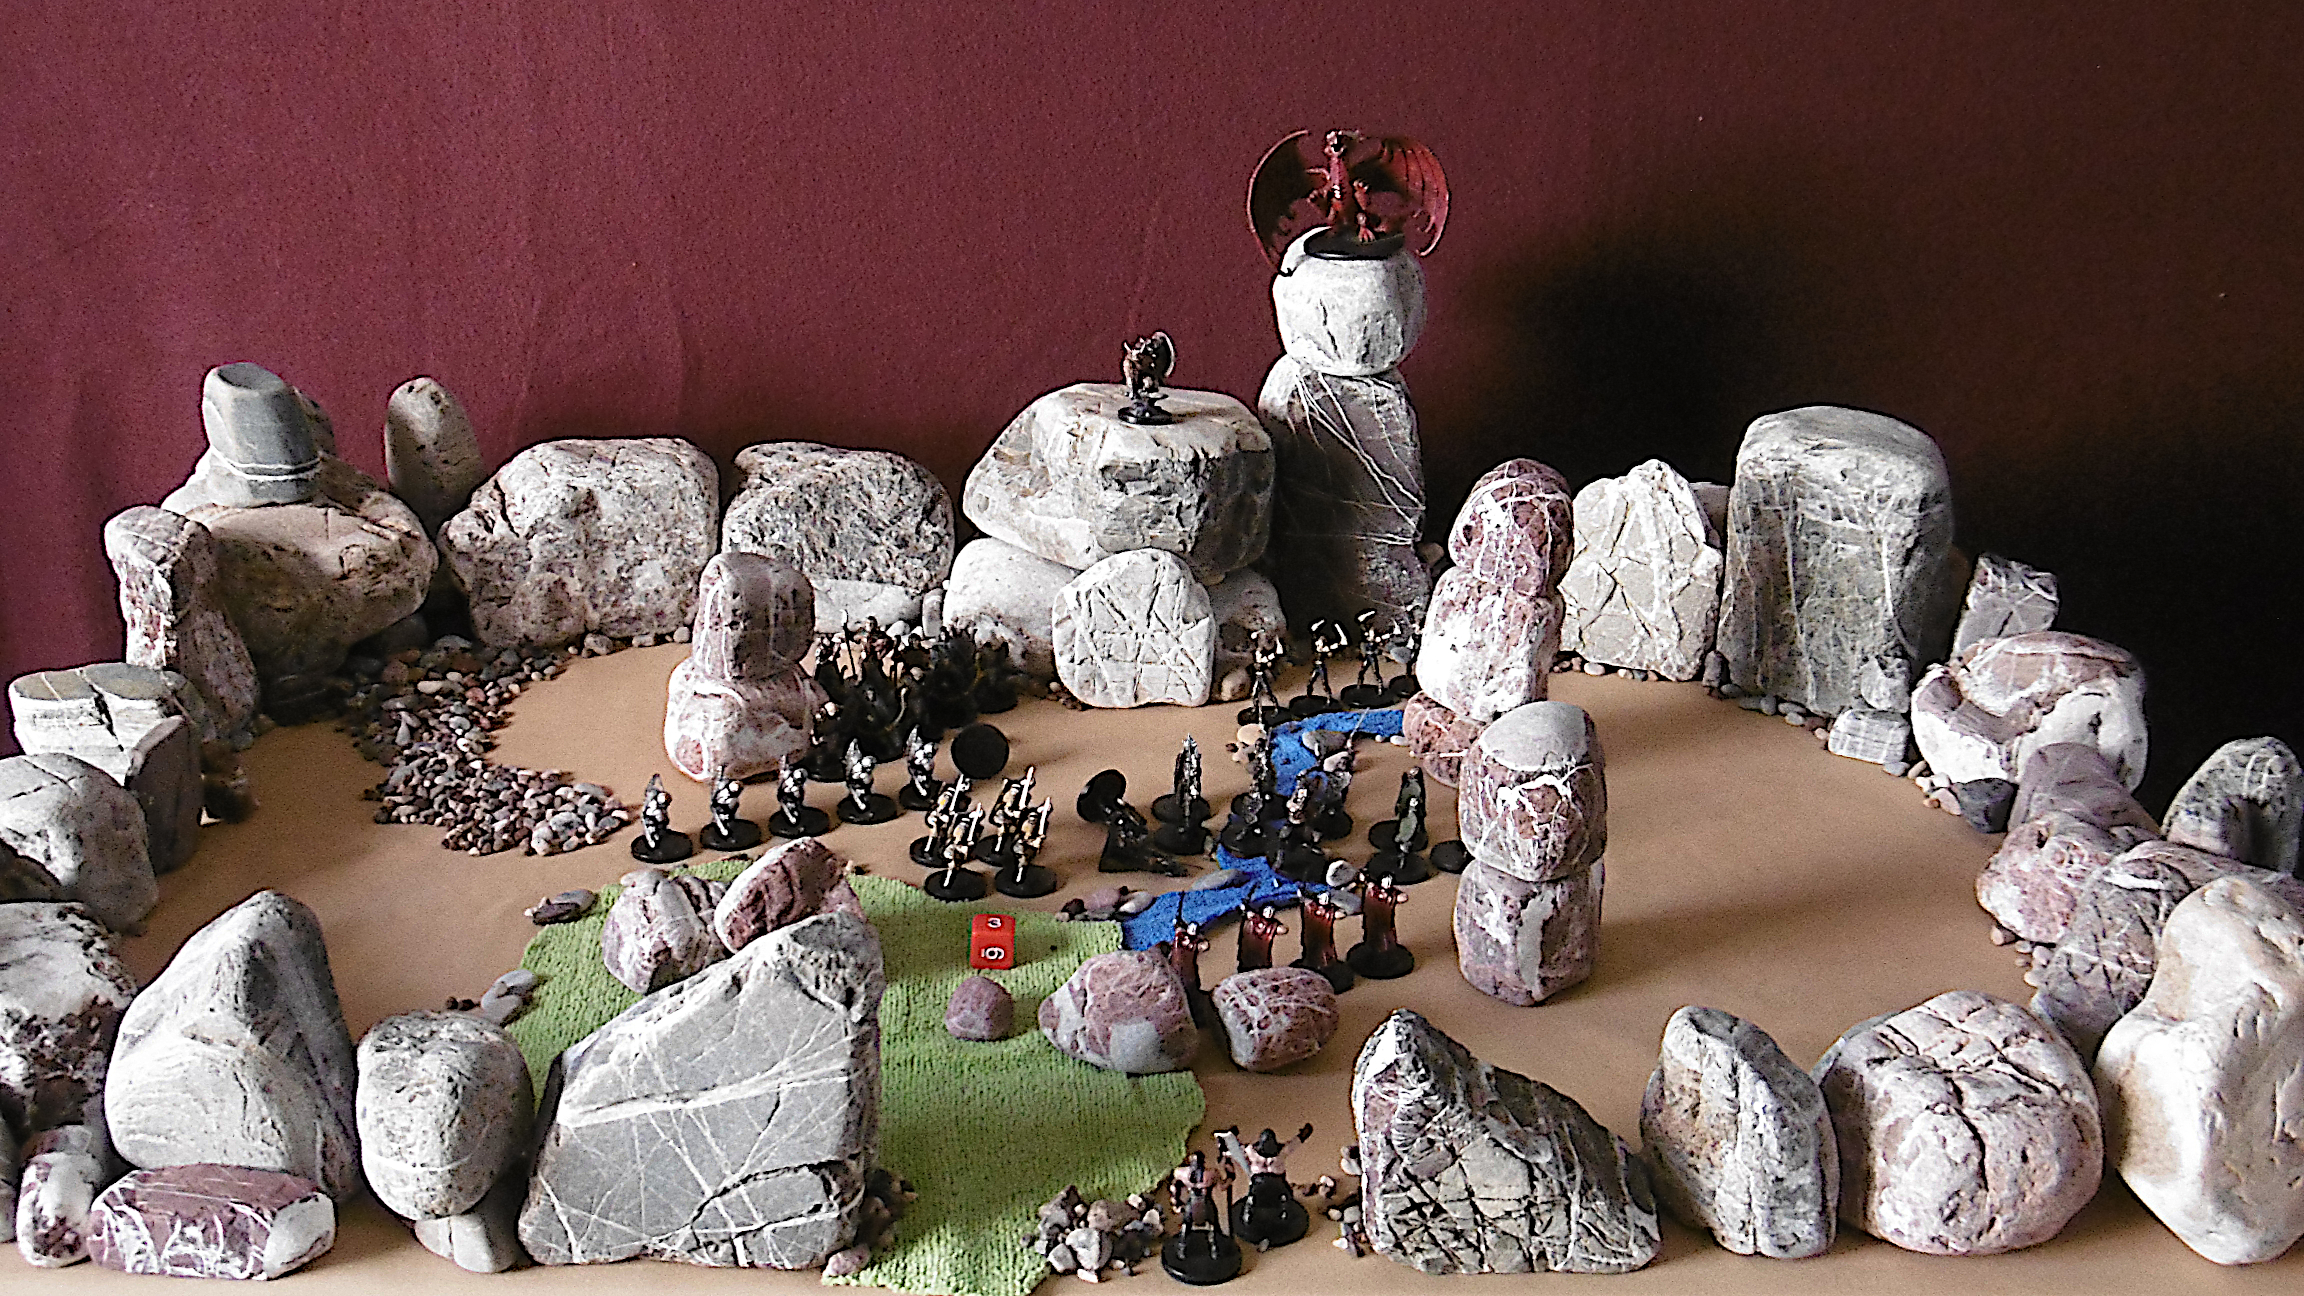
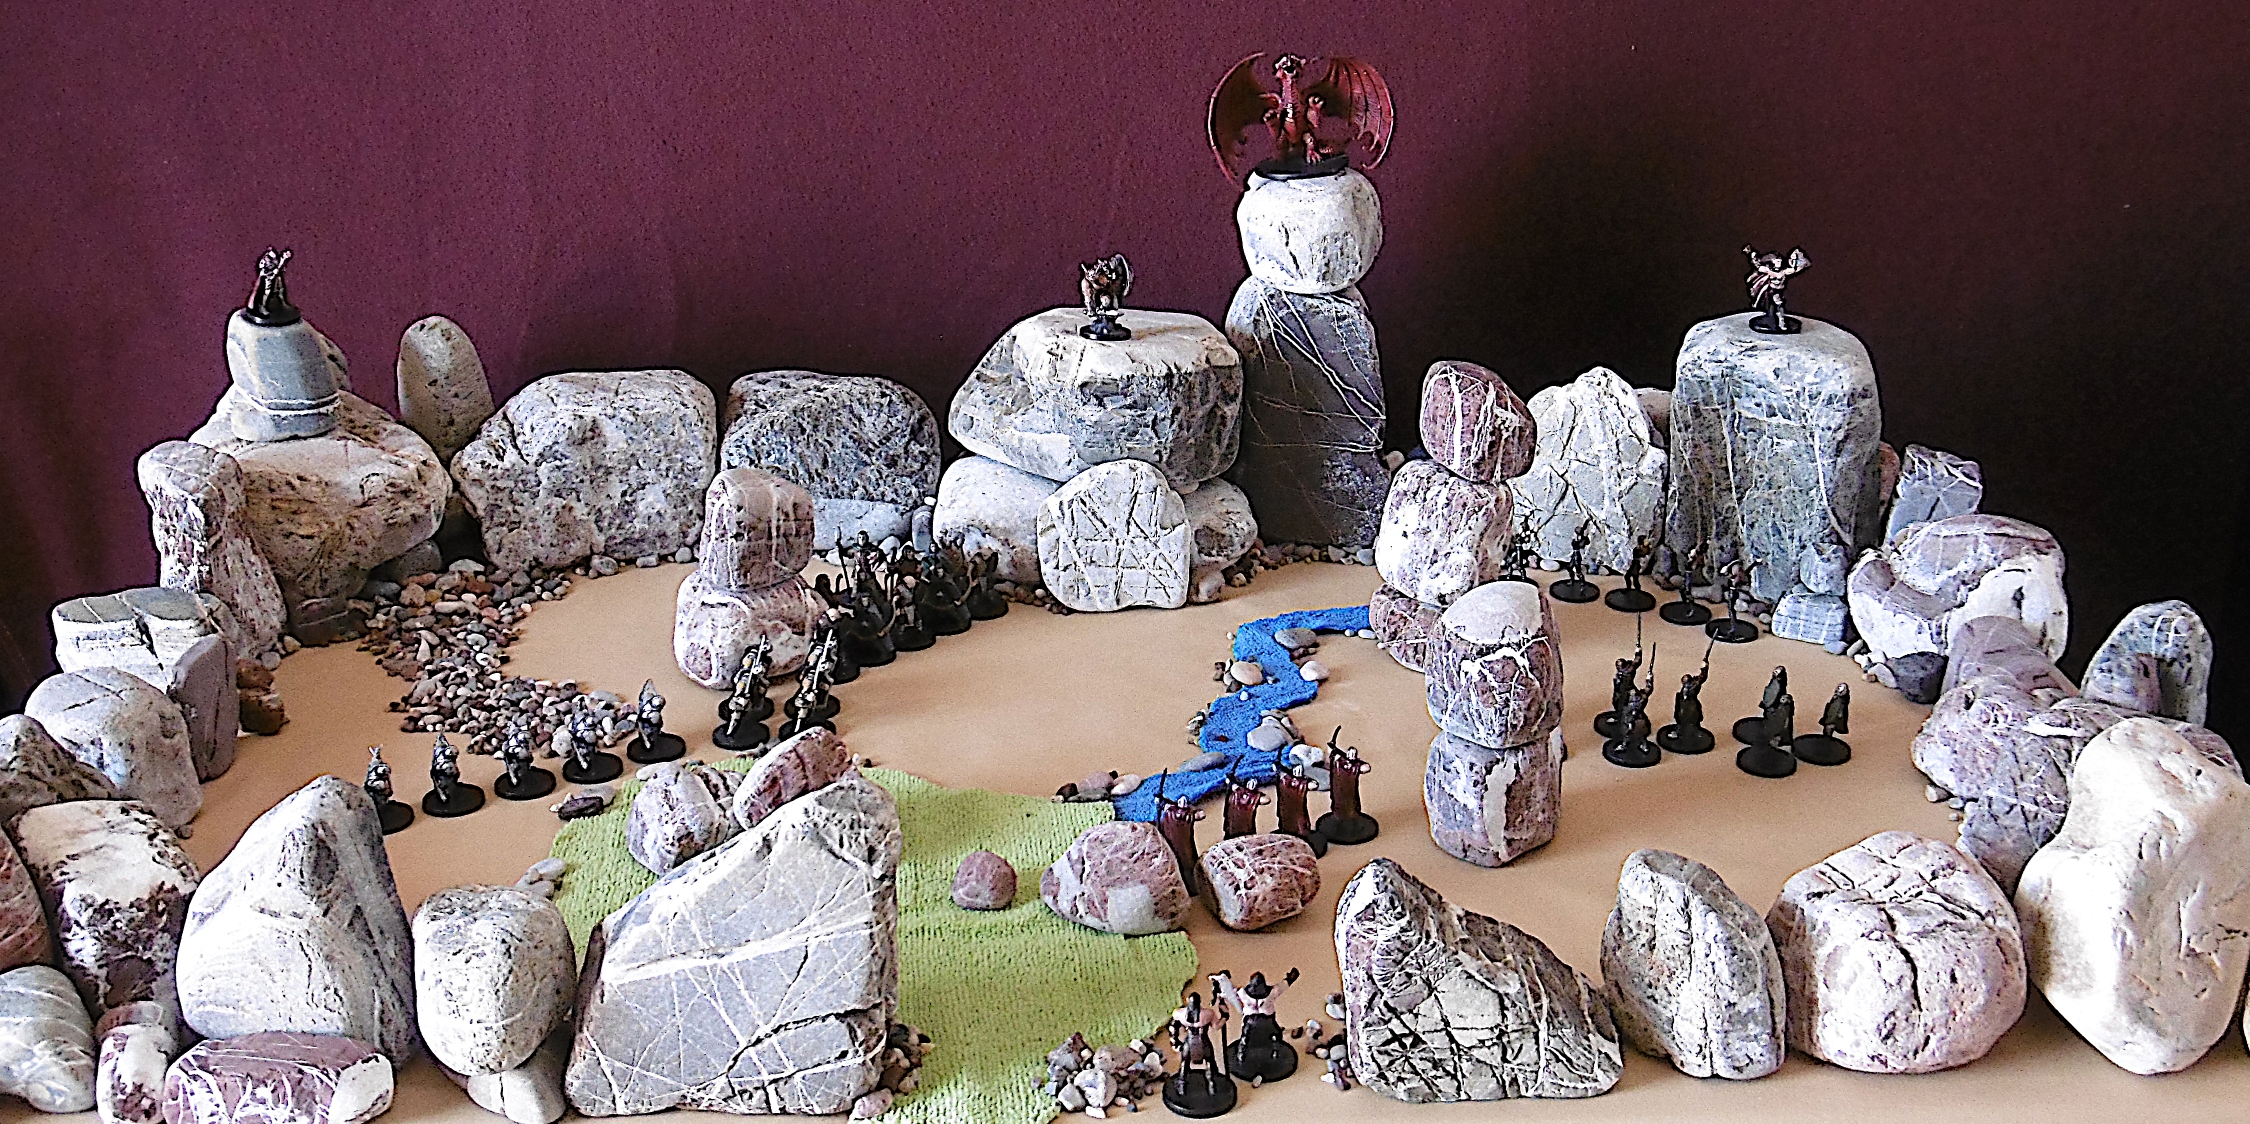
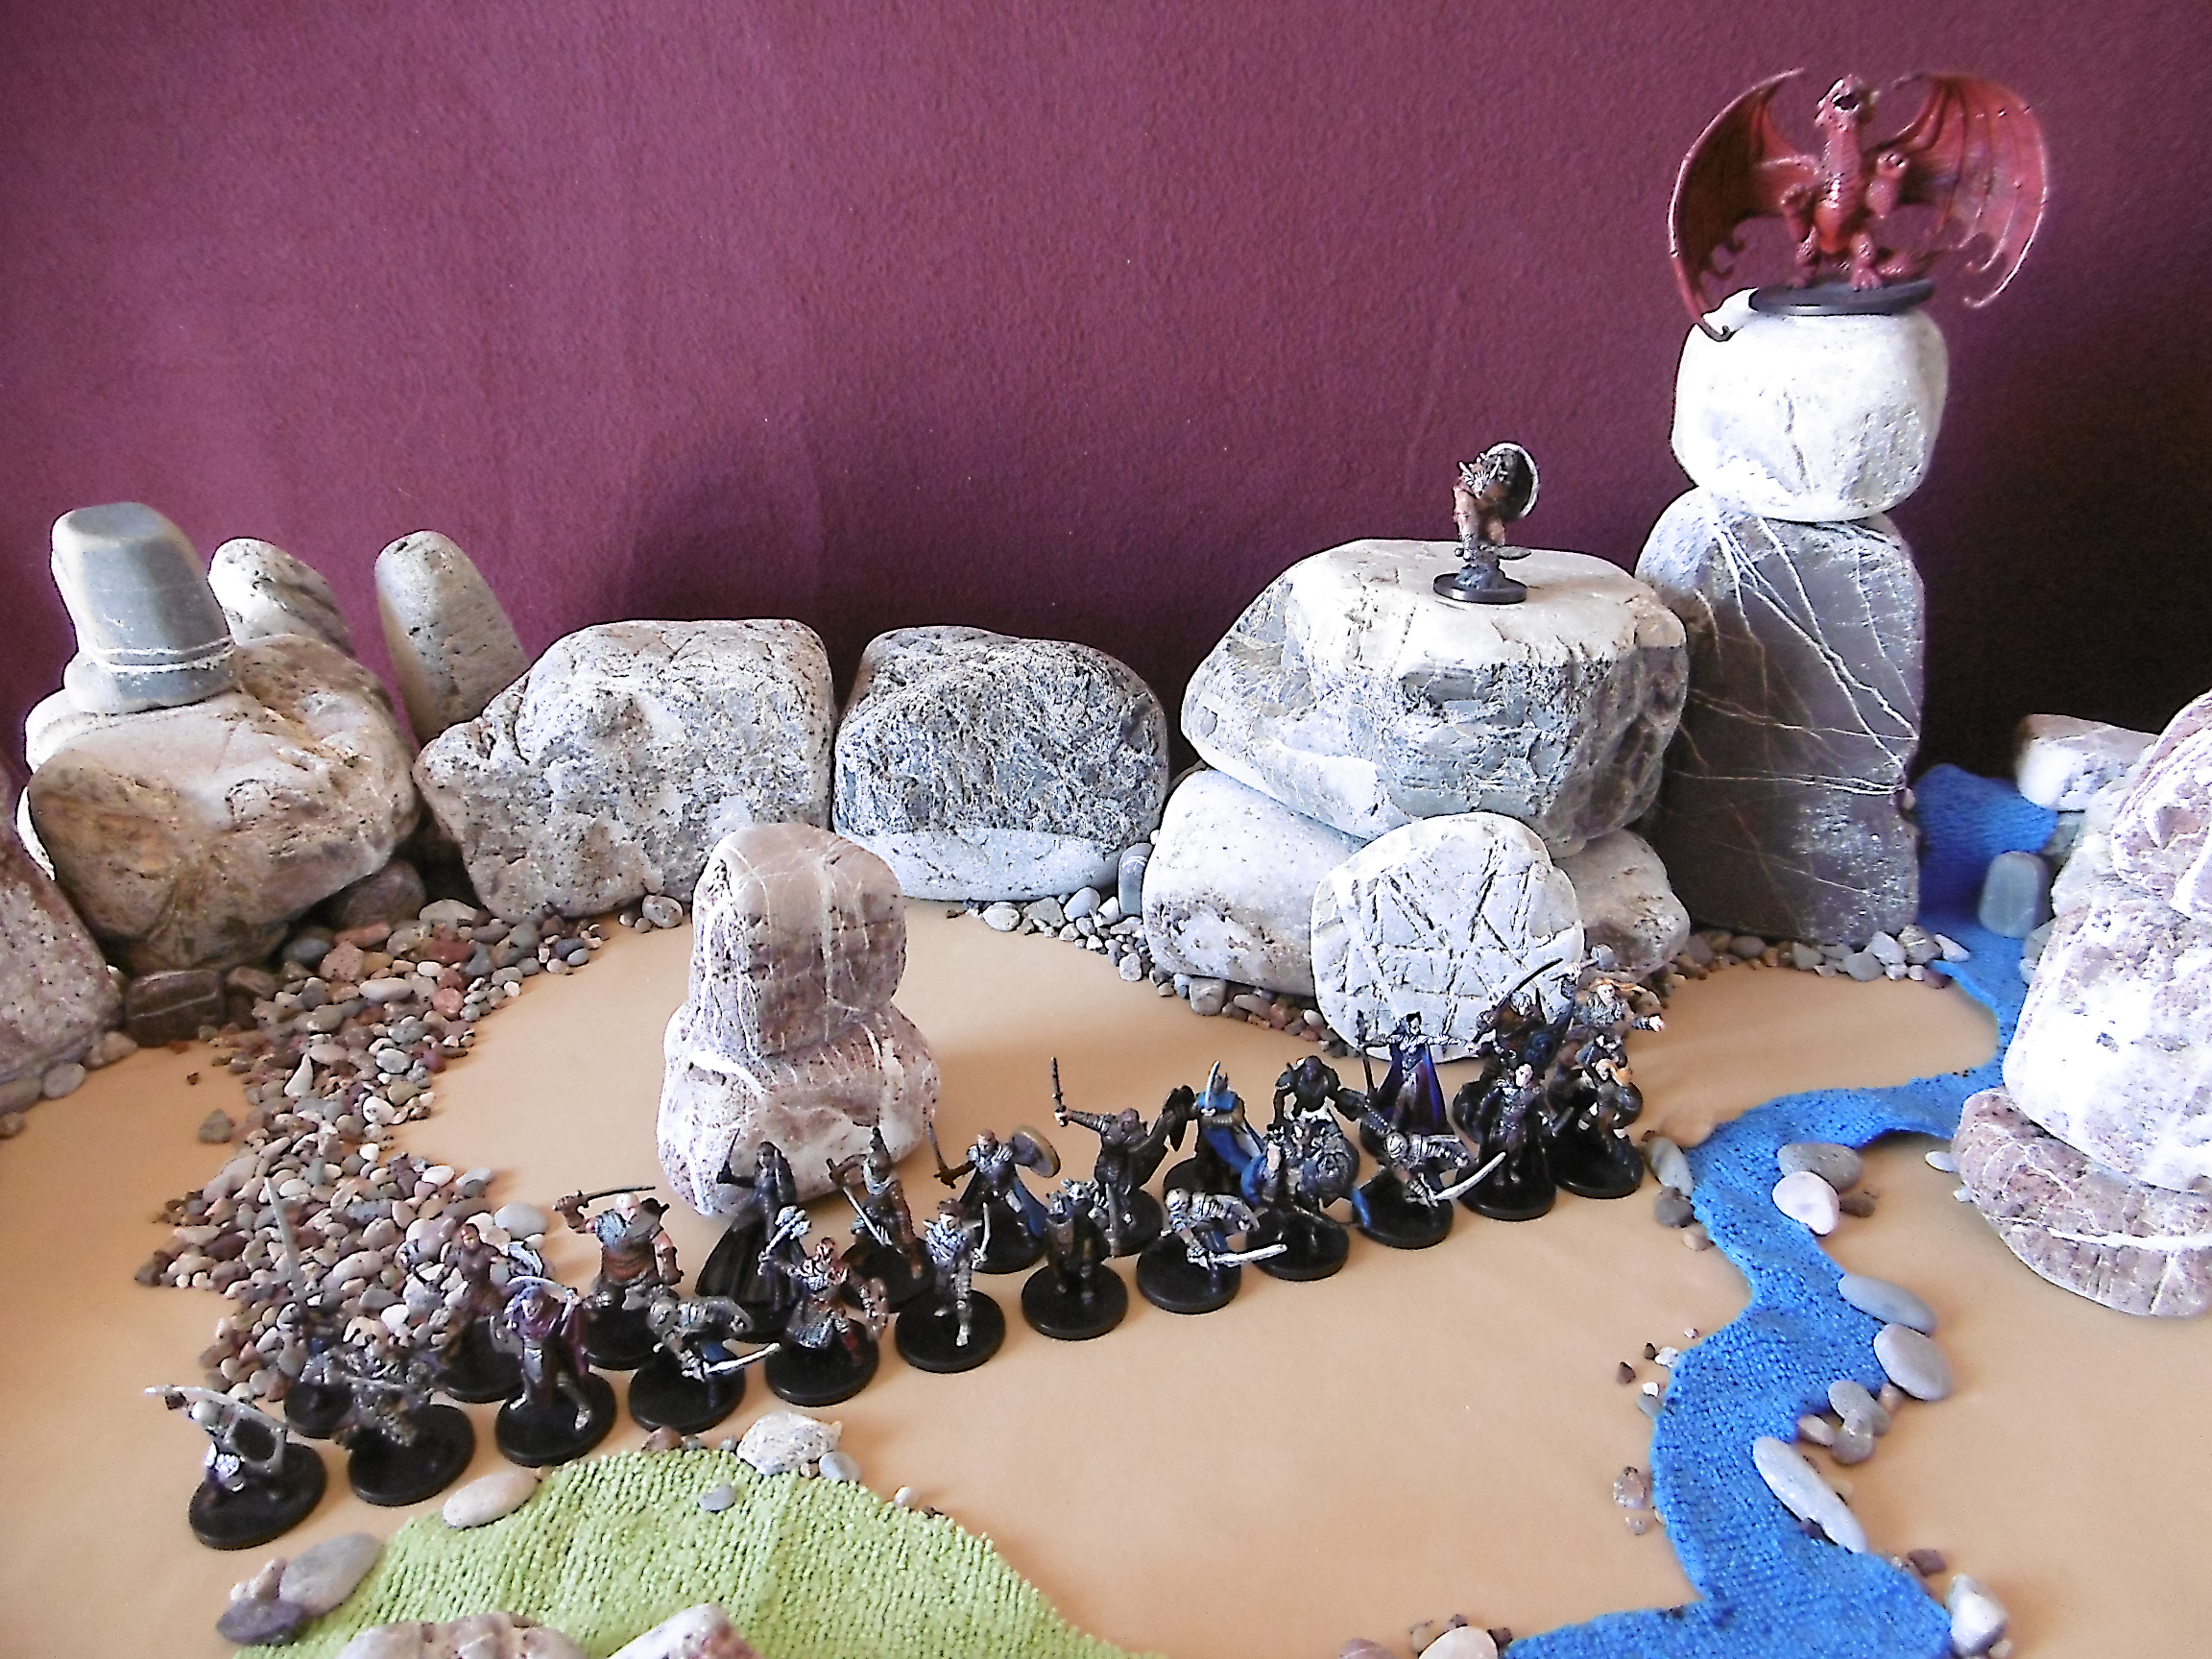
Afternoon light seeps through Darkmeer’s mists. At Aldefane, Solon Theros, from the loggia, surveys the field below. His eyes glow red through a steel visor. Atop a tall tower crouches Anax Archontas. Diamond pupils, large as shields, gleam through slits.

Terrain

The simplest version of the scenario is played on a featureless field. To exercise the terrain effects rules, I embellish the arena.

Aldefane
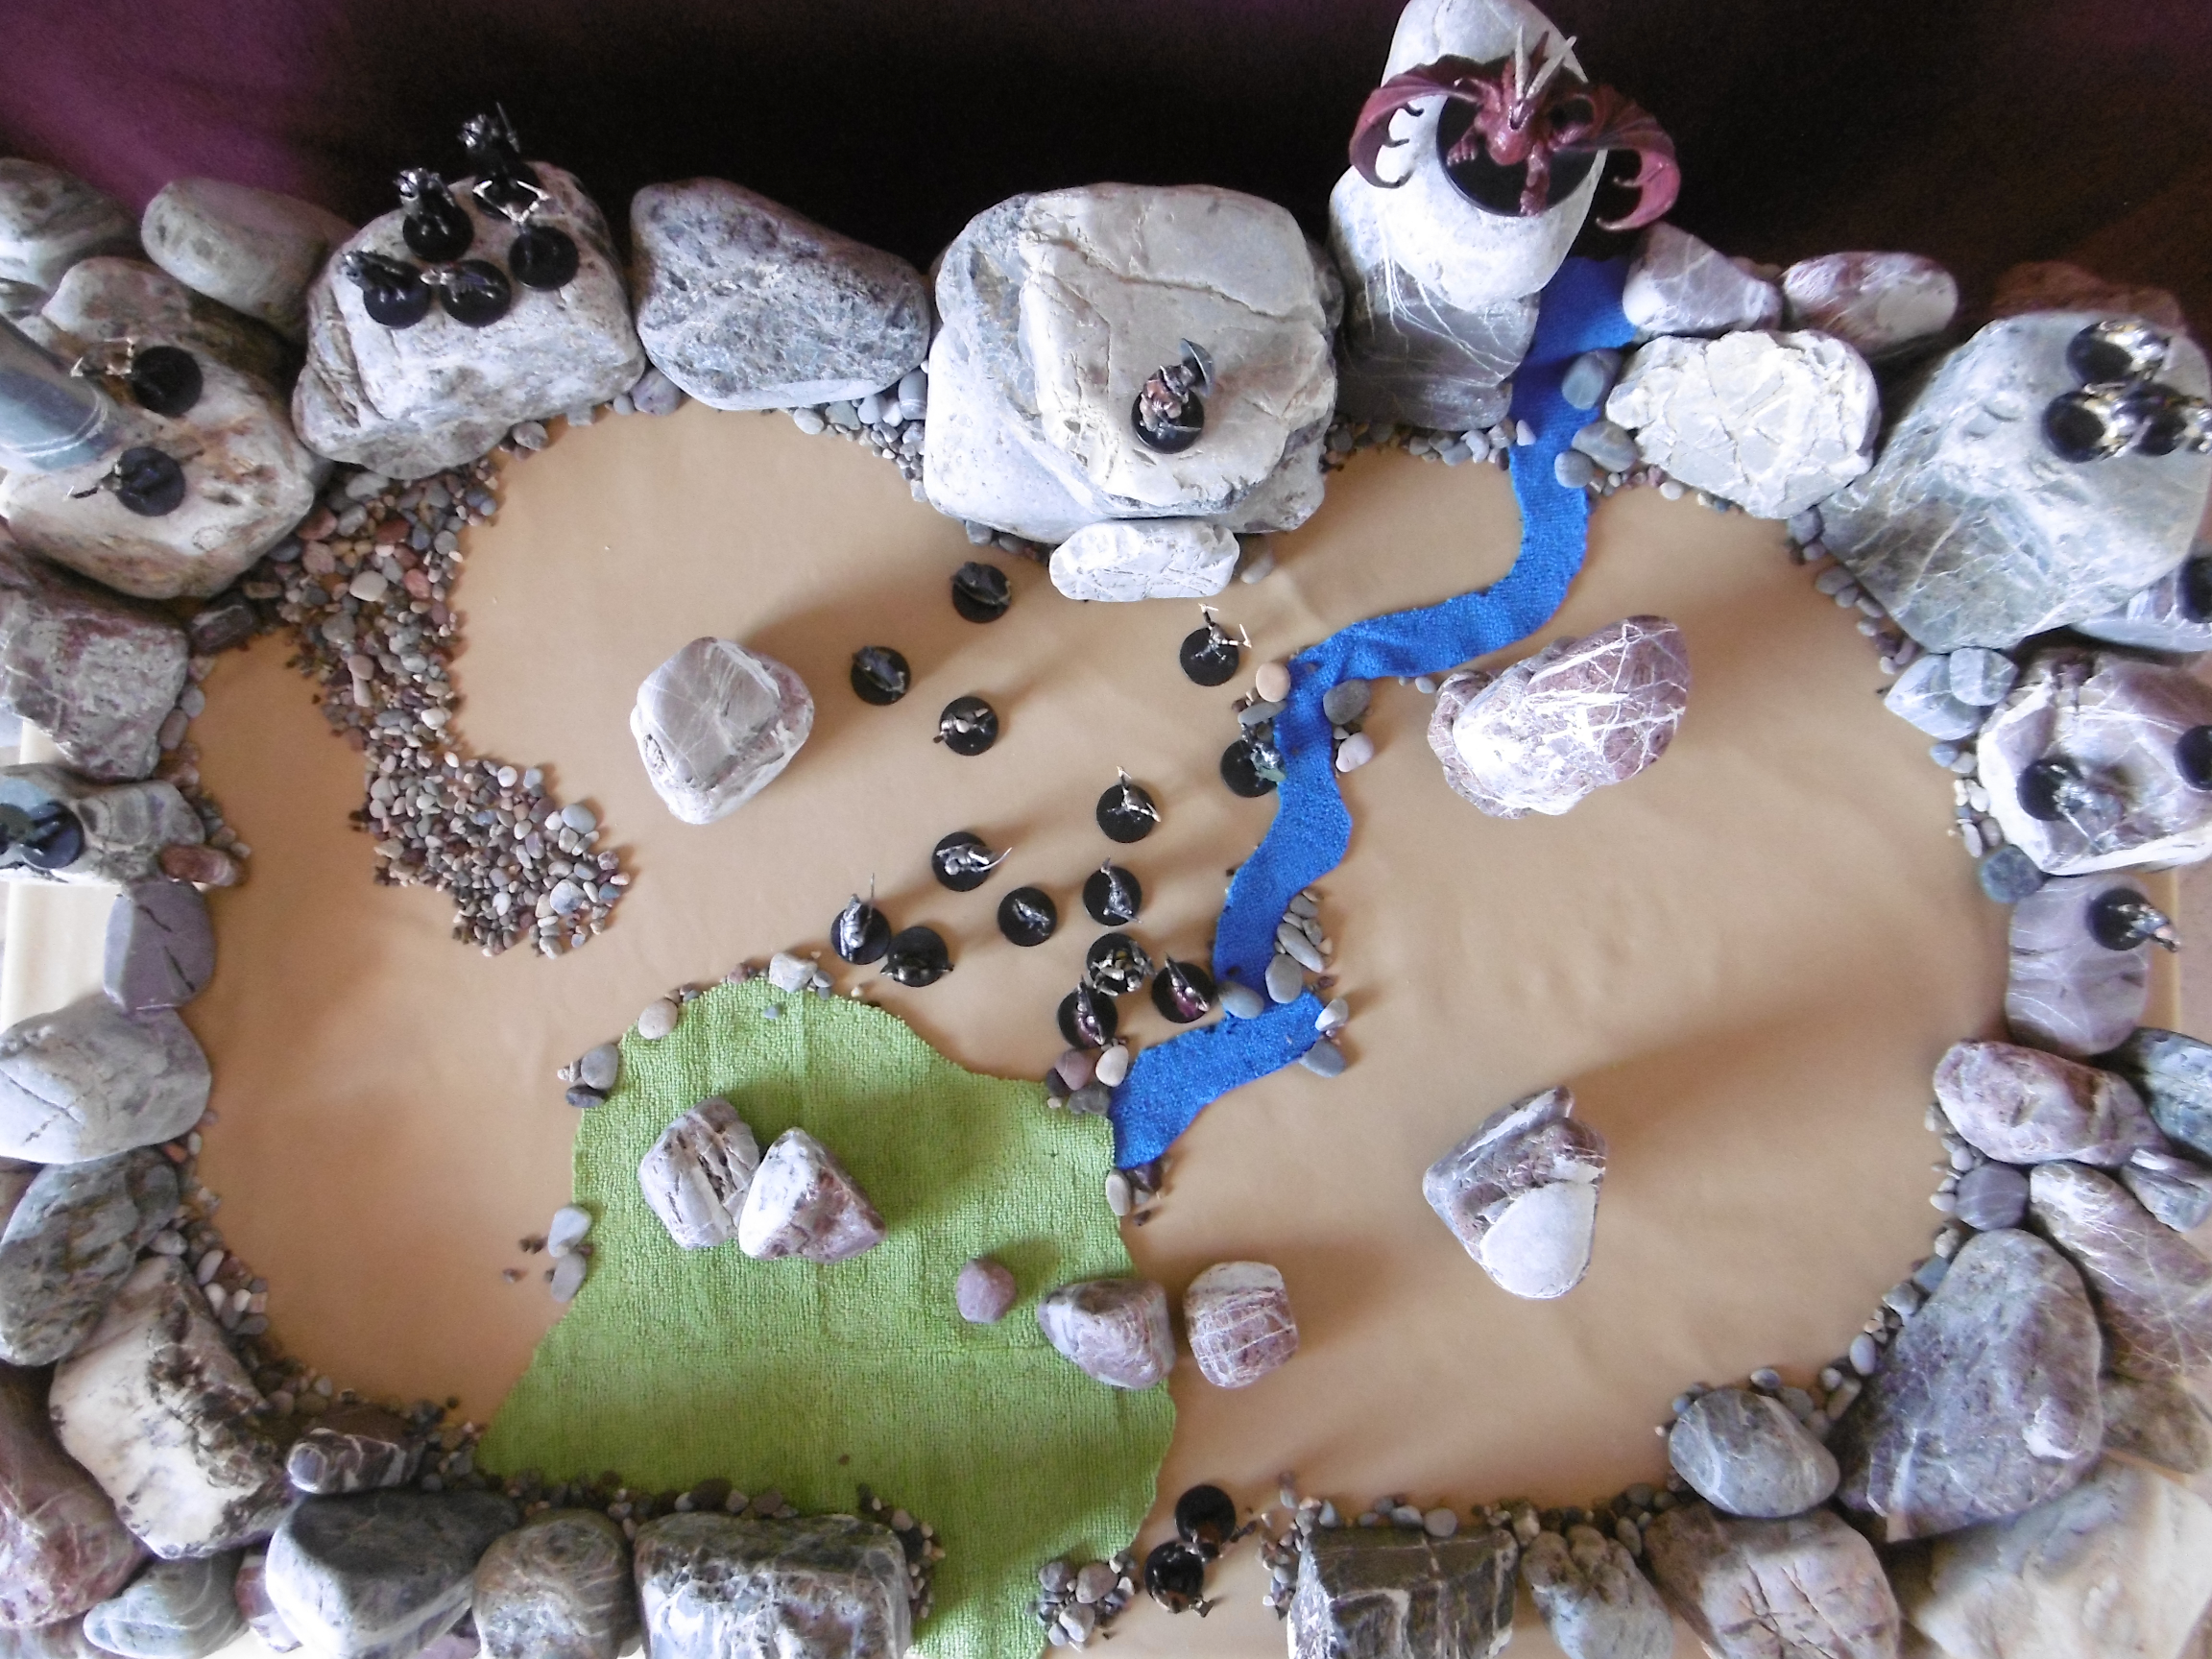
Aldefane.
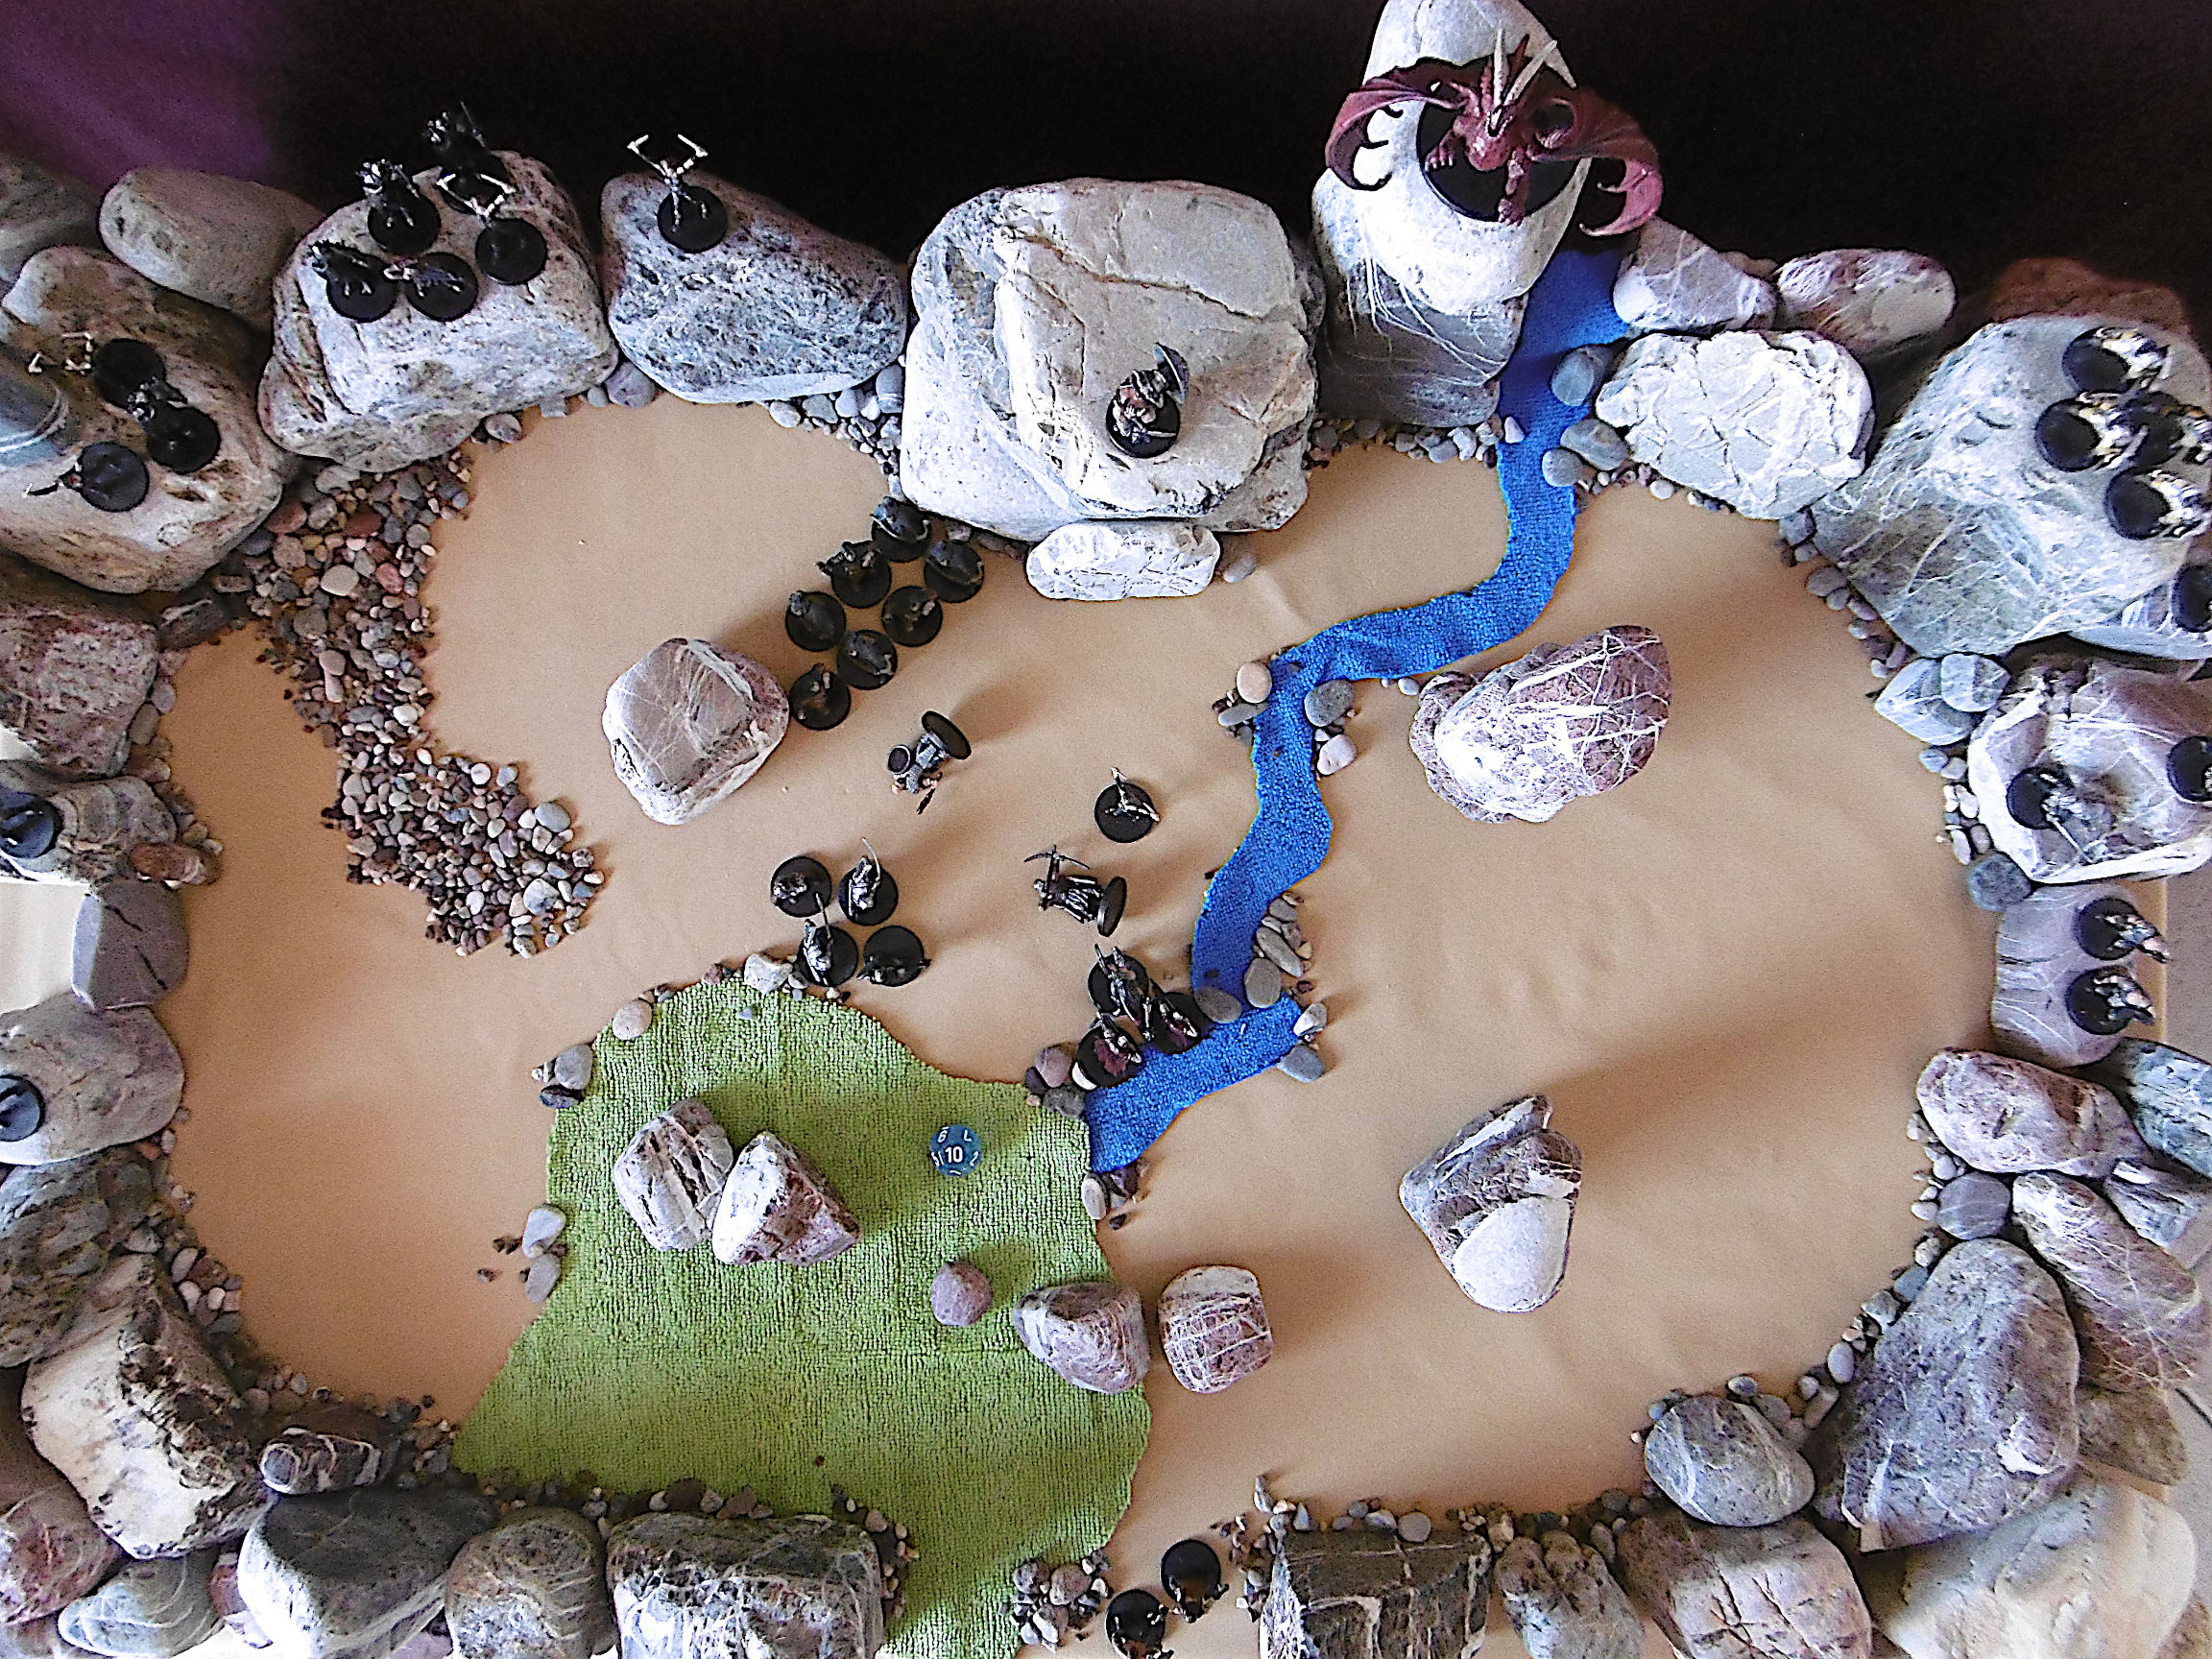
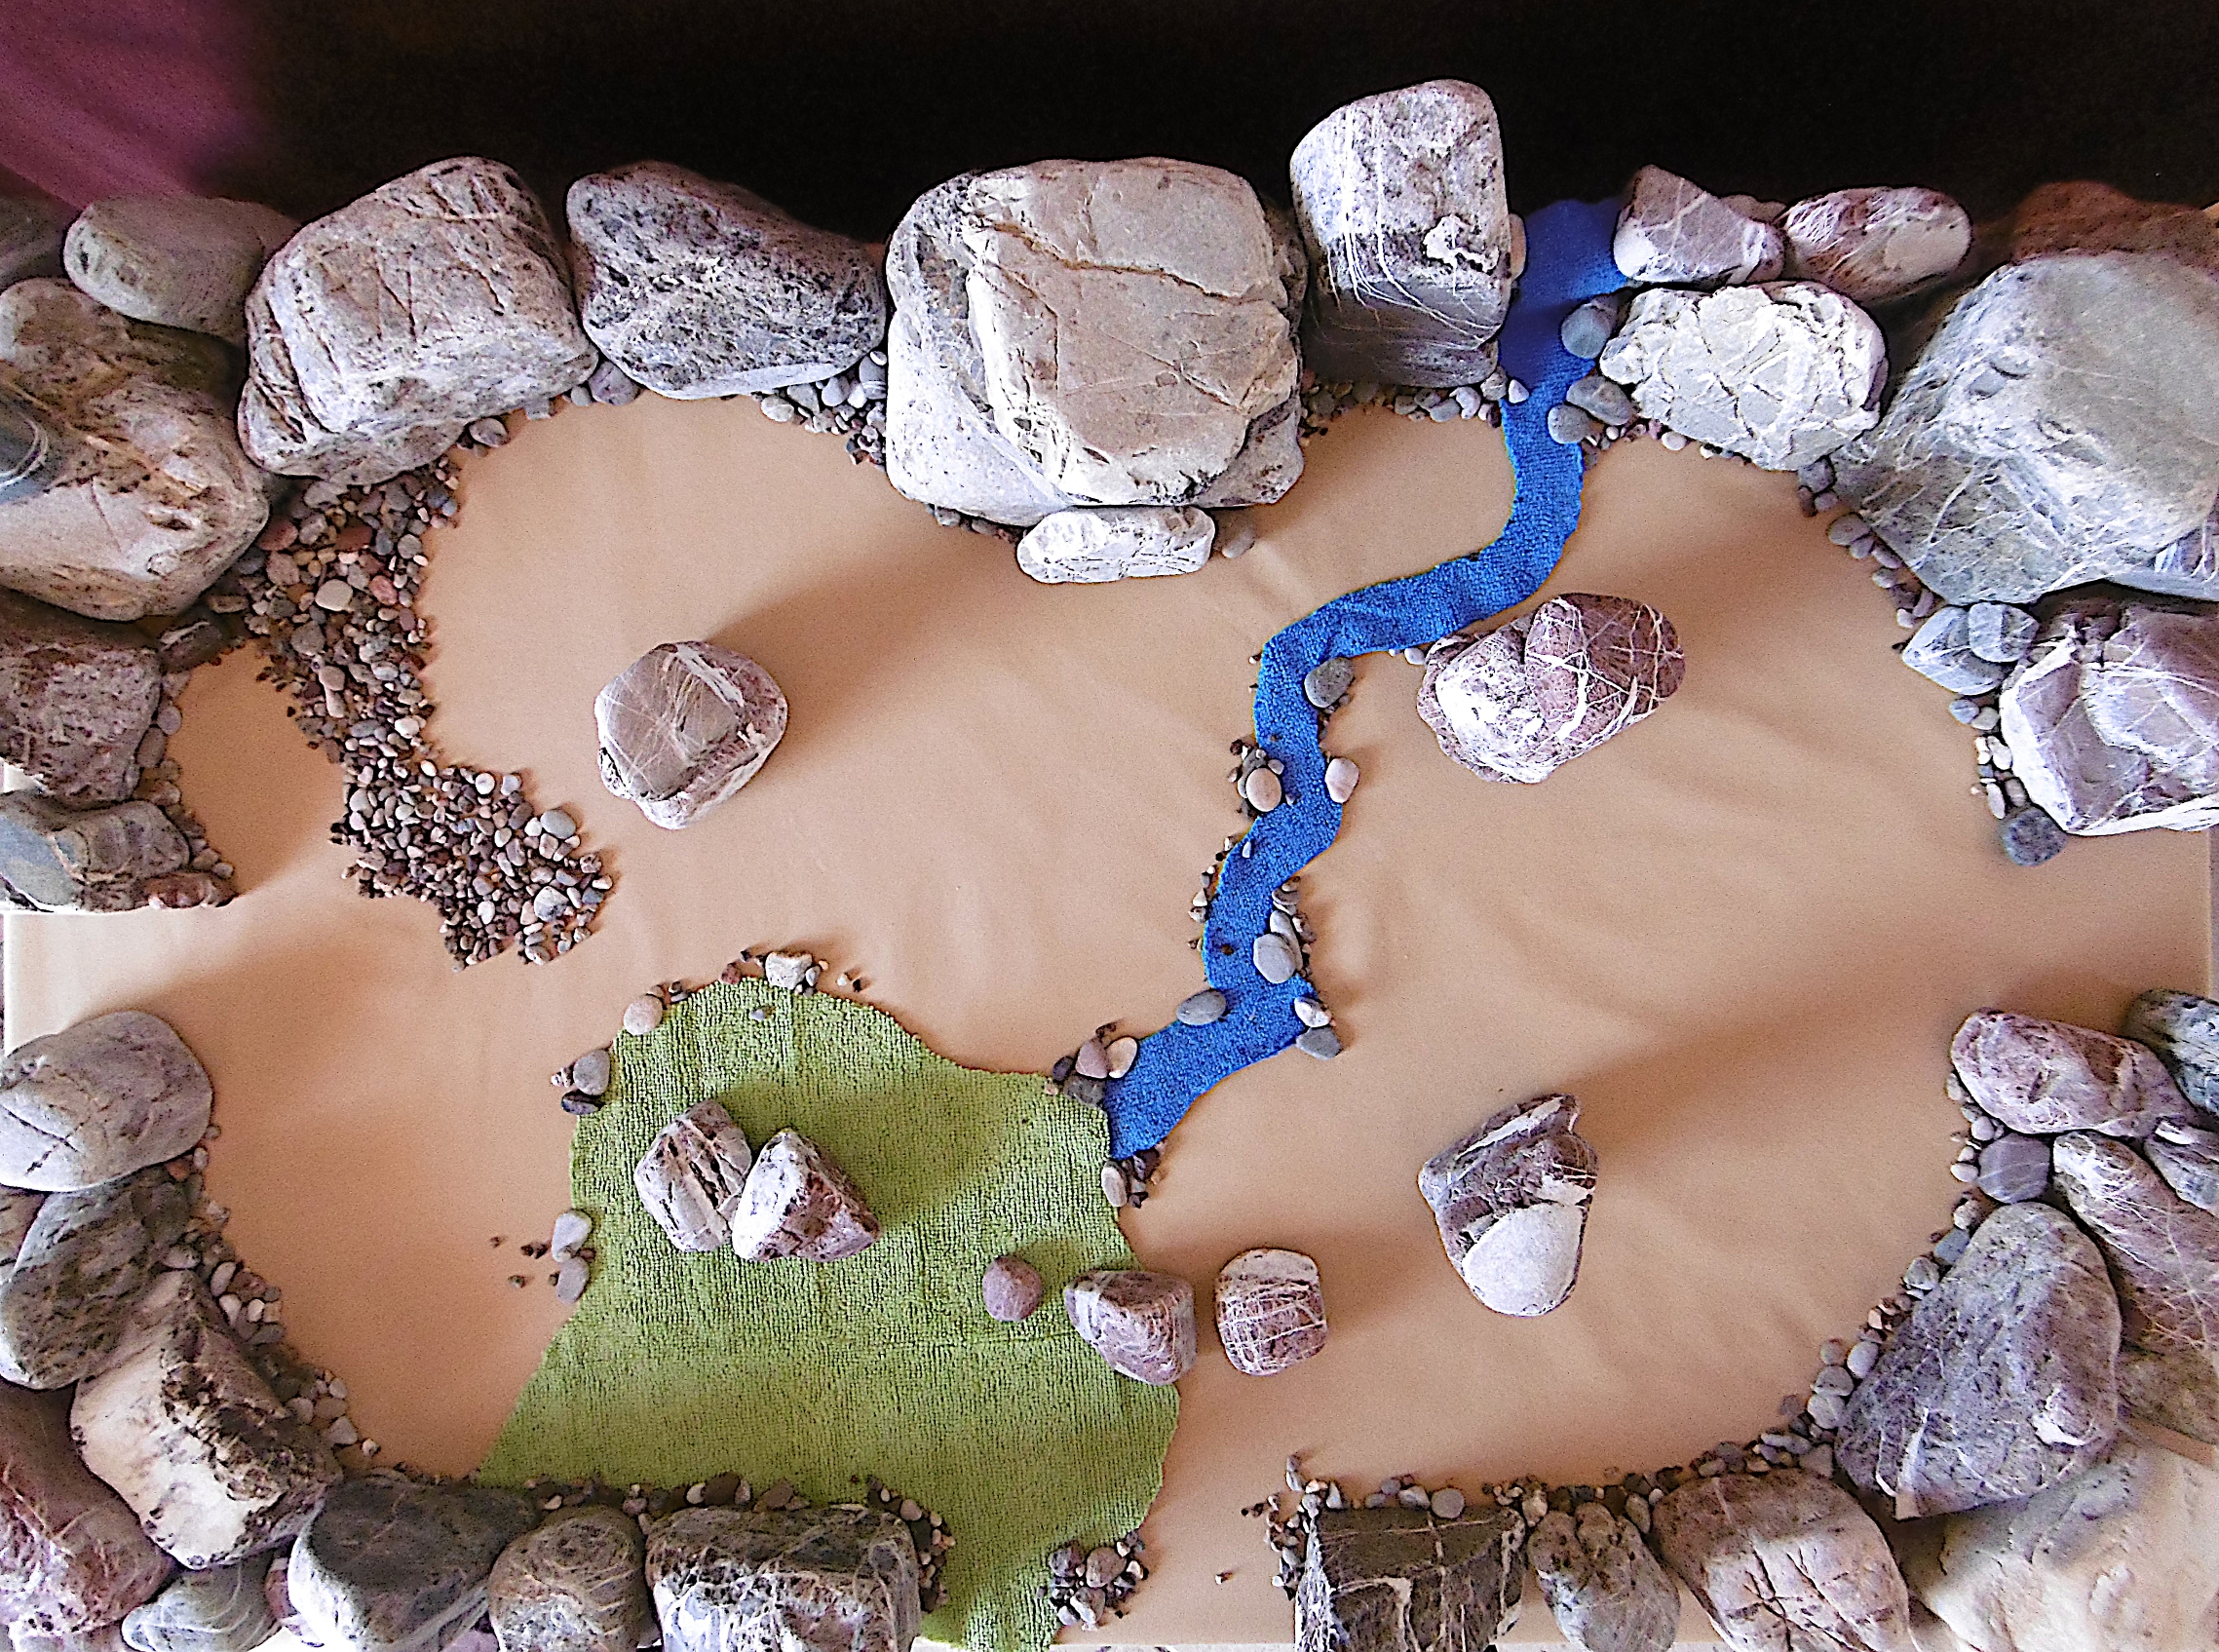
The table is 35″ × 22″—I reserve the dining table for Valormr’s climactic battle. The arena interior, 18″ × 30″, scales to 360 by 600 yards.

A loggia, still intact, overlooks the arena from the north. Beside it, a stone tower reaches 480 feet into the fog above.1 An ancient fountain (off table) still flows. Water spills through cracks to form a stream (blue), which floods low ground (bog, green). Massive columns (stones), which once supported a roof, lean at discomforting angles. The sinking ground toppled one of the four. It lies half submerged in the bog. Elsewhere, the decaying structure deposits rubble (pebbles) on the otherwise hard-packed dirt. A large gate, now destroyed, once enclosed the south side. A door is set in each semicircular end, east and west.2

With 120-foot bases, the columns, whether standing or toppled, block movement, line of sight, and field of fire. Consider rubble as rough terrain. The stream is 20 yards wide at all points. Otherwise, see the Terrain Effects table (Chainmail, 9).

Champions of Chaos

“Dracken Deep vs. Ternemeer” is the skirmish phase of Champions of Chaos, an introductory wargame scenario, in which Solon Theros chooses champions to fight for Chaos.

Figures

The orders of battle give the number of figures by cost and troop type for each force.

Orders of Battle Dracken Deep Ternemeer
Troop Type Cost Figures Total Figures Total
Peasant 0.5     3 1.5
Light Foot 1 5 5 4 4
Heavy Foot 2 4 8 3 6
Armored Foot 2.5 10 25 9 22.5
Additional Weapons          
Bow 3 4 12    
Longbow 4     4 16
Total   19 50 19 50

Notes on Orders of Battle

  1. Additional weapons count only for total points; the figures are already counted.
  2. Commanders are not purchased. They don’t fight. Their presence impacts troops on the battlefield as per Chainmail’s commander rule (21).
  3. Dracken Deep Bows are Heavy Foot; Ternemeer Longbows, Light.

At 50 points per regiment, Anax Archontas spends 100 points, which are deducted from Chaos’s total for the Valormr Campaign. With the points, the dragon could have bought five heroes. He expects Solon Theros to produce more.

Deployment

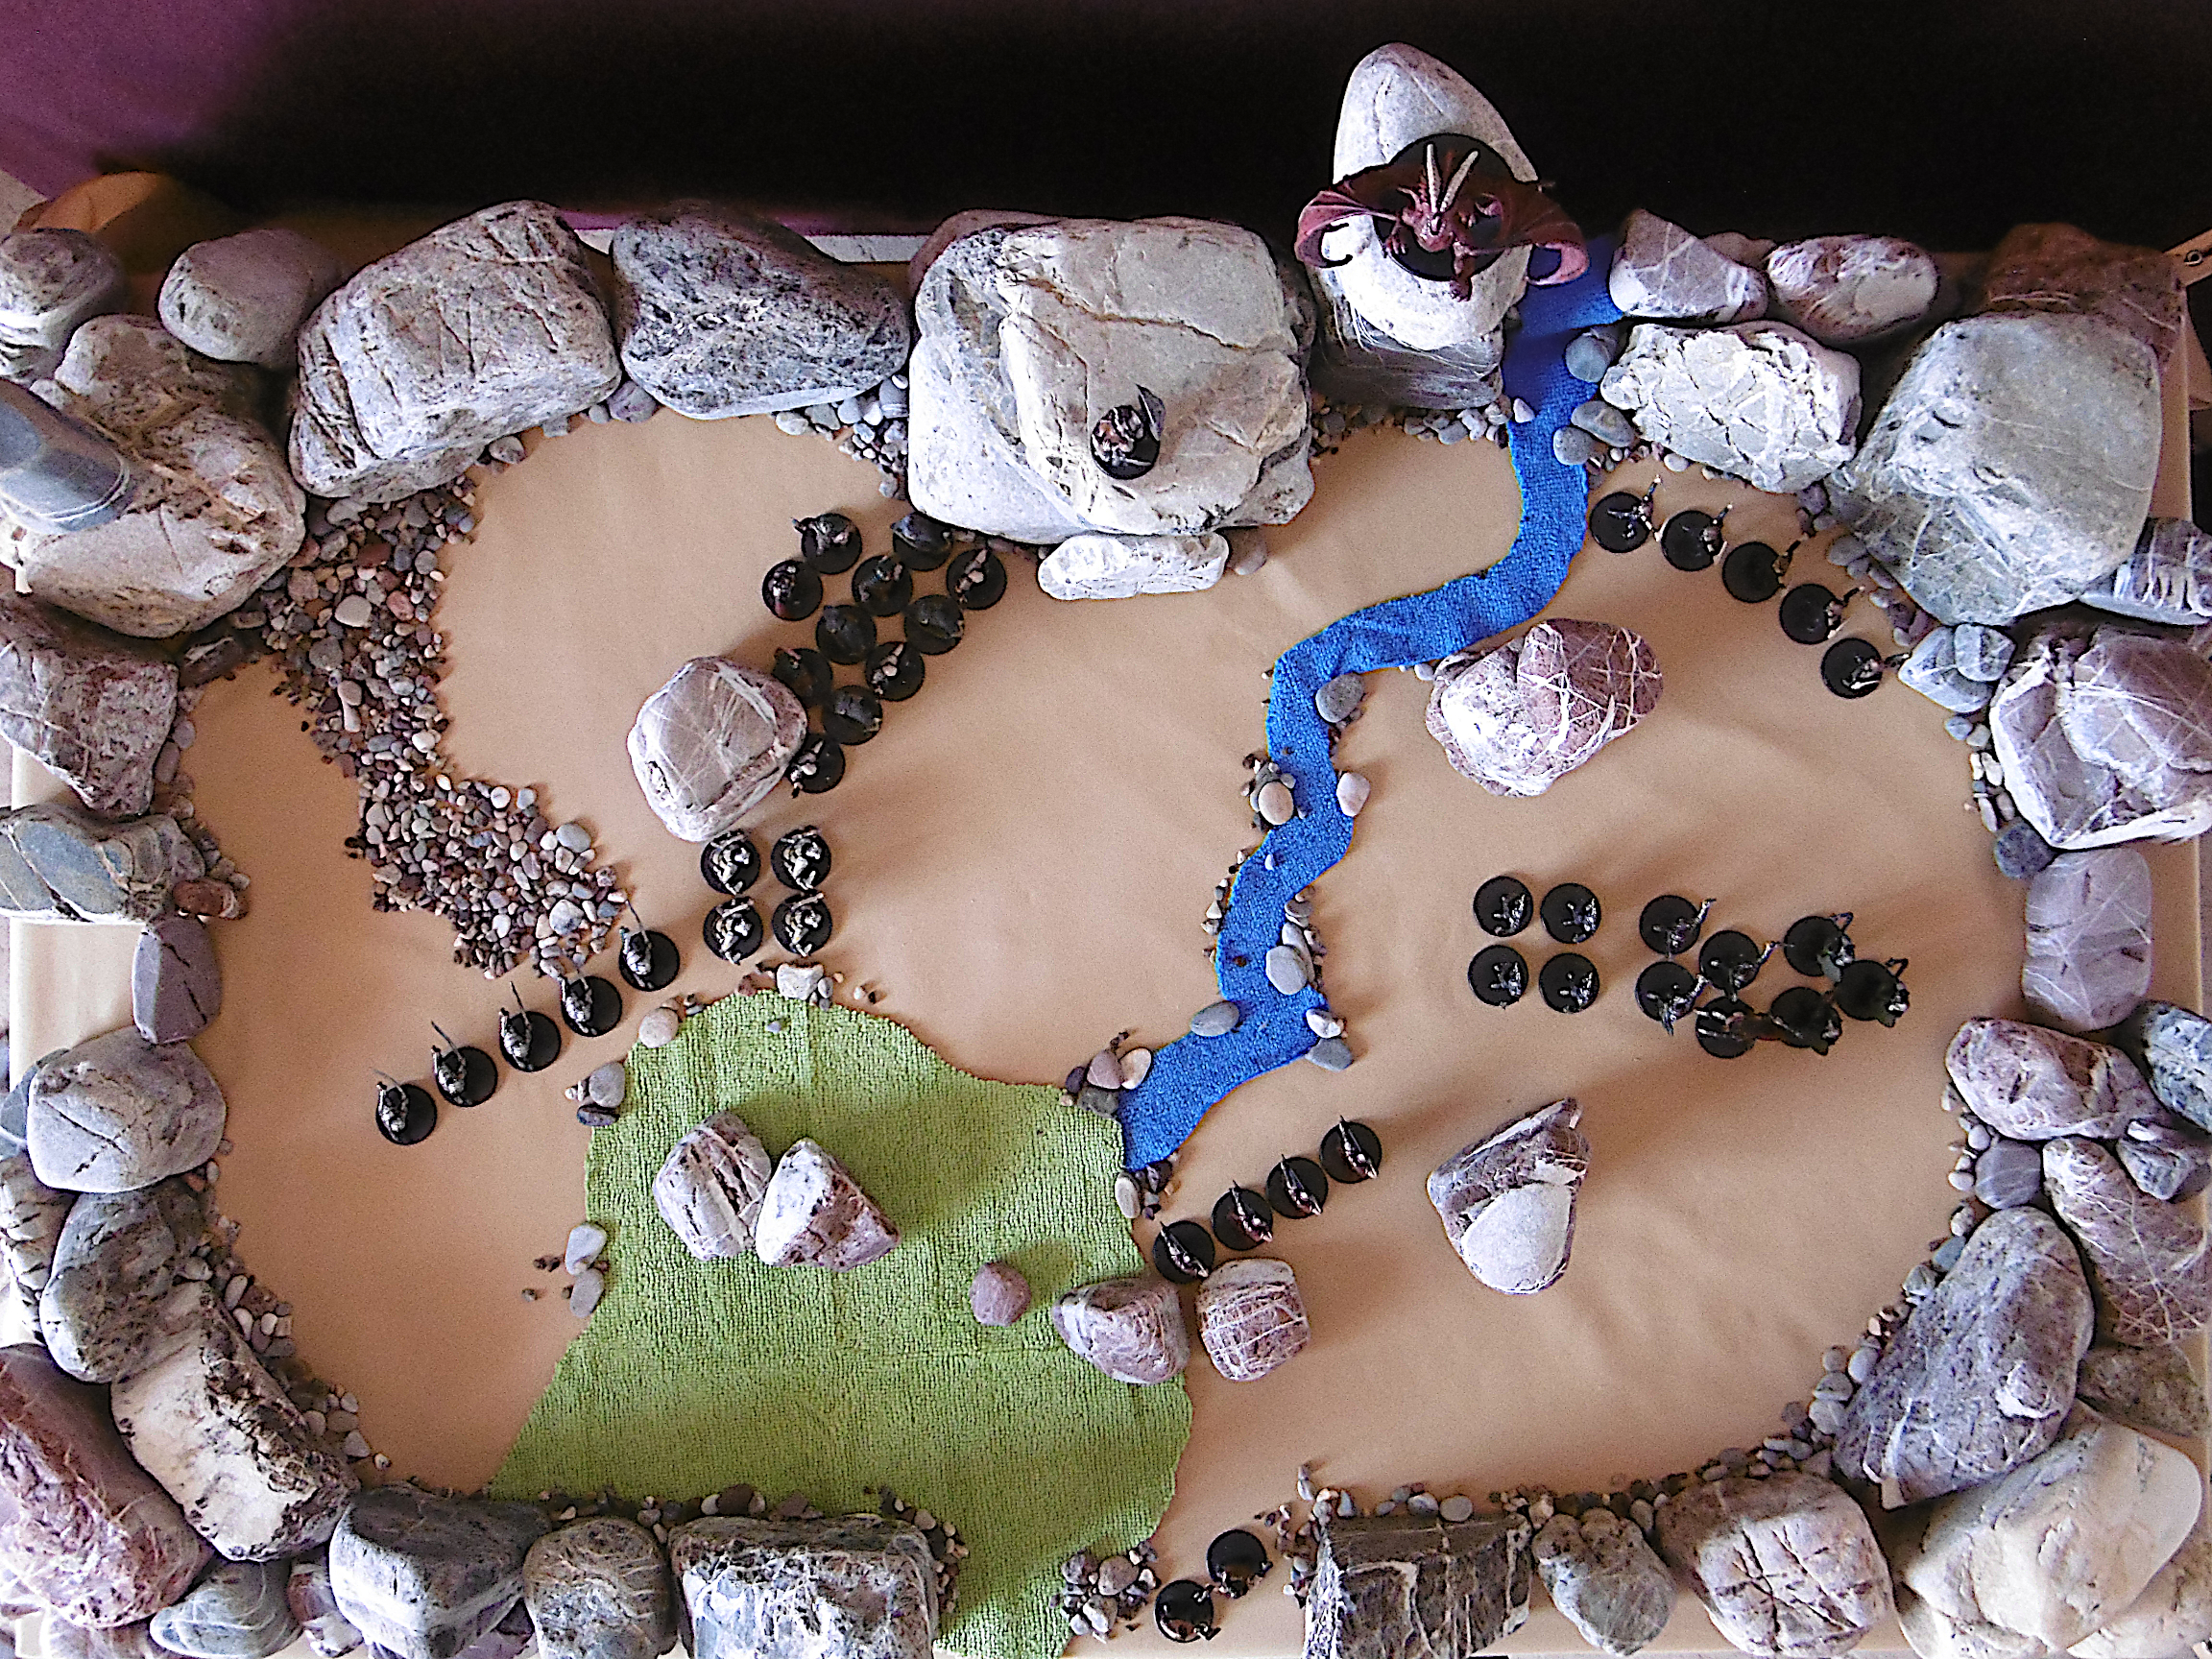
Regiments are divided into formations of like troops called units.3 The commanders dice for first go. The winner chooses a side of the stream in which to setup her troops, positioning herself in the stands above. Her opponent takes the other side.

The commanders, in turns, then place one unit at a time, each anywhere on her side of the stream.4 The commander figure is also placed in turn on the battlefield.

Start

When the last unit is deployed, Solon Theros orders the doors closed. Two figures position themselves in the south gate. One holds an axe, the other a whip. Both wear black hoods.

Claws scrape granite as the dragon adjusts position. Pebbles and dust fall in a plume from the tower.

Solon Theros scans the assembled troops. “Who flees kneels—before the executioner… after long torture.”

The superhero begins the battle so: “Destroy your enemy; give no quarter.”5

Begin with the Turn Sequence (Chainmail, 9). Move-and-countermove preferred, as it’s faster and easier.

Morale: Test Post Melee Morale (15) as normal but replace a surrender result with a rout. Furthermore, a unit that fails a check for Instability Due to Excess Casualties (17) is not removed from play, nor does it surrender. Instead, each time a unit fails this test, it suffers a penalty (-1) on one dice whenever a roll is made. So, if a unit fails a second time, it takes a -1 from two dice.6

Objective

Score points by removing enemy figures from play. Each figure is worth its purchase cost, including additional weapons. The commander with the most points when Solon Theros calls a halt wins.

Dracken Deep vs Ternemeer
Minke Meine (right) of Dracken Deep Squares Off Against Rival Annemie Tacx (left) of Ternemeer at Aldefane.

Notes

1 The tower’s height puts the battlefield 30 feet outside the range of the dragon’s fear effect.

2 The tabletop arena is built from stones quarried from the wintertime model of Throrgardr.

3 Larger forces might have enough figures of a troop type to make multiple formations. In that case, a formation of like troops may be added to a previously placed formation.

4 Another scenario, perhaps called “Champions of Law,” might restrict setup to a smaller area.

5 Prisoners, the rules for which are too complex for the scenario, are disdained by Solon Theros.

6 Tracking accumulated penalties for instability might be a record-keeping burden. I suspect though that a unit fighting with even the initial penalty won’t last long.

Ground and Figure Scale, Formations, Troop Ratio and Types

“The ratio of figures to men assumed is 1:20, the ground scale is 1″:10 yards, and one turn of play is roughly equivalent to one minute of time in battle. The troop ratio will hold true for 30mm figures, but if a smaller scale is used it should be reduced to 1:10” (Chainmail, 8).

Figure Scale

In the 2000s, I collected an embarrassing number of plastic fantasy figurines. Inexpensive and pre-painted, D&D Miniatures are 30mm scale. Perfect. Except they are mounted on a circular base. A man-sized model takes up a one-inch-diameter space, which fits in the five-foot square occupied by the character on a twenty-first century battle grid.

Wargame miniatures often have rectangular bases, which correspond to the breadth and depth of the unit represented. Transposing its one-inch base to the battlefield, my man-sized figurine represents 20 men milling about in a hundred square yards.

A wave of the hand seems an easy solution. I respect the breadth but ignore the figure’s depth. The 20 men are in formation at the front edge of the space occupied by the figure. In the case where multiple figures make two or more ranks, all troops represented are in ranks, one behind the other, irrespective of the scaled depth.

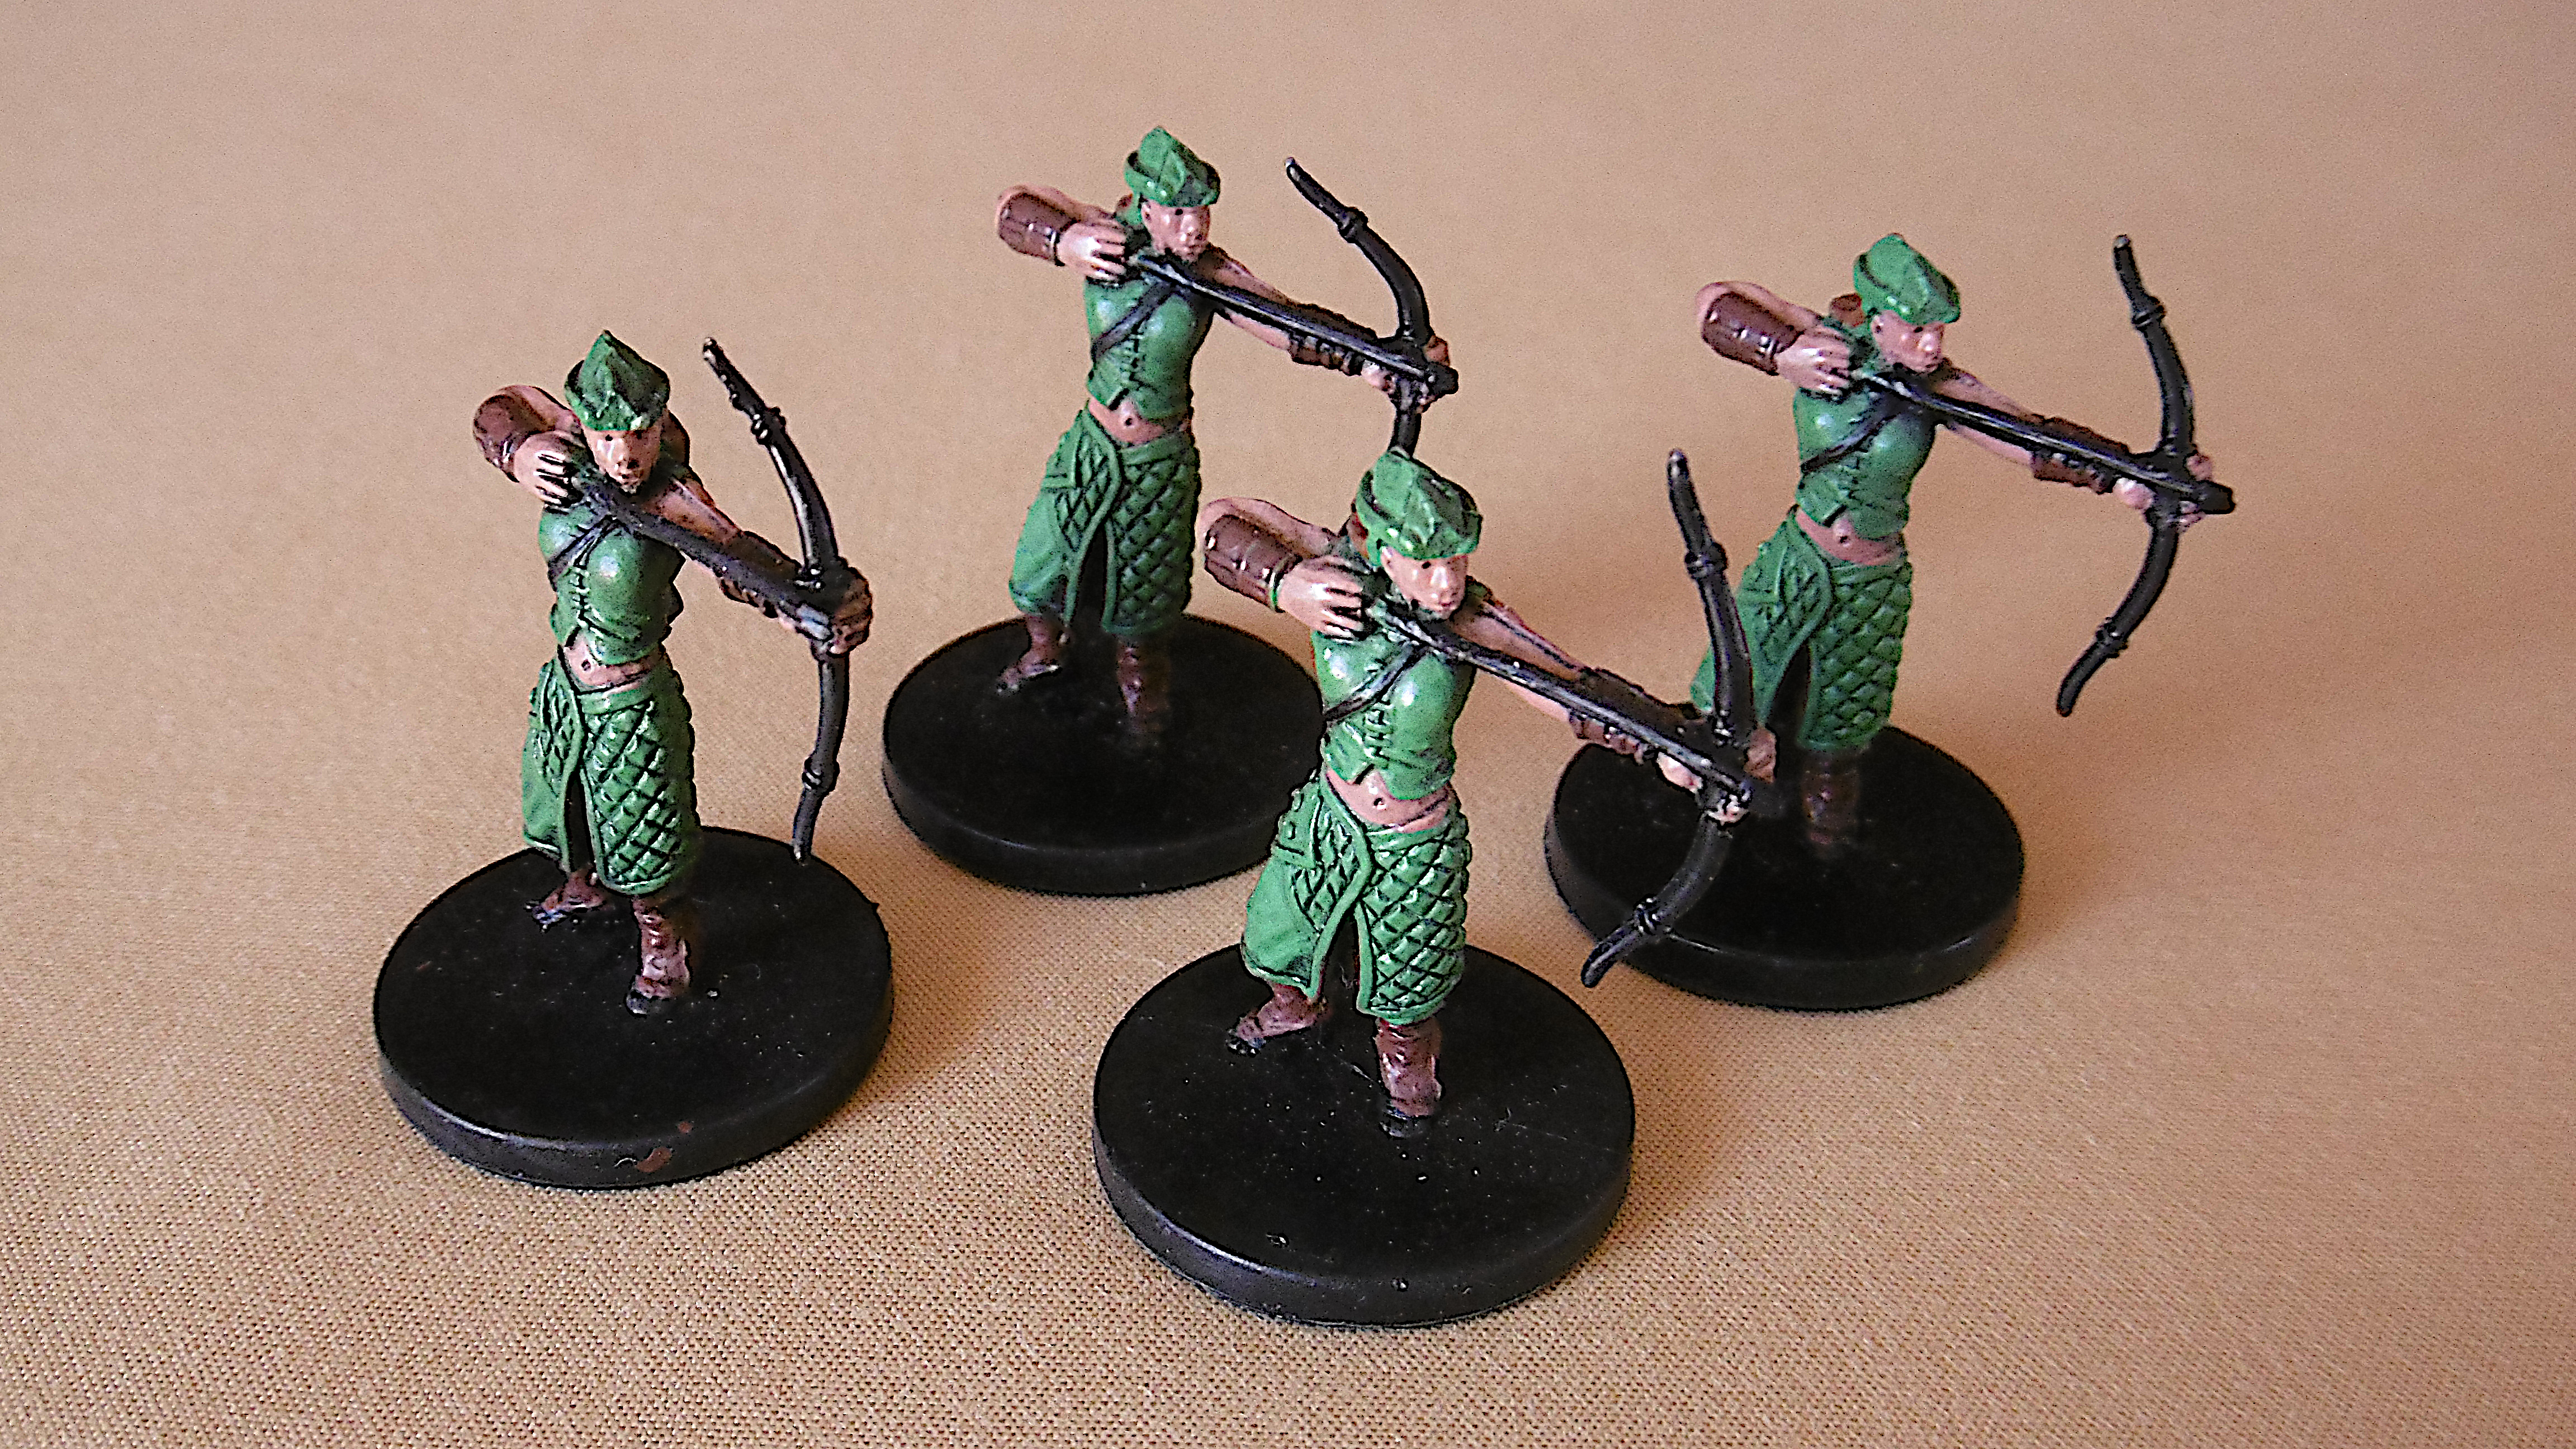
Archers in Two Ranks
Archers in Two Ranks.
Each figurine represents a number of troops in a rank across the leading edge of the front rank of figures.

Using the larger scale without also using smaller figurines impacts play in two other ways. One, areas of effect, while scaled accordingly, more frequently touch a larger base. A near miss on Gygax’s table is a hit on my table. Two, shorter distances present less spectacle. A giant hurling a rock 20 inches downrange on an eight-foot table looks the same as the scaled ten-inch throw compared to my four-foot table. But, as the giant in both cases is three inches tall, the shorter throw appears less impressive.

To compensate for the former, I might use a longer “variation measure” (Chainmail, 13) for field guns and giant throws. I’m not sure, though, that this won’t have some other unintended impact.

Ground Scale

“The playing area that the battles are fought out upon should be a table rather than the floor. It can be from a minimum of 4′ to a maximum of 7′ wide, and it should be at least 8′ in length” (Chainmail, 5).

Gygax was famous for hosting wargames on a large sand table in his basement. The largest table I have—upon which I must also dine—measures 31″ × 47″. I could run small engagements in the scaled 310-by-470 yards, but Light Horse charge across it in a single turn, and a figure anywhere on the table is a target for Longbowmen stationed in the center.

I stretch the table by doubling the ground scale. At 20 yards to the inch, the battlefield is 620 yards by almost a thousand. It’s similar to playing on a five-by-eight-foot table. But not quite. The figurines remain the same size, so they effectively take up four times the space on my battlefield than they would on Gygax’s basement table. On my table, commanders lack the same room for maneuver.

Figure-to-Troop Ratio

Because a one-inch base now stretches across 20 yards, I up the figure scale as well. At the corresponding figure scale, I could field armies the same size as Gygax, but 1:80 sounds unreasonable.

To approach the calculation another way, I count men in one rank at Bath’s “very close order” (Ancient Wargaming, 20).1 In the closest formation, each man occupies only 18 inches.

At 18″ per, 40 fighters fit in one rank 60 feet (20 yards) wide. Therefore, at 1:40, a rank of figures, bases touching, are in very close order. As per Chainmail, figures up to 1″ apart are in close order, and any farther is open order.2

Scale for the Valormr Campaign

Ground Scale: 1″ to 20 yards*
Figure Scale: 1:40
Time Scale: 1 minute per turn

* To convert, all distances given in Chainmail are halved.

Formations
Formations.
Left to right: a lone figure represents 40 troops in one rank at close order unless otherwise stated; 120 Heavy Spears, one rank, very close order; two ranks of 80 each Armored Foot, close order; two ranks3 of 160 Armored Spears, the first presents a shield wall, very close order.

Troop Types

According to Bath, light foot “wear no armor of any description, either leather or metal. They may carry a light shield and are usually but not always armed with missile weapons” (16). Gygax & Perren imply as much in the missile fire table (Chainmail, 11), where targets are categorized as unarmored, half-armor [another word for Heavy or Medium (Bath, 16)] or shield, and fully armored.

Since most any combat-capable characters in D&D wear some sort of armor, it is the rare figurine in my collection which could be considered Light Foot. I, therefore, adjudicate by case, according to my needs, whether to class a lightly-armored figure as Light or Heavy.

Furthermore, there is a dearth of mounted figures in the D&D Miniatures line. Again, I take the liberty to call any figure mounted, thus turning Foot into Horse as desired.

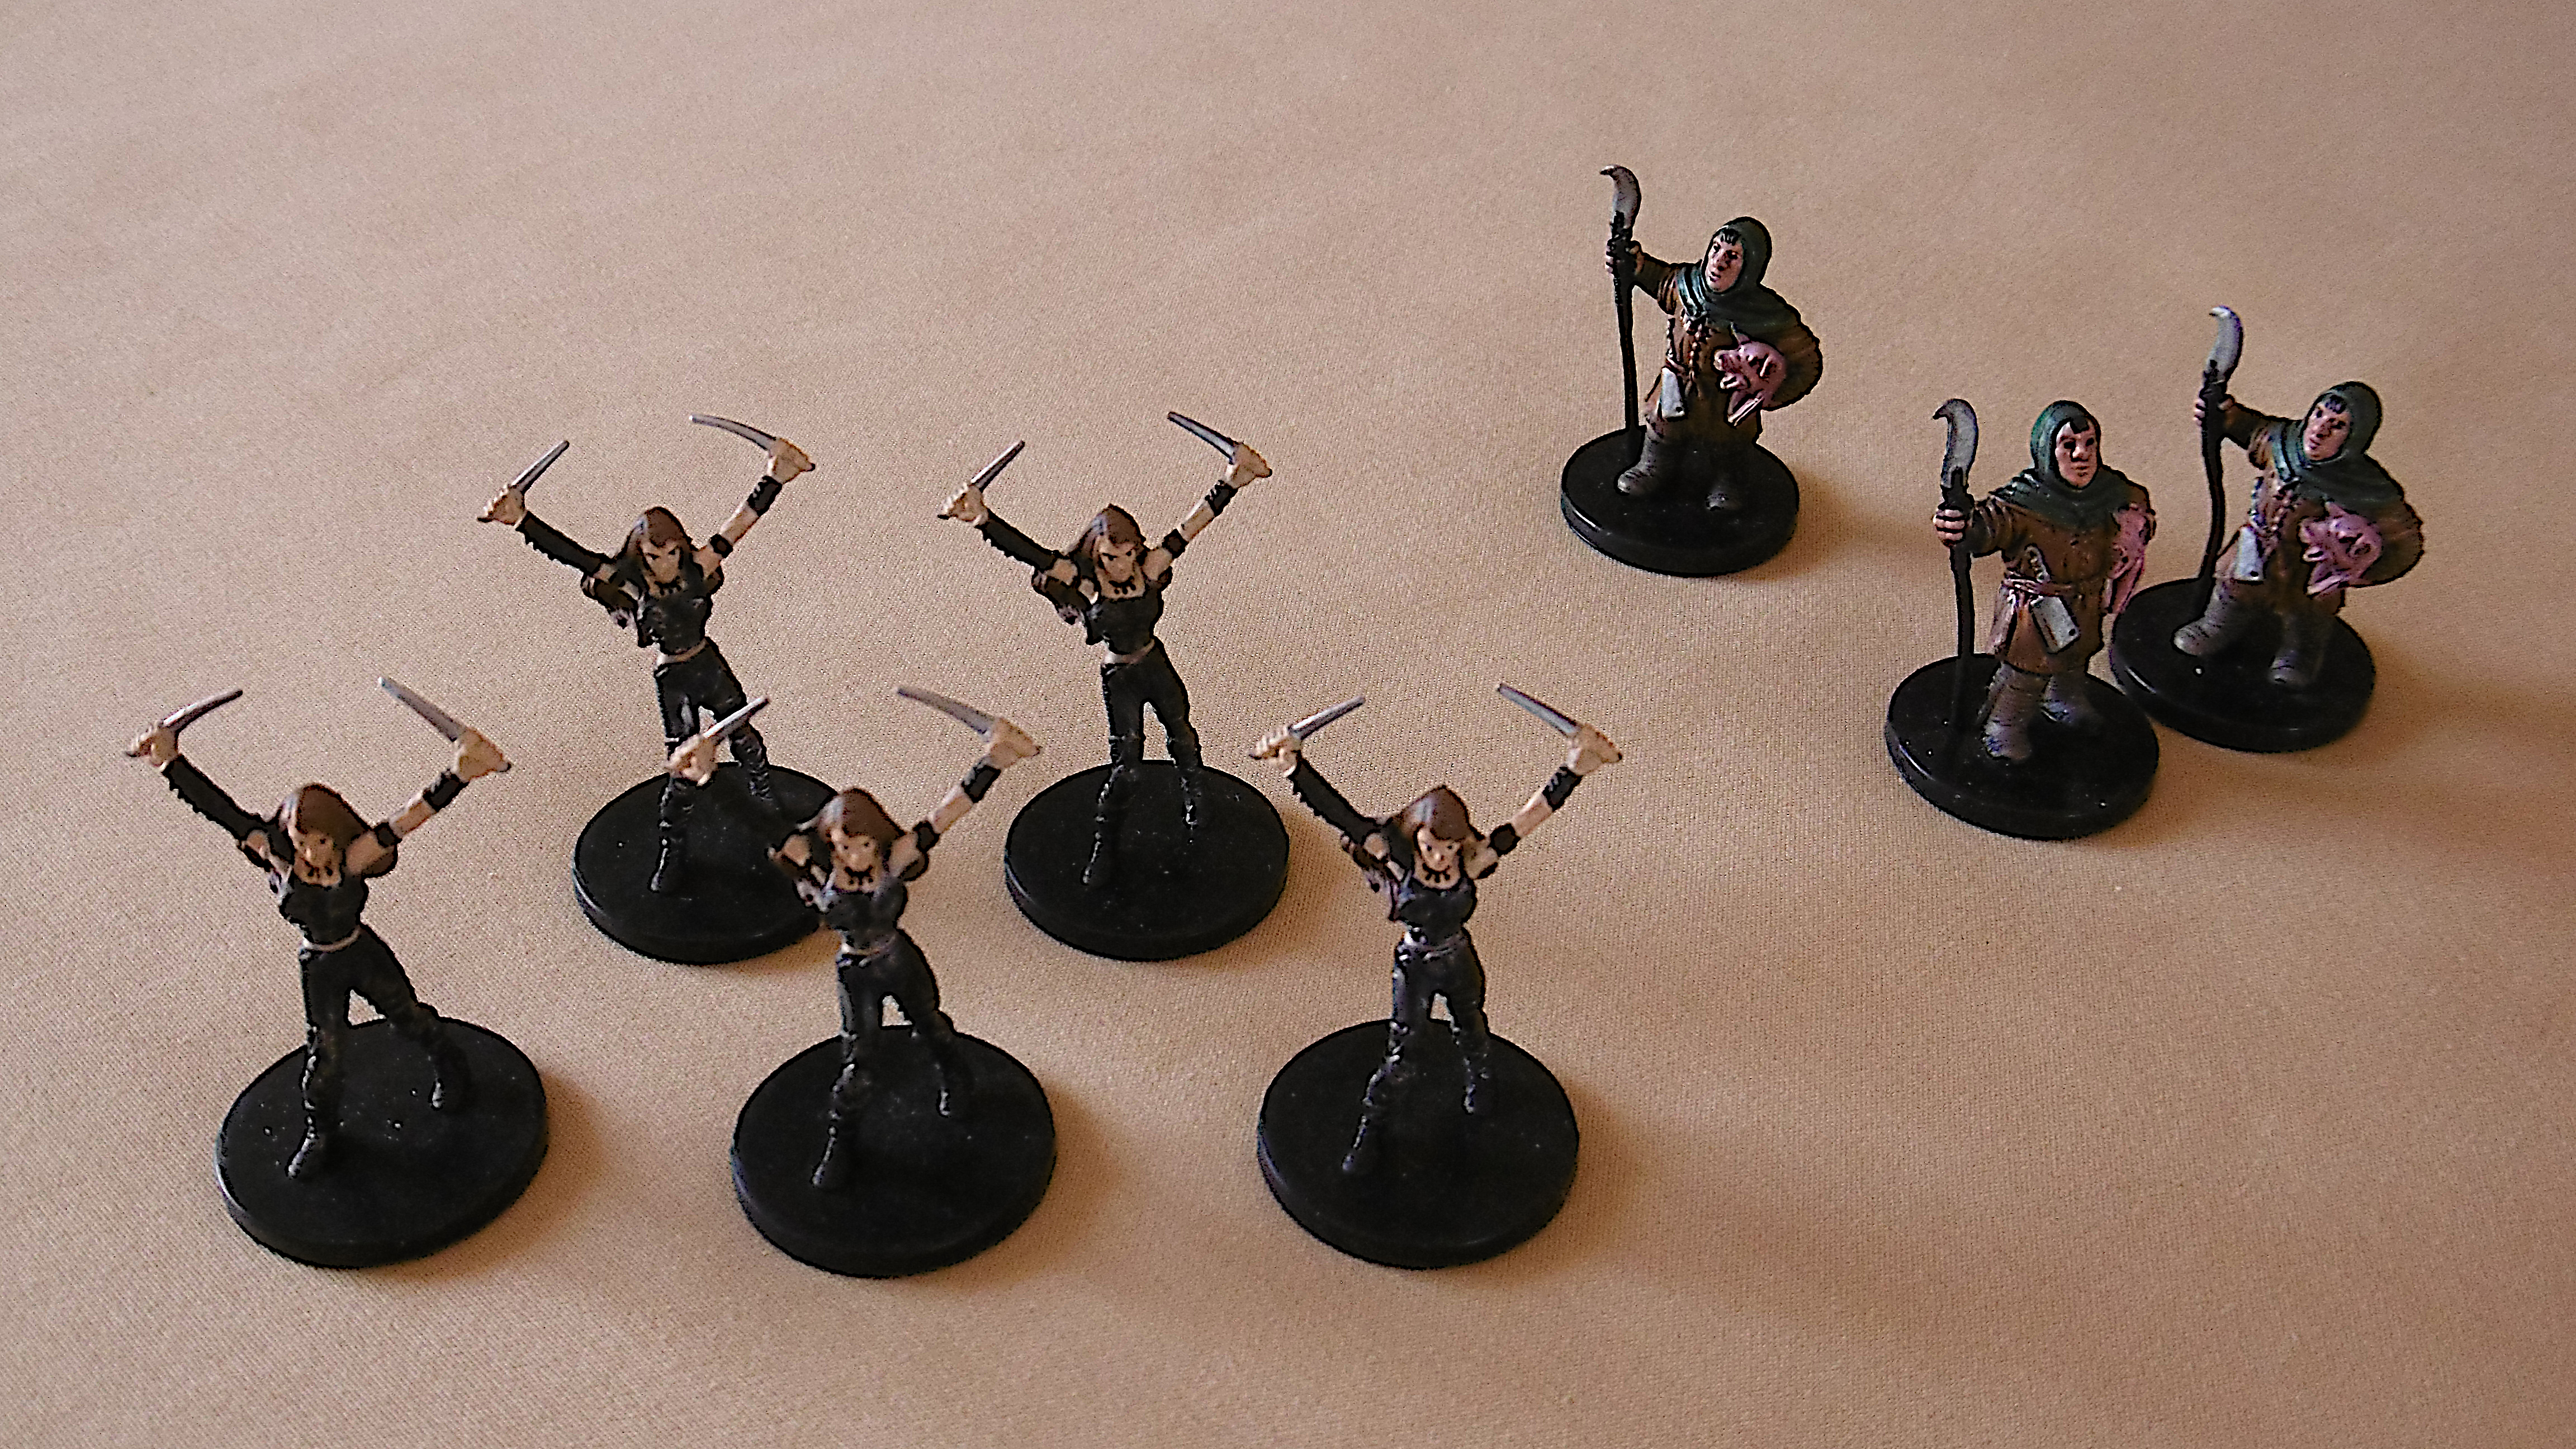
Light Foot and Peasants
Light Foot and Peasants.
In Champions of Chaos, these figures wearing leather armor (foreground) are classed as Light Foot. They stand in open order. Others (background) are peasants in milling-about formation.

My reading of Chainmail gives Light Foot a sore disadvantage. They move and charge at the same rate as Heavy Foot, get no more attack dice than an equal number of points of Heavy Foot, and suffer weak morale. I suspect this is by design, being historically—and logically—accurate. In historical wargames, as in early fantasy games, a force adhered to percentages of troop types. We see such orders of battle in Bath’s Hyboria, Arneson’s Blackmoor (First Fantasy Campaign), and as recently as the AD&D Monster Manual. I assume a player bought only as many Light Foot as the order of battle required. Though anachronistic, the cliché is apt—cannon fodder.

I haven’t yet worked out the orders of battle for the Valormr Campaign. These Light Foot are a nod in that direction, as are the peasants, who Solon Theros herded from the countryside to fill the ranks.


Notes

1 Bath seems to have invented the term “very close order” to differentiate from close order. Historically, close order is less strictly defined, meaning troops spaced anywhere from 18″ to 36″ apart. Gygax and Perren make no mention of “very close order.” Chainmail gives advantages to pole arms formed in close order, given as figures “1″ or less apart” (Chainmail, 40).

2 Chainmail makes no distinction of, nor has rules for, extended order. We’ll leave it at that for now.

3 Chainmail allows only a formation’s first rank of figures to engage in melee. I am not sure why that is. In the historical phalanx, men armed with spears could engage targets from the second rank and with pikes (up to 20′ long) from as far back as the fifth rank. Maybe Gygax and Perren assume each figure is in multiple ranks, but then the figure’s width cannot accurately depict the formation’s breadth.

Setting Up a Wargames Campaign

I came only recently to Tony Bath. I’d heard vague stories about a game in the misty past set in Conan’s world. Details were murky and scarce. It wasn’t clear if it was D&D or something else, and I couldn’t sort out how the game related to the archetypal barbarian.

In early 2011, while browsing the Hill Cantons, I discovered a four-part series about Bath’s Hyboria wargames campaign (December 2010). Author Chris Kutalik had got hold of a copy of Setting Up a Wargames Campaign by the legendary English wargamer. Kutalik doesn’t so much review the book as proselytize. That day I became an acolyte.

Today, we take for granted the campaign. For modern role-playing gamers, a single adventure is called a “one-shot,” and while the form has its merits, it lacks the scope, continuity, and satisfaction a campaign provides.

The Society of Ancients

Tony Bath founded the Society of Ancients and its journal Slingshot in 1965. Now in its 56th year, the society continues to thrive. It has an active members-only online forum, hosts an annual Battle Day, and still produces Slingshot bi-monthly in full color.

So it was, too, with wargamers in the 1960s. Pushing lead figures across a tabletop gets stale after a number of unrelated battles. The context, coming from historical accounts, is inflexible. The setup and tactics, again historical, are sometimes limited. Battles often ended in a slug-fest, there being no reason a general might conserve troops for the morrow.

Veering from the strictly historical wargame, campaigners step back from the table and consider the larger theater of operations. On large-scale maps showing rivers instead of streams, mountains instead of hilltops, countries instead of towns, opposing generals exercise strategy instead of tactics. They march armies, represented by pins, across the map, each general in secret from the other, until forces meet.

In the ensuing battle, the context, setup, and tactics are all determined by the preceding events and the terrain upon which the two forces find each other. Troops must be used effectively or be withdrawn to fight another day. This is the stuff of the campaign.

In Bath’s Hyboria, King Arthur and his knights waged war on Conan’s Cimmerian hordes.

In those years, Tony Bath devised the quintessential wargames campaign. But he went further, for he set the campaign in a fictitious world. He lifted the map from the end papers of a Robert Howard novel. He cribbed also the setting’s name, and so Hyboria came again to life in the second half of the twentieth century. Bath borrowed real-world cultures, both ancient and medieval, to populate the continent with peoples, whence armies were drawn.

In Bath’s Hyboria, King Arthur and his knights waged war on Conan’s Cimmerian hordes. Carthaginians struggled against Viking raiders. Picts crossed swords with Persians. Aquilonians, allied with Argives and Nemedians, laid siege to a Turanian town occupied by Hyrkanians.

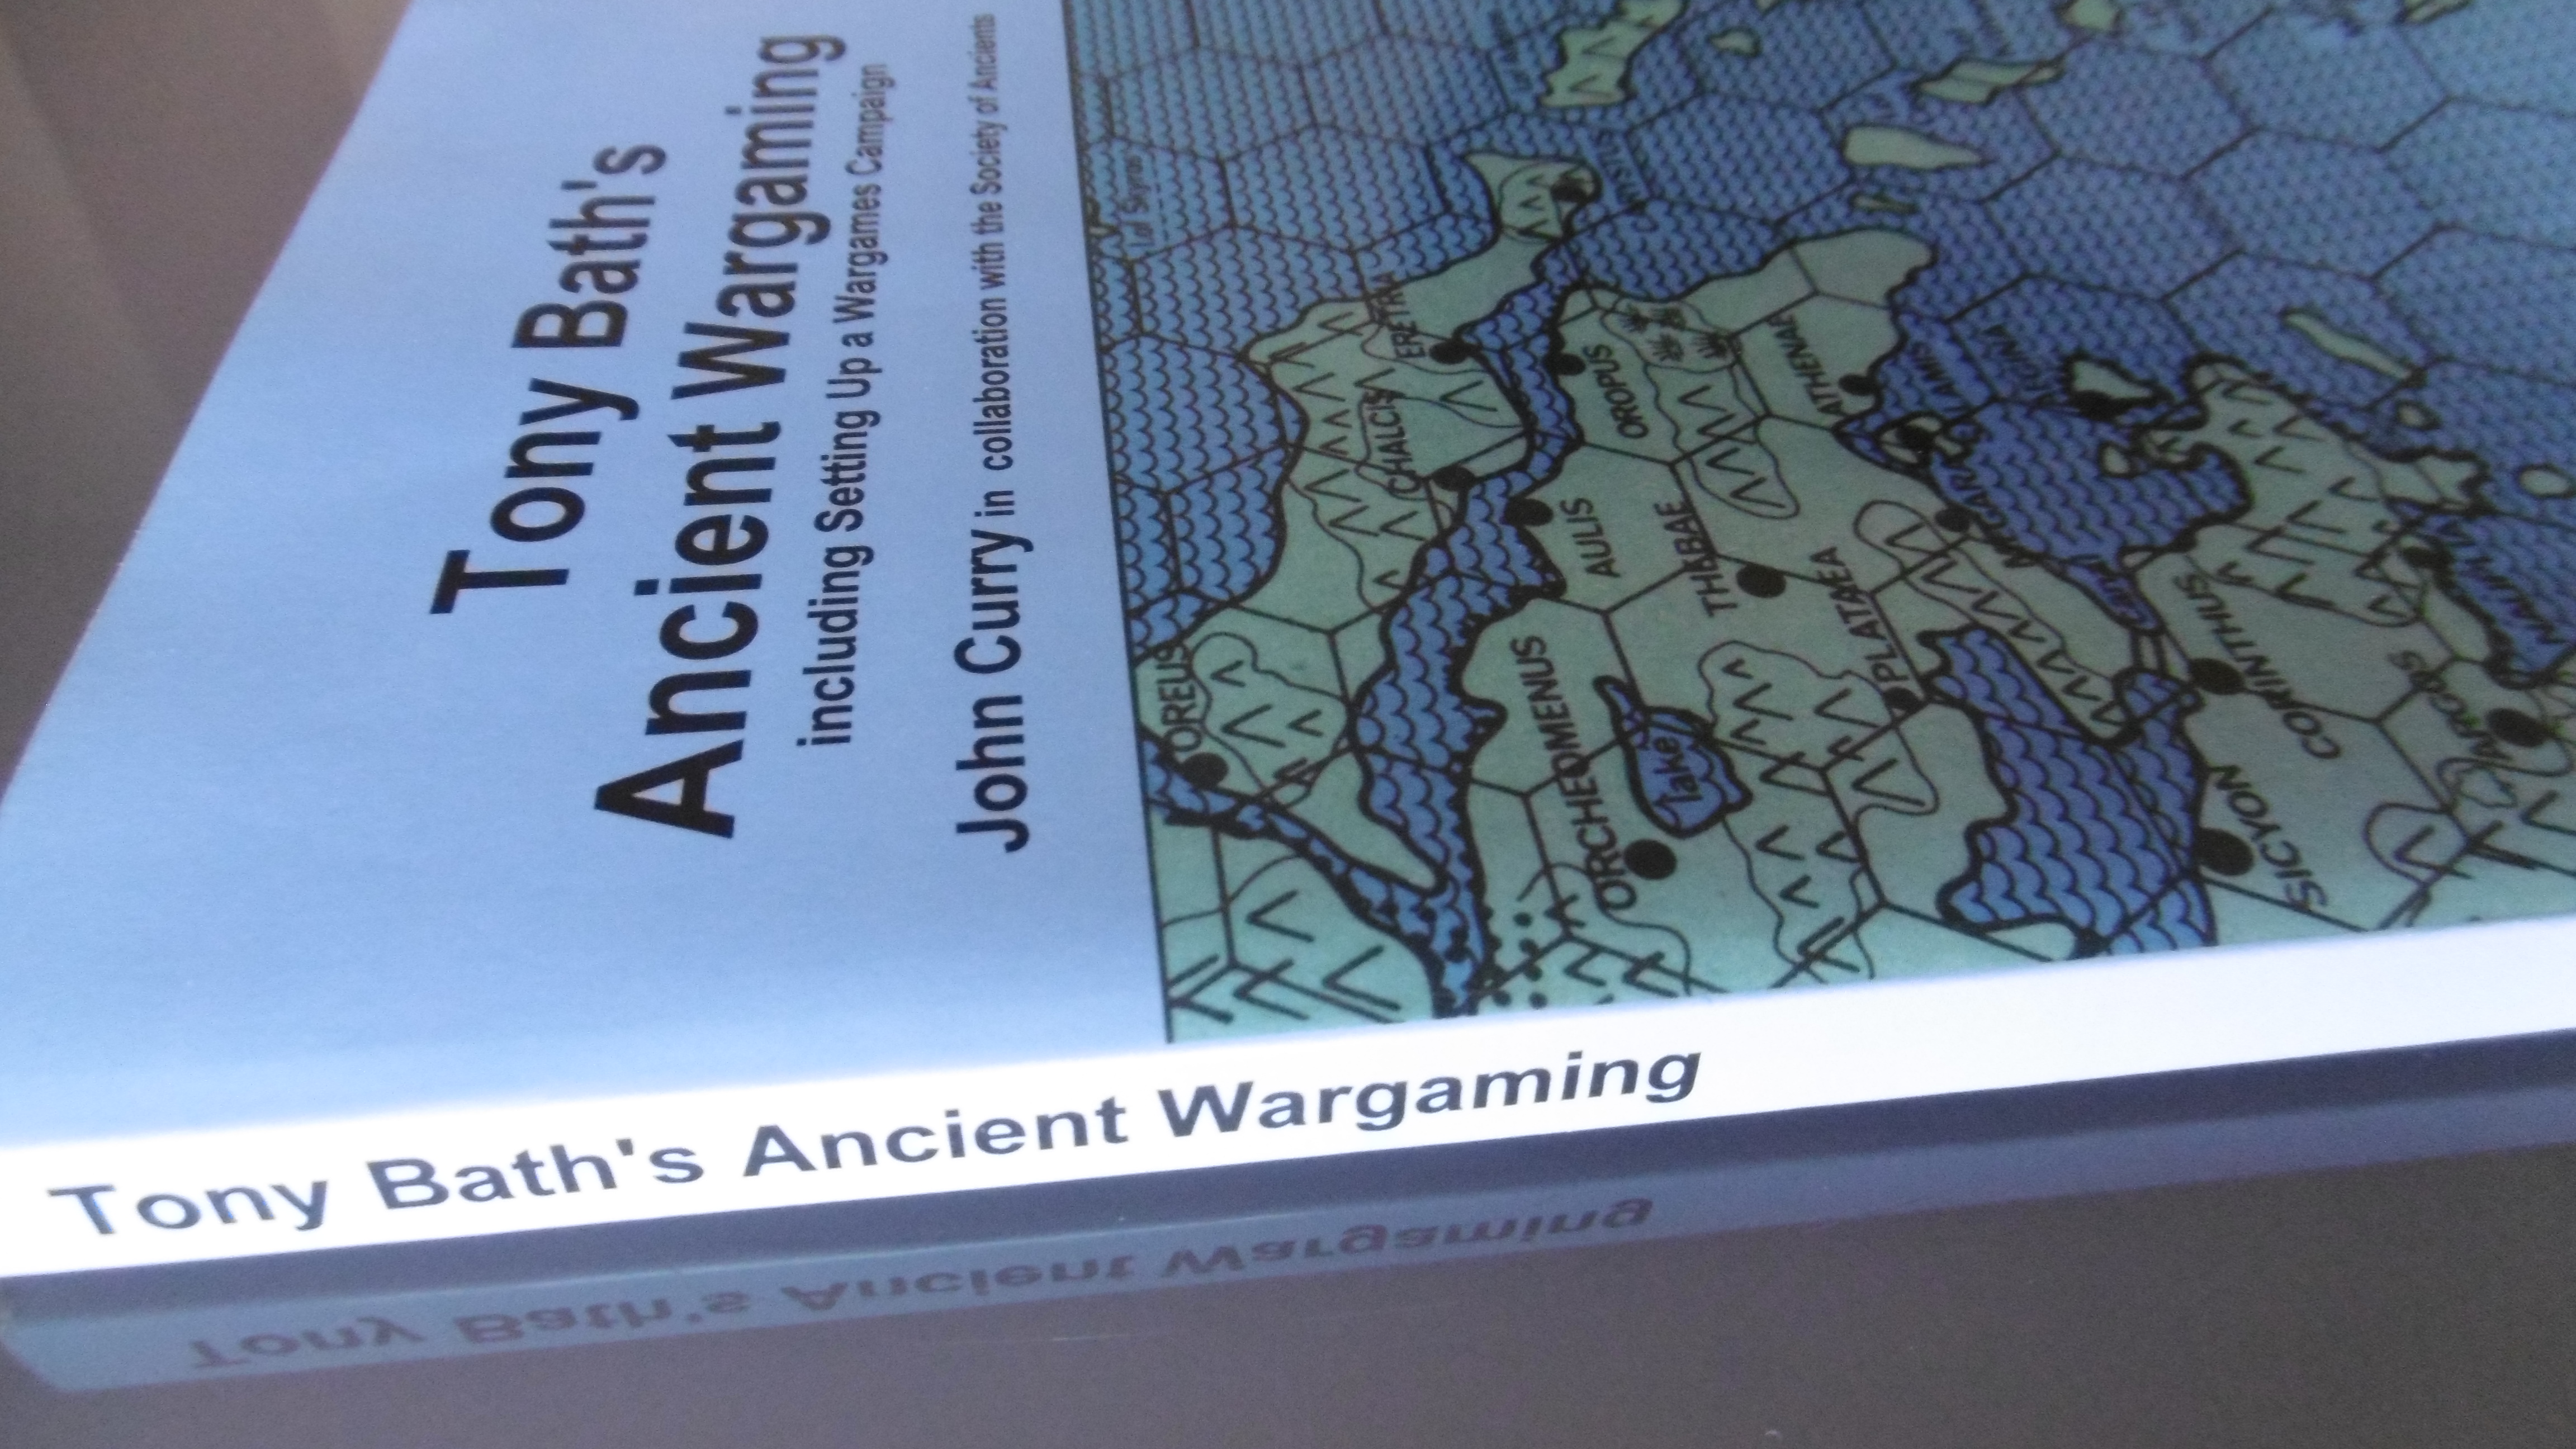
Tony Bath’s Ancient Wargaming including Setting Up a Wargames Campaign

That was only the beginning. Bath describes the process and much more in amicable prose. Setting Up a Wargames Campaign was published in 1973 by Wargames Research Group. It had a second edition (1977) and a revised third edition in 1986. Copies now circulate on various reseller sites for not extraordinary prices. At the time, though, I couldn’t find any such copy.

Instead, I found a reproduction. As part of his History of Wargaming Project, John Curry, with the Society of Ancients, published Tony Bath’s Ancient Wargaming (2009, 2011), which is a reprint collection of three previously published books:

  • Peltast and Pila Ancient Wargaming Rules (Tabletop Warfare, 1976)
  • Setting Up a Wargames Campaign (WRG, 1973)
  • The Legend of Hyboria (Society of Ancients, 2005)

In setting up the Valormr Campaign, I’m using Wargames Campaign’s first three chapters, in which Bath describes the basics:

  • How to Set Up Your Campaign
  • Map Movement
  • Contacts, Battles and After Effects

I’m sure to make use of later chapters in subsequent campaigns. Furthermore, the ancient wargame rules Peltast and Pila will serve in campaigns taking place earlier in the DONJON LANDS time line.

Champions of Chaos

It was yet during Throrgrmir’s Renaissance when rumors spread to the four corners of the world about the wyrmlings which terrorized the dwarves in their dungeon domain.

Anax Archontas Pyrgos Pyrkagias came from lands far south of the World Dragon Mountains, where the red dragon was known as Lord Master of Flame Tower. He brought with him Solon Theros, a superhero with a reputation for ruthlessness, savagery, and cunning in war.

From a temporary lair in the Western Mountains above Darkmeer, Anax Archontas verified the truth of the wyrmling rumors. Then, with Solon Theros he made a plan to conquer the dwarves and thus begin the prophesied Age of Dragons.

Plan made, the dragon hissed at Solon Theros. “First, find champions from among the human rabble below to fight for our purpose.”

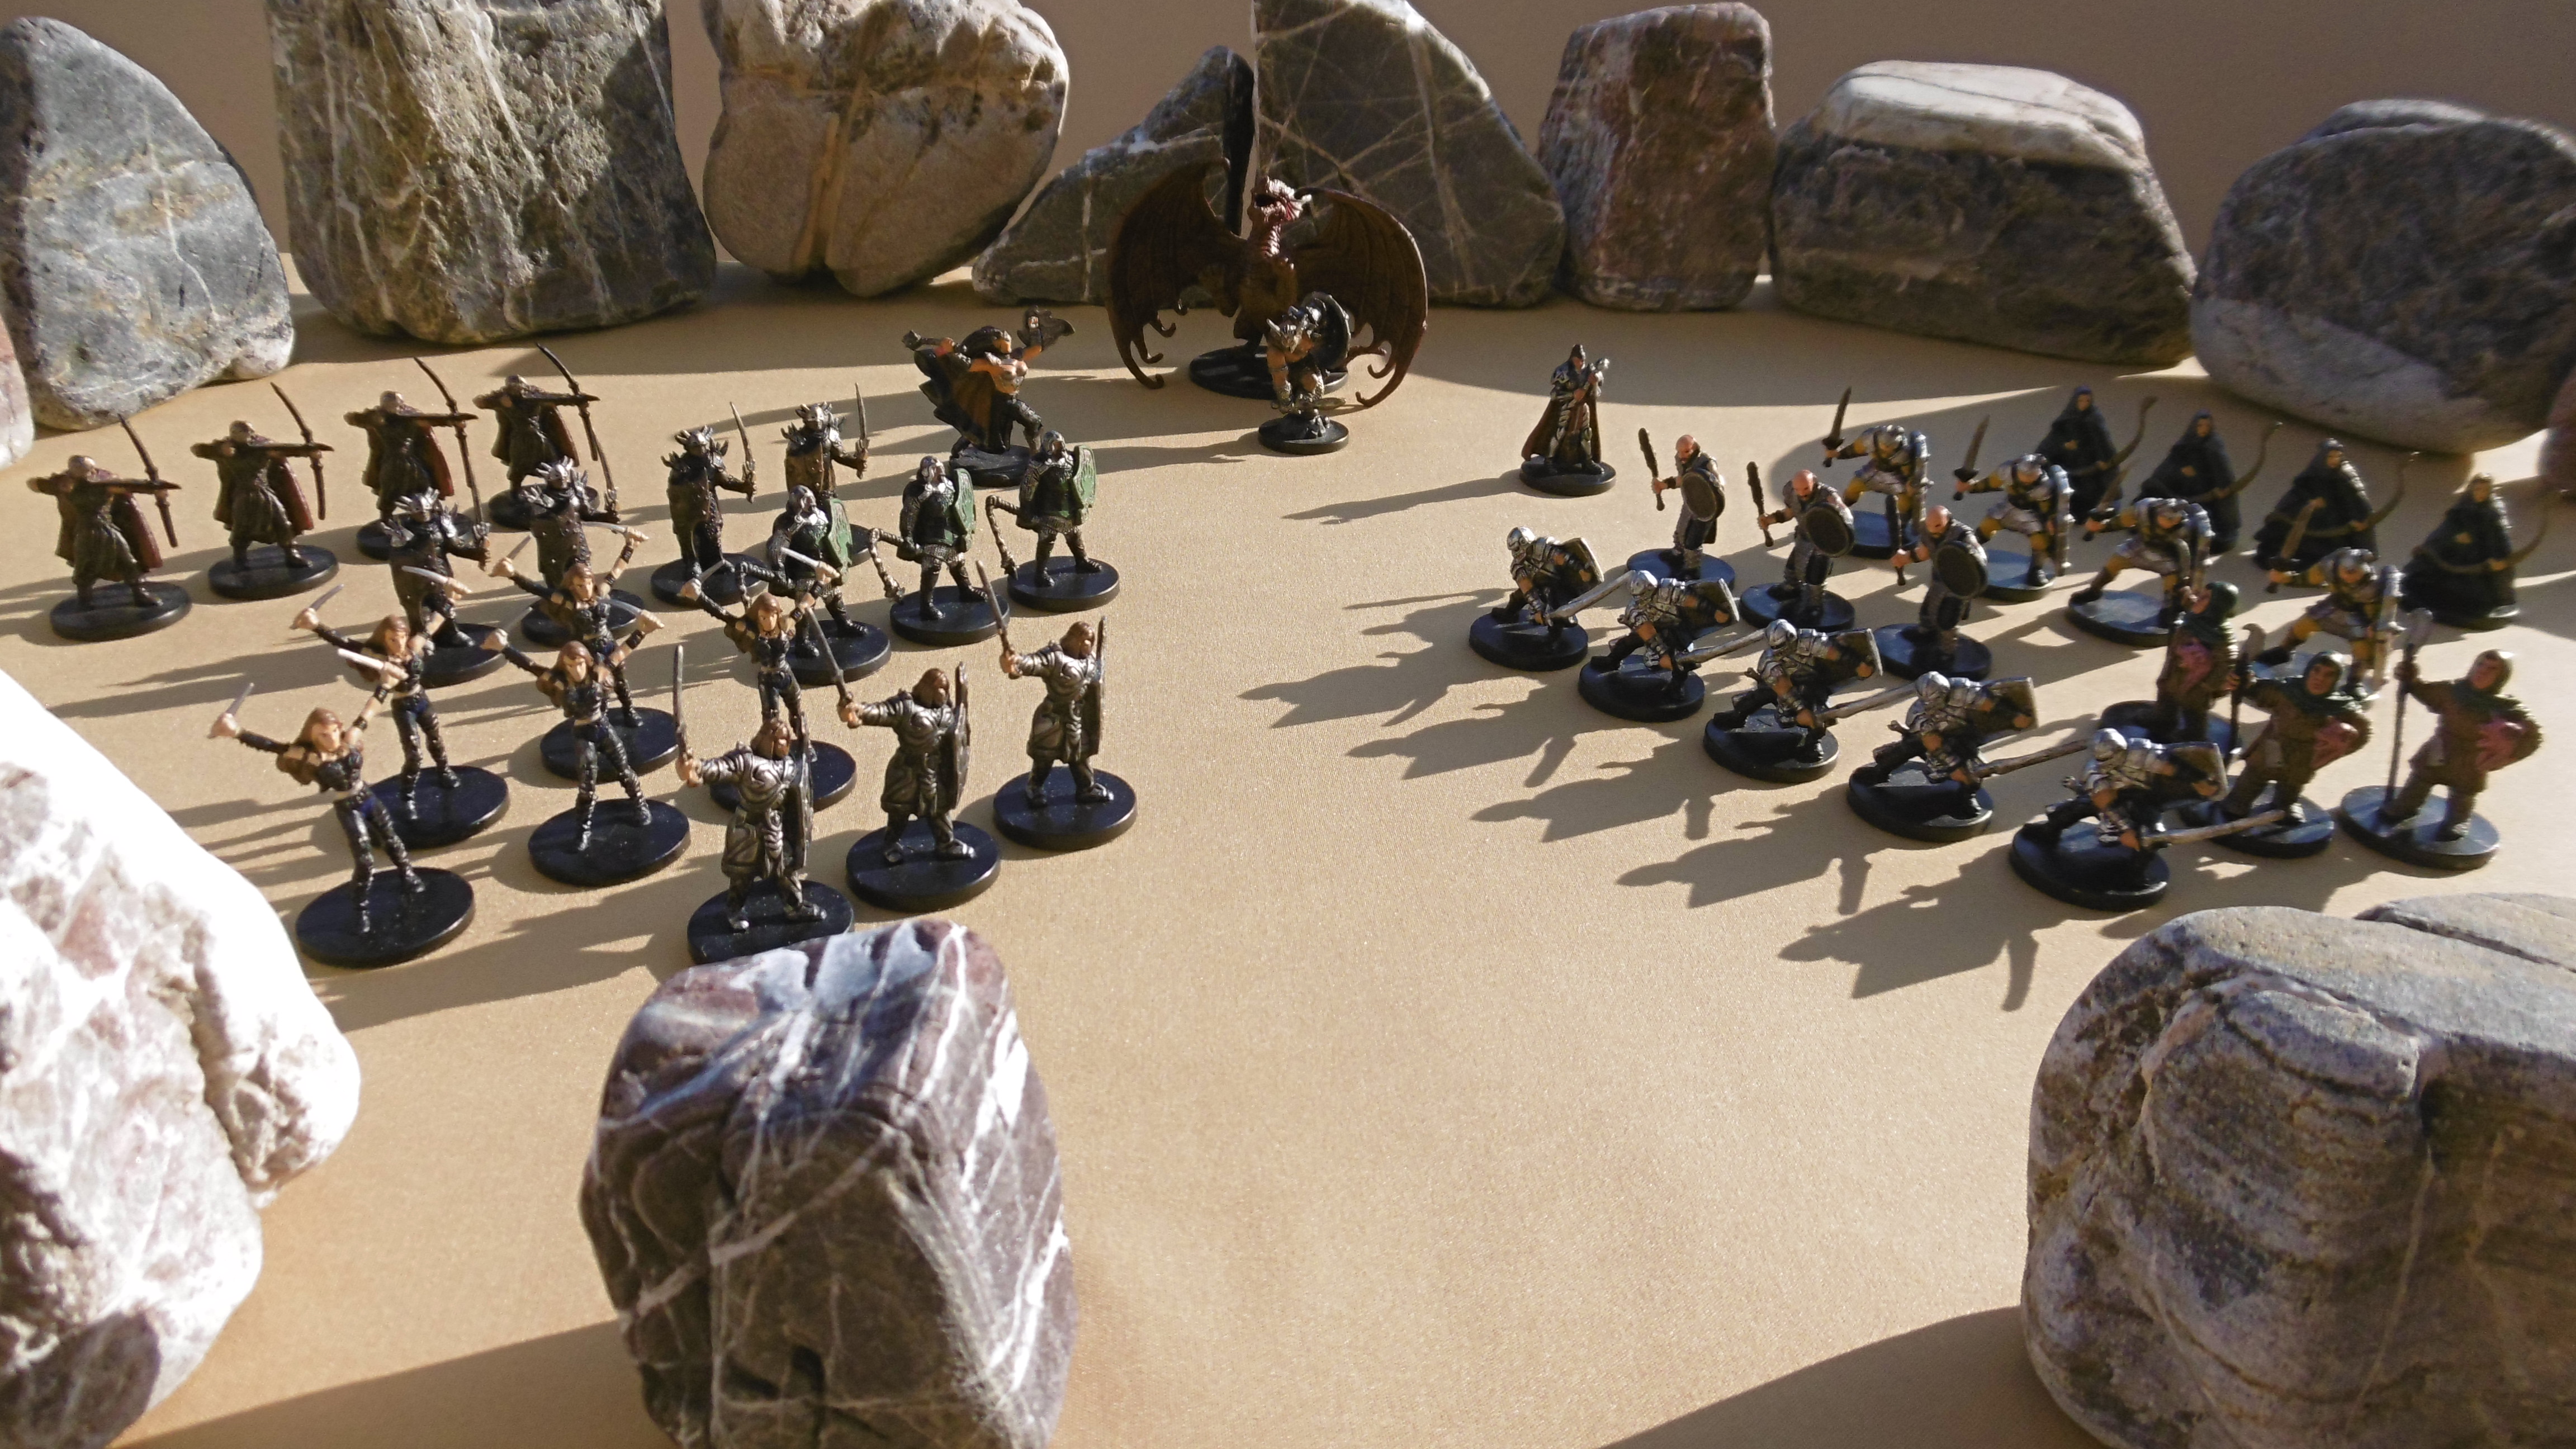
Regiments assembled before Solon Theros and Anax Archontas
Regiments from Dracken Deep and Ternemeer assembled before Solon Theros and Anax Archontas.

Wargame Scenario

Champions of Chaos is an introductory wargame scenario, in which Solon Theros chooses champions to fight for Chaos. It exercises four of Chainmail’s rule subsets.1 Thus, the scenario is conducted in four phases.

  1. Skirmish: Regiments from two petty states fight an engagement.
    ▪ Setup: Dracken Deep vs. Ternemeer
    ▪ Narrative: Killing Field at Aldefane
  2. Man-to-Man Combat: Surviving troops of both sides face off against each other—every man for himself.
    ▪ Setup: “Allies You Have None”
    ▪ Narrative: Four Without Country
  3. Jousting: Those who remain standing compete in the lists.
    ▪ Setup: Death Rides to Mortal Combat
    ▪ Extra: Strategy on the Jousting Matrix
    ▪ Narrative: Hargrane Against Nine in the Lists
  4. Fantasy Combat: Winners undergo long and arduous training under the whip of Solon Theros. One year later, the heroes are tested against fantastic creatures.
    ▪ Extra: A Final Test of Courage
    ▪ Setup: Heroes of Chaos

Solon Theros chose warriors from two of Darkmeer’s petty states. Neighbors Dracken Deep and Ternemeer are fierce rivals. Commanders Minke Meine and Annemie Tacx have met before.2

For the venue, Solon Theros chose Aldefane, a structure built by the Greater Ones. Whatever its original purpose, its ruins now serve as an arena.

It’s been a lustrum since I played Chainmail. Before the Valormr Campaign proper, I refamiliarize myself with the rules for medieval miniatures in Champions of Chaos.


Notes

1 Another rule subset describes sieges. Too complex for the simple scenario, those rules may serve later in the Valormr Campaign.

2 Naming: Anax Archontas and Solon Theros, being from south of the World Dragon Mountains, get their names from Ancient Greek. For Darkmeer places and persons, I cull names from Dutch, Frisian, and Old Frankish. In all cases, I take license to suit my own ear, finding justification in the millennia between now and then.