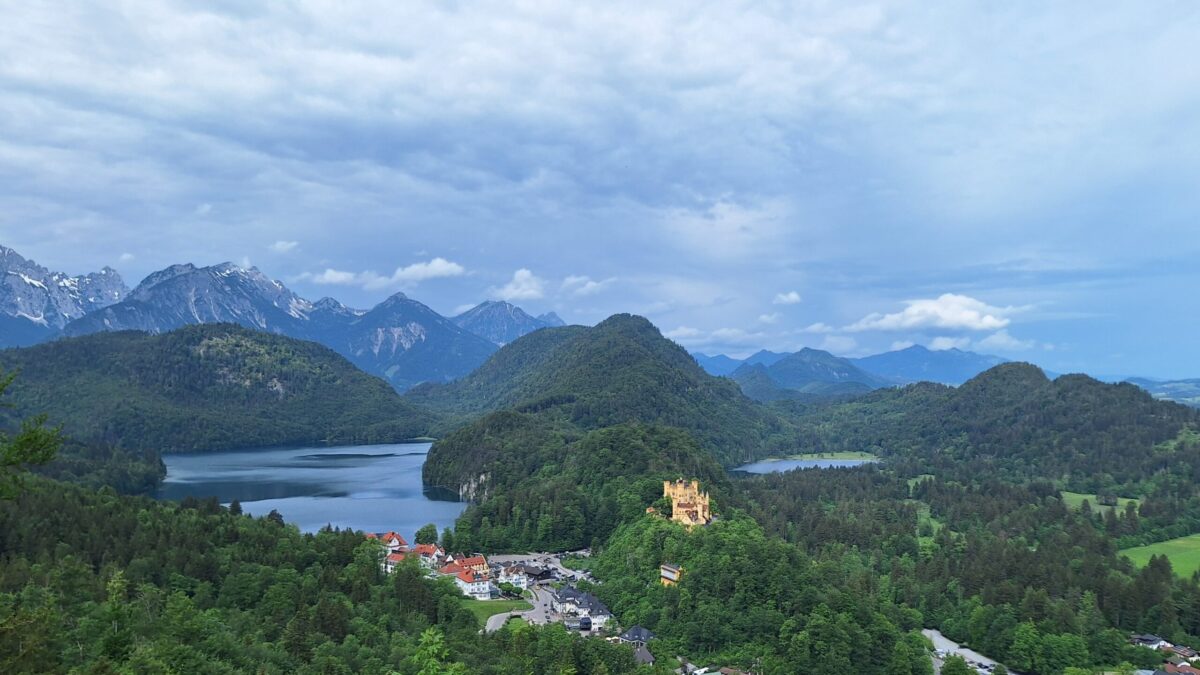
Last fall, preparing to lead my own tours to Neuschwanstein, I followed a few tour guides around the castle. The second most spectacular view on the walk to the gate overlooks Hohenschwangau Castle, set on a hill between the lakes Schwansee and Alpsee. All the guides told the gathered group about a dragon that lay in the landscape. They pointed to the castle, saying, “That’s its crown.” They showed the high hill, which is the dragon’s back, and the green hills on either side, its wings. None had a story about the dragon or where it came from or how it got there. I searched online. Nothing.
A dragon, lying right there in plain sight, is intriguing. But, without a story, it’s hardly worth pointing at. I knew I had to make something up. And wouldn’t it be nice if I could relate some real history in the tale’s telling. So I did a little digging in Bavaria’s ancient past. There are lots of good stories back there. The Ostrogoths went through the region before the Franks arrived. Before them, the Romans were there. Before the Romans—and after them too—there were Celts. With Celts come druids… I can work with that.
And when you are planning an excursion to Bavaria, see “Stephen guides castle tours” and get in touch. I’ll show you around a castle, and we’ll play some D&D!
The Baiuvarii Dragon
After the fall of the Western Roman Empire in the 5th century, Celtic tribes spread out of Bohemia onto the Alpine Foreland and up into the river valleys of the southern mountains. These people became known as the Baiuvarii /by-you-var-ee/, which may have meant “people from Bohemia.” From this word we get Bayern in German and in English Bavaria.
The Baiuvarii were a fierce and independent people. The tribes were led by chieftains. Their spiritual leaders were druids. The druids were wise men and women who served as legal authorities and judges, lore keepers, healers, and advisers to the chieftains.
The druids were also sorcerers. They drew power from nature: from rush of wind, from steady of stone, from fall of water, and from heat of flame.
Then came the Franks from the east. They dominated the Baiuvarii and set up the first dukes to rule over them. The Franks feared the power of the druids and, so, tried to repress them. To defend themselves, the druids called up from the earth a great dragon.
The dragon was big as a mountain. On wide wings, it swooped in the air, its scales were hard as rocks, it moved quick like a river, and it breathed great gouts of fire. The dragon defended the druids against the Franks.
In the 8th century, Charlemagne came. Charlemagne fought the dragon and subdued it. He was then crowned emperor in the year 800. His son Louis the Pious appointed the first king of Bavaria. There followed a series of six Bavarian kings in the 9th century. These kings were fabulously wealthy, the next more wealthy than the previous.
Now the dragon had been subdued but not defeated. And when the last of the six kings died, the dragon collected the treasure of the Bavarian kings and brought it to the Alpsee. It dropped the treasure to the bottom of the lake. The dragon then lay down beside the lake, with the Crown of Bavaria upon its head, and slept.
Do you see the dragon…?
Hohenschwangau Castle from the Overlook at Jugend. The Schwansee (lake) on the right, Alpsee left.The Crown of Bavaria
The castle is the Crown of Bavaria atop the dragon’s head.
Do you see the dragon?
The dragon’s snout lies in front of the castle. Behind the castle, the hill crest runs up its neck to its back, the tallest hills. Its wings, green hills, spread behind the lakes on either side. The tail stretches into the background, right.
I may have made up parts of this story. Druids are commonly associated with the Celts earlier in history. We don’t hear so much about them later. This is perhaps due to two reasons: one, it was first the Romans, then later Christian conquerors, who repressed the druids for fear of their power, and two, in compliance with their own customs, the druids didn’t write.
I’m sure I’ve exaggerated the Bavarian kings’ wealth, and as far as history is concerned, druids did not call dragons. Some of us know better.
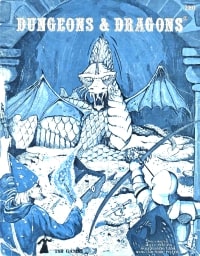
This is the 35th in a continuing series of articles, which reedits house rules for Holmes Basic D&D from 40-year-old game club newsletters. Mentions of house rules are in bold text and followed by a [bracketed category designator].
Phenster’s Pandemonium Society House Rules is a work of fiction. Names, characters, businesses, events, incidents, and newsletters are either products of the author’s imagination or are used in a fictitious manner. Any resemblance to actual persons, living or dead, or actual events is pure coincidence.
“Bluebook” D&D. The 1977 edition of Gygax and Arneson’s DUNGEONS & DRAGONS is also known as “Holmes Basic” after editor Dr. J. Eric Holmes.
In his contribution to the April 1984 issue of L’avant garde, Phenster describes several monsters to challenge higher-level PCs. As with his earlier monster descriptions, I see no need to tamper with the text, and the stats are sound. Moreover, the monsters are not out of the realm of fantasy, so I put the ensemble in category [E] Extra.
I make a couple notes within the text [in brackets]. Otherwise, any holes Phenster leaves the DM may fill to suit.
Apart from the opening reference to AD&D, Phenster makes no mention of any source material. I add footnotes where I am aware of possible sources. Of the monsters given, Baazmaeg, grimpshee, slink, and Demon of the Lake appear to be entirely made up.
Monsters in Deep Dungeons
by Phenster
The rulebook doesn't have very many high-level monsters. AD&D has lots more and that's where we get most of them. But sometimes we make up new monsters too. I'll describe some of them for you. But first, Hazard made a new table for monster HD wandering in the deeper levels of the dungeon, and he added more HD to the XP table.
Wandering Monster Level Matrix
Monster Level
Dungeon Level
1
2
3
4
5
6
7
8
9
1st
1-8
9-11
12
2nd
1-3
4-8
9-11
12
3rd
1
2-4
5-8
9-11
12
4th-5th
1
2-4
5-6
7-8
9-11
12
6th-7th
1
2-4
5-6
7-8
9-11
12
8th-9th
1
2-4
5-6
7-8
9-11
12
10th-12th
1
2-4
5-6
7-8
9-12
13th-15th
1
2-4
5-6
7-12
16th+
1
2-4
5-12
XP for Monsters Overcome
Monster HD
Value
Exceptional
Under 1
5
1
1
10
3
2
20
5
3
35
15
4
75
50
5
175
125
6
300
225
7
450
375
8
625
525
9 to 10
825
675
11 to 12
1075
825
13 to 14
1375
975
15 to 16
1725
1175
17 to 20
2150
1525
21 and up
2650
2025
Any pluses to HD make the monster the next higher HD.
MONSTERS
Witches/Warlocks[1]:
Witches (and warlocks) use witchcraft, which is a kind of magic that gets its power from demons and devils. It's also called black magic. Witches sell their soul to a demon or a devil. They have to sign a contract with their own blood, and the demon or devil gives them spells, special powers and rituals. They have 1 witchcraft power for every level, plus they get magic-user and cleric spells.
Witches are notoriously hard to kill. They have regular d8s for HD, and they heal quickly. They start every day and every night with full hit points. Even after you kill them, you have to burn the body and throw the ashes in a running stream, or they might come back, and then they'll be after you.
There are Low Order witches and High Order witches. Low Order witches are the most common ones, and there are a lot of different Low Orders with names like the Coven Under Gnarled Grove, the Gray Raven Coven, and the Evil Eye. Low Order witches can have up to 7 HD. They get magic-user and cleric spells for each level and one witchcraft power per level from the Low Order list. [For spells, treat as cleric/magic-user, both classes of level equal to hit dice.]
The more powerful witches are from the High Order. The only High Order we know about is the Sordid Coven of Greater Malevolence. They lair in a great cavern on the 8th level of the dungeon, where they made a twisted grove of undead trees with colored glass beads and precious gemstones hanging from the branches. High Order witches go up to 13 hit dice (Hazard says, "As far as you know . . ."). For each HD above 7 they get a witchcraft power from the High Order list.
We've heard of another group of witches that has a lair even deeper in the dungeon. They are so secretive that we're not sure what their name is. We just call them "the Dark Covenant." We think it was them who opened the gate that let out a hoard of rampaging demons. They are devious!
Witchcraft Powers
Witchcraft powers aren't spells. Witches can use their powers whenever they want. They don't have to memorize them or forget them. And they don't write them down either. Because they get their powers from their infernal patrons.
Low Order: bewitch (charm), herbal medicine (heal/cause wounds), herbal medicine (poison), permanent familiar, change self (illusion), darkness, hold person, hold portal, fairie fire, speak in tongues, call animal (attack/messenger).
High Order: brew potion (love), brew potion (truth), brew potion (insanity), effigy (control), effigy (injure), change shape, protection from normal missiles, ESP, dark sight.
Witchcraft Rituals
Any two or more witches (High or Low Order, but always from the same coven) can perform a ritual. The more witches participating in the ritual, the more effective it is (e.g. higher saving throw, more damage, larger area, etc.). To perform a ritual, the witches must make certain sacrifices, usually blood (their own or from an animal). There can be lots of different rituals. Here are some: curse, hallucinatory terrain, plant trap, continual darkness, send to Hell, animate dead, guards and wards, commune with spirit, geas, limited wish, call demon/devil.
Alignment
Most witches are either Lawful Evil or Chaotic Evil, never neutral. The lawful ones have devil patrons and the chaotics have demons. There are neutral magic-user/clerics in the pagan tribes of the First Peoples, but those are not real witches. Sometimes NPCs call them witches, but they're really more like druids.
Good Witches
There are rumors that good witches exist too, but we haven't met any yet. They don't have to sign contracts in blood. They work with angels and saints, who grant their powers, which are different from evil witch powers.
NPC ONLY: We can't play witches like a character class, not even good ones. Hazard says any DM who allows players to be witches is completely nuts!
Grimpshee: Undead spirit of someone captured, taunted and killed by an infernal creature. Some say they are not killed, but they are taken down into the Pit to Hell directly. We aren't sure how they become undead then. But when they turn into a grimpshee, they are disfigured and have a drawn out look of horror on their faces. Only magic weapons can hit them, and when they hit you, they drain a level every time. [A cleric turns a grimpshee as a spectre.]
Move: 90'
Alignment: chaotic evil
HD: 6+2
Attacks: 1
AC: 3
Damage: 1-8
Treasure Type: E
Flamewort[2]: Moss that grows in warm, damp, dark places. It glows in pulsating red and orange like fire. It gives light in a 5' radius but no heat. Also called red dragon's wort, because there is usually one of those in a lair nearby.
Demon of the Lake: Underwater flying demon, like a manta ray. Its "wingspan" is 30 feet wide. Its body is 40 feet long and it has a tail 20 feet long with a serpent head at the end. Strange blotches around its mouth turn into a grotesque human-like head when it attacks. The head's jaws are 2 feet wide with long teeth big as daggers. It bites for 1-10 points of damage. Its tail stings with poison, save or die.
Move: swim 60', fly 120'
Alignment: chaotic evil
HD: 13
Attacks: bite and tail
AC: 4
Damage: 1-10
Treasure Type: E
Slink: A creeping monster from another dimension that can practically hide in its own shadow. It sneaks around on large, padded feet, and it wears a red stocking cap. It steals valuable objects (99% chance to Pick Pockets) then slips through its shadow into another dimension. It prefers to carry a bag of holding to put its booty in, but a large sack will do. (If no bag of holding, divide its coin treasure by 10. Maximum 600 coins.) When it's got a lot of booty, it passes the stolen goods to a fence (usually bandits/thieves), who sell it to dungeon traders. Slinks don't like weapons, but they'll steal anything left unattended. So we know, if there's a slink around, no point to search for hidden treasure. And don't set the lantern on the floor!
If you can catch a slink, you can slap its hand and it will drop its booty bag and disappear into its other dimension.
Move: 90'
Alignment: neutral
HD: 2
Attacks: pick pocket
AC: 4
Damage: 0
Treasure Type: F
Giants[3]:
The giants have their own kingdom that spreads across half the Heptarchy. There are several fire giant kings that try to rule over the whole Giant Kingdom. Below the kings, there are frost giant jarls, then stone giant thanes and hill giant chiefs. They quarrel with each other at every level, but they only fight a battle when there is a dispute over who rules who. There was only ever one Giant War, and that was thousands of years ago.
The cloud giants and storm giants usually stay above the petty politics of the smaller giants. And all the giants mostly ignore the people and rulers of the Heptarchy who live inside the Giant Kingdom as long as they don't make trouble. Except the hill giants (and sometimes stone giants) which often raid human towns.
Giants keep other monsters as pets in their castle lairs. They can be anything from giant-type animals to fantastic creatures (hydras, griffons, dragons, etc., etc.) When giants go outside their lair, they always carry a giant sack full of gold and throwing rocks: 1-6 x 1,000 g.p. and 3-18 rocks.
Bull of Heaven[4]: There's only one Bull of Heaven. It's the biggest monster anybody ever fought. It gores (1-12), it tramples (2-20), it breathes fire (6-36). It goes on rampages and destroys towns, cities and crops for miles around. If you can find out who the Bull belongs to, you can ask for it and you might get it. It used to belong to an old god named Anu. Ishtar got it from him to sic on Gilgamesh. Poseidon got it from Ishtar, and he gave it to King Minos, but then he took it back because Minos reneged on their deal. Friar Tombs got the Bull from Poseidon, because Beowulf the Bully wanted to fight the toughest monster imaginable. If you want the Bull of Heaven, you just have to ask Friar Tombs for it. Serious inquiries only!
Move: 150'
Alignment: chaotic
HD: 23
Attacks: 1
AC: -1
Damage: 1-12
Treasure Type: No treasure
Baazmaeg (demon)
We first heard about Baazmaeg when Mangus Manes called her "the Duchess." Phenster Prime did some research, and I found out that Baazmeag is the Demon Lady of Torment. She rules one of the planes of Hell, either the 4th or the 8th. Baazmaeg looks like a seductive woman without any hair. Her eyes are like bronze. She has fangs, bat wings, a ridge down her spine and a barbed tail that can sap your strength. We haven't met her yet, so Hazard won't tell us her stats. But I'm betting she's got 155 hit points.
Sandestins[5]: Sandestins are made in vats by powerful wizards (mages or arch-mages). They do the wizard's bidding, usually taking care of things around the wizard's tower when the wizard isn't home. They're only 1' tall and look like tiny, chubby humans with fat fingers and grotesque faces.
A sandestin has the same hit dice (roll h.p. separately with d8s) and intelligence as the wizard who made it, and it is imbued with spells, which means it can use the spells whenever it wants. Just about any imbued spells are possible. Here are some popular ones: comprehend languages, hold portal, mending, message, detect invisibility, ESP, knock, levitate, wizard lock, haste, hold person, plant growth, minor globe of invulnerability, telekinesis.
Move: 60'
Alignment: as creator
HD: as creator
Attacks: 1
AC: 2
Damage: depends
Treasure Type: No treasure
—L’avant garde #62 (April 1984)
1 In an earlier article, I mention the witch class and give the source articles from Dragon magazine. Hazard may have used any or all of these.
“The Witch” NPC class is detailed in Dragon No. 43 (November 1980). Tucked into that article is another article: “The Real Witch” (8) is an origin piece by Tom Moldvay. Also interesting are two articles: “Witchcraft Supplement for Dungeons & Dragons” (Dragon No. 5, March 1977) and “Another Look at Witches and Witchcraft in D&D” (Dragon No. 20, November 1978). Following the latter, check out the related article “Demonology Made Easy” (No. 20).
2 An Internet search comes up with only a reference to Umbelled flamewort, not a moss but a flower, also known as Phlox divaricata, in Circle of the Seasons (London: Hookham 1828). The plant’s luminous and subterranean qualities must be imagined.
3 Giants’ pets and sacks full of gold and rocks may come from the first printing of Holmes, OD&D Monsters & Treasure, or the AD&D Monster Manual. The three sources put 1 to 6 thousand g.p. in a sack. Only AD&D specifies a number of rocks, limiting it to “a large rock or two” (44).
4 From the Epic of Gilgamesh. We might see more later about the Bull of Heaven.
5 However imperfectly represented here, sandestins come from Jack Vance’s Dying Earth and Lyonesse stories. Only the first book of the latter series was published by 1984.
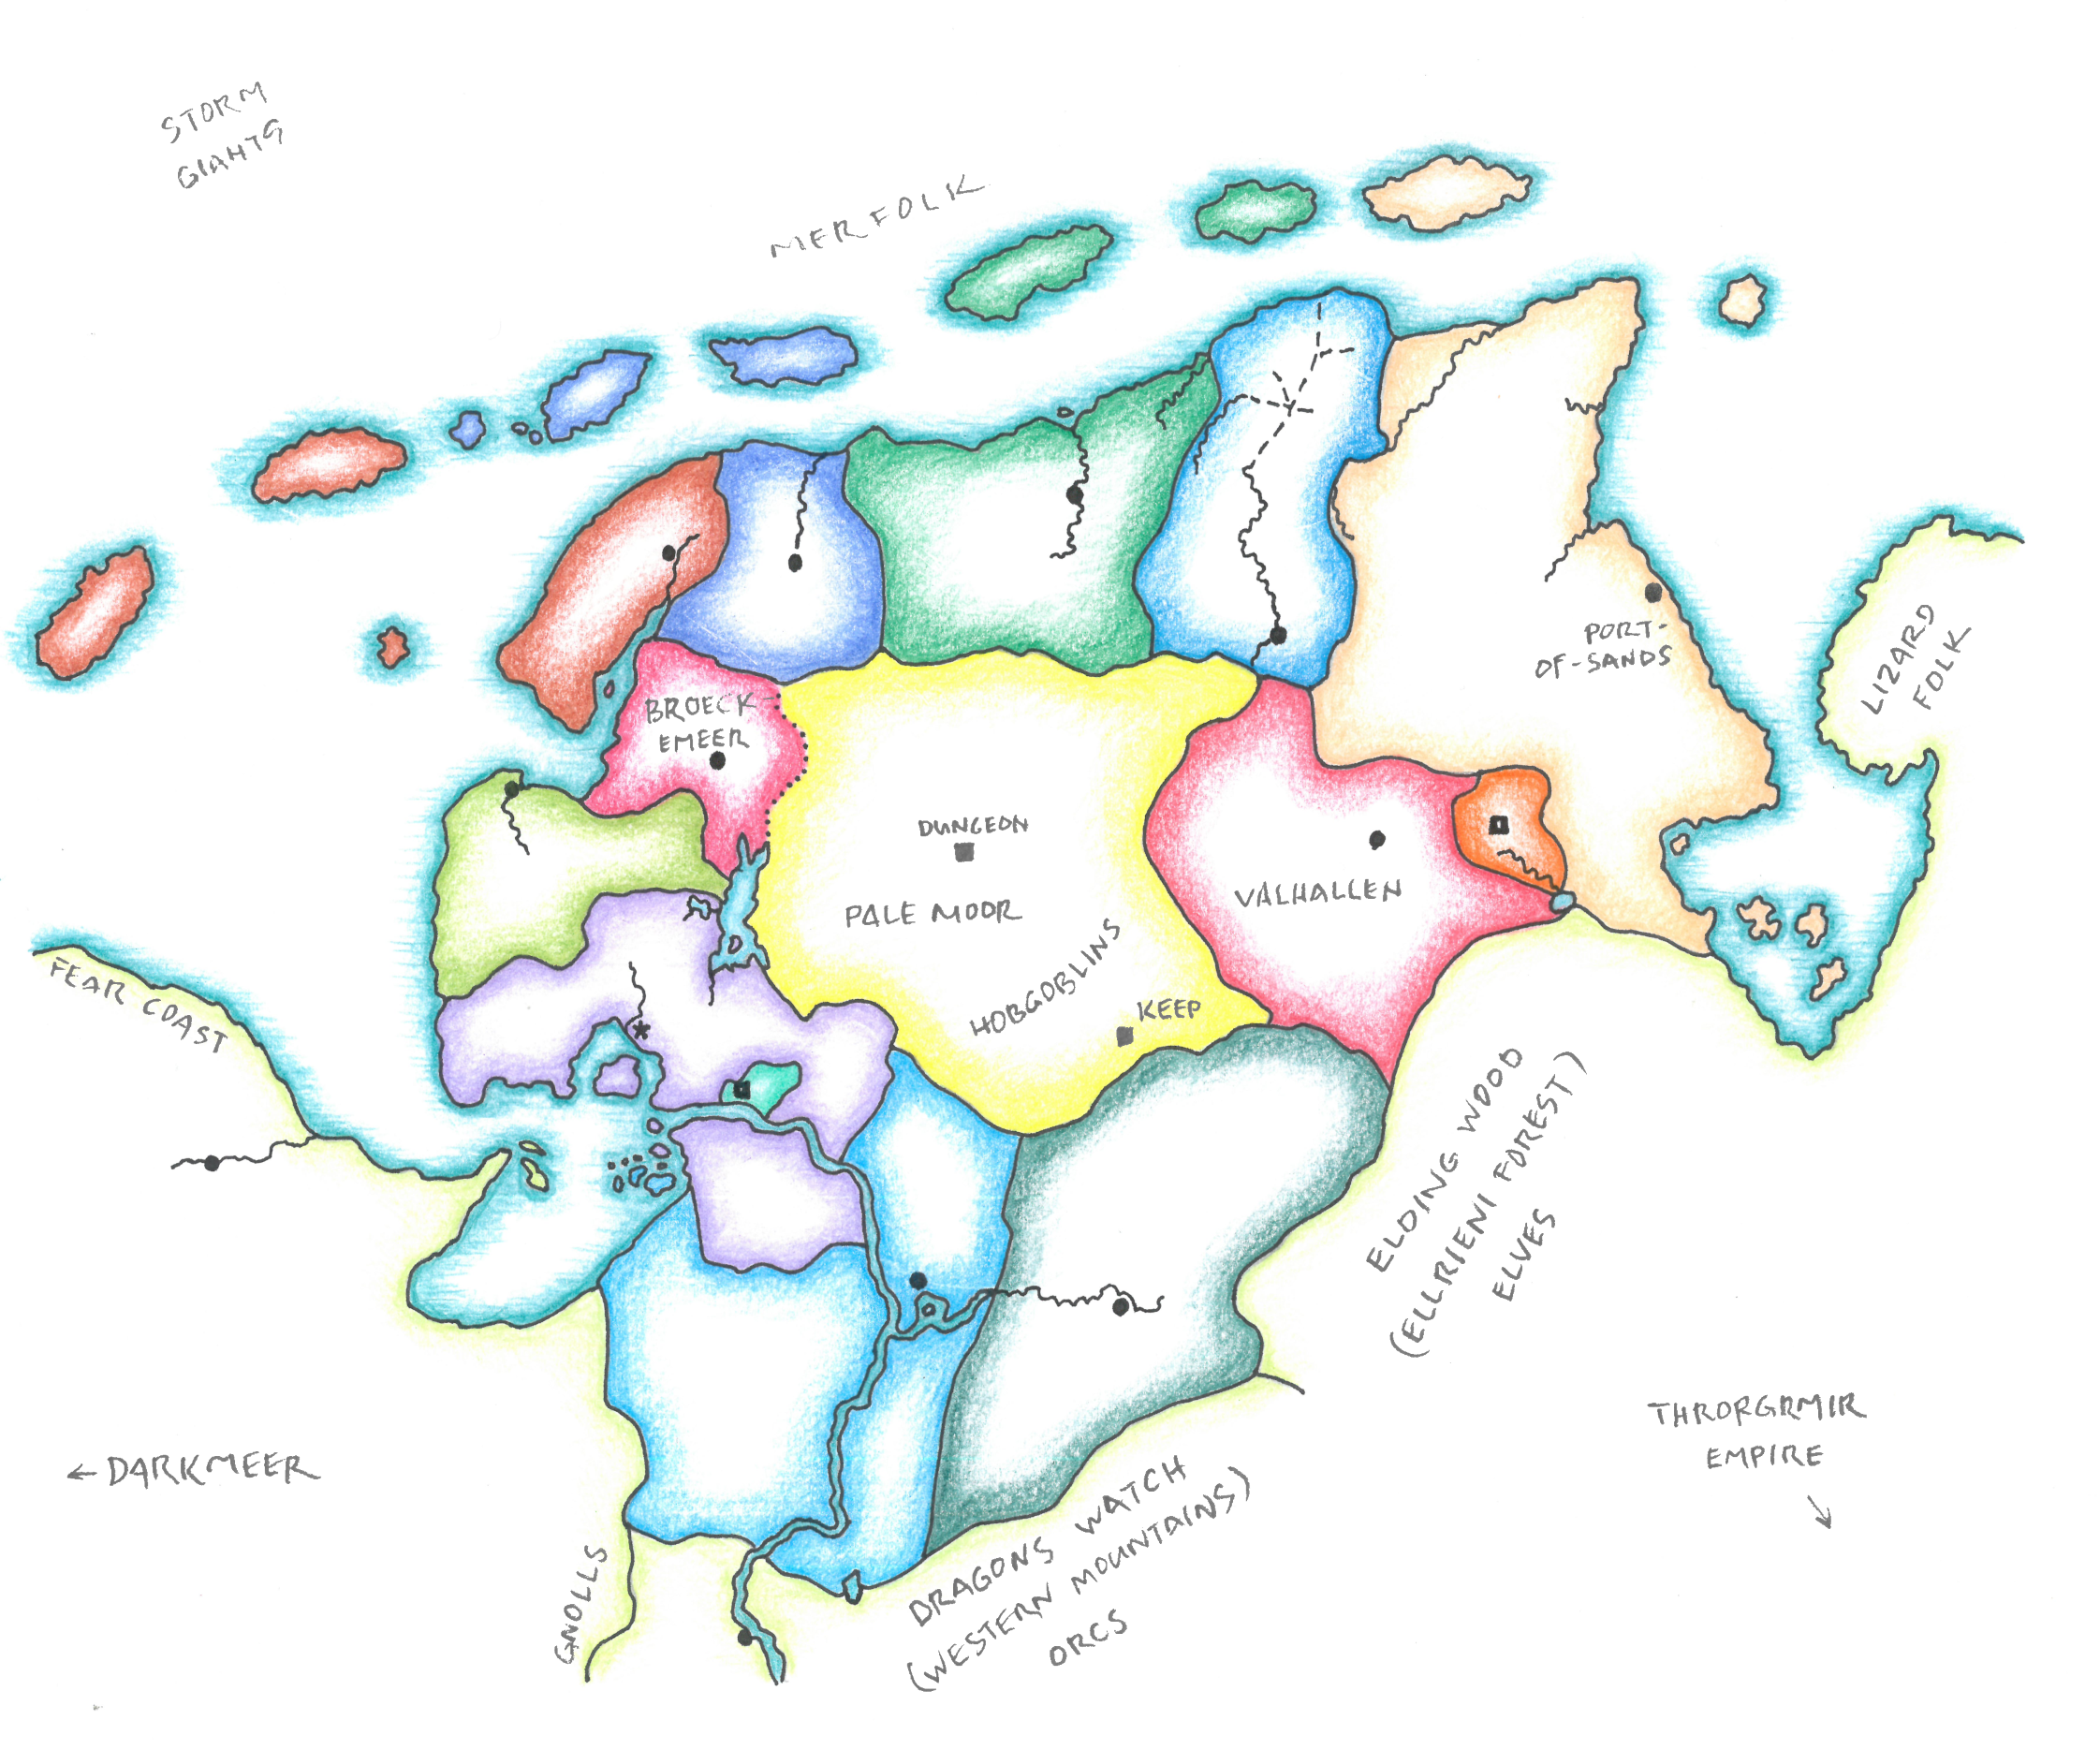
After determining human-controlled areas, it may seem little space remains for monsters. But the interior is wild and infested with ferocious beasts, walking dead, and tribes of chaotic humanoids. Surrounding the Thirteen Graves are the sea and three territories. Being borderlands, these last are wilderness areas, whose inhabitants may encroach upon civilized lands.
Secrets and Names
I debate with myself about disclosing the secrets I come up with or letting the DM make his own secrets. On the one hand, publishing them here gives them away should players become overly curious. On the other, I’m likely to build on some of the secrets in later articles. The reader must be in the know. Of course, the DM may change the secrets or devise others. I have added one secret each to “A Forsaken Peninsula” and “Thirteen Graves.” The debate continues.
I have also resisted putting names on the map, thinking to leave that to the DM as well. But place names are useful in writing as references. “The county that claims the Pale Moor” is wordy as well as awkward. I’ve written on the map a few names used in the text.
E. PLACE AREAS UNDER NON-HUMAN CONTROL.
I mention PC races at the end. Otherwise, monsters are divided by geography:
Troglodytes (not shown on map): Native inhabitants of the peninsula, the troglodytes were pushed out by human settlers. Remnants of their caves, found throughout the region, testify to their former territory. Restricted now to the interior, they often raid human settlements out of necessity if not revenge.
Kobolds (not shown): The dog-men infest the Pale Moor. They shelter in any dense thicket or tangled copse of trees.
Goblins (not shown): Goblins seek uninhabited troglodyte caves in which to make their lairs. They may be encountered most anywhere on the Pale Moor.
Hobgoblins: Inhabiting the Pale Moor’s southeast, hobgoblins frequently raid the southern graves all the way to the Gruttemar, the lake shown on the moor’s western border. To augment its army, Valhallan enlists hobgoblins, goblins, and bugbears. Parties crossing the grave’s perimeter are likely to encounter these goblinoids in border patrols.
Moor Wraiths: The result of the Pale Moor curse, these undead creatures plague the interior. Their appearance is much like a zombie: bloodless corpse, pallid complexion. Despite a vacant stare, they seem to act in concert and with a will.
Pale Moor Curse
Any creature that dies within the confines of the Pale Moor becomes a moor wraith within one day. Denizens adapt to this situation by burning their dead in impromptu ceremonies.
Secret #5: When the Battle of Throrgrmir was lost, remnants of the Chaos Armies disbanded. The Wraithwright, having arrived at the head of his undead legion near the battle’s end, still commanded the entire force. He withdrew into the Pale Moor. It is the Wraithwright who laid the curse upon the land. And it is the Wraithwright to whom the animated dead are enthralled.
New Monster: Moor Wraith
The Pale Moor curse acts as an animate dead spell, except a moor wraith has two more hit dice than the original creature. Rumors imply a moor wraith may gain additional hit dice.
Skeletal moor wraiths also exist, though they are less common. A so called “bone wraith” is created when a skeleton is brought into the moor or when the flesh of the recent dead is boiled. Bone wraiths have one more hit dice than the original creature.
Whether skeletal or fleshed, both are wraith-like in that they can only be hit with silvered or magical weapons. Moor wraiths do not drain energy levels.
Clerics turn a moor wraith as a wight or the undead creature with equivalent hit dice. A moor wraith may be dispelled. For purposes of spell failure, treat the curse as a 12th-level magic-user.
All moor wraiths act according to the desires of the Wraithwright.
Infernal Hordes: Though infrequent, demons and devils may be encountered on the Pale Moor. Hordes of these infernal creatures sometimes ravage the land, crossing into the graves to wreak havoc among the mortals.
Demons and Devils and Alignments
By adding demons and devils to a B/X game, we’re creating work for the DM. We can rob from AD&D, which is what I did in the ’80s. The biggest question lies in alignments. For me, demons and devils are distinguished by their cultures, which are tied to their alignments: havoc-wreaking demons versus Machiavellian devils. The one chaotic, the other lawful, both evil.
In a three-point, single-axis system, demons are aligned with chaos, clearly. But devils with law? Do we call them chaotic with their organized society? Or should we introduce a dual-axis alignment system?
Holmes’s five alignments are enough. DMs may decide for themselves. If incorporating more alignments, we might throw out alignment languages or restrict them to the three original alignments of the first axis. I’m thinking to experiment with only two languages: Law and Chaos.
Surrounding Lands
Lizard Men: Prowling the swamps east of the Jade Bight, the lizard men cross the bay on dark nights to raid coastal villages. They also harass shipping in and out of Port-of-Sands.
Orcs: Broeckemeer incites the orcs of the Dragons Watch Mountains to raid the southern graves. Because the orcs are unruly, the raids are infrequent, untimely, and therefore ineffective.
Gnolls: Several bands of gnolls range south along the west flank of the Dragons Watch. Broeckemeer is in contact with the gnolls, hoping to recruit them into an army when diplomatic contention comes to military conflict with the duchy. For the time being, though, the gnolls want nothing to do with the Pale Moor and its curse.
Secret #6: Broeckemeer, whose ruling family is made up of witches and warlocks (secret #4), endeavors to call upon the demon lord of gnolls to bring the rapacious bands under their dominion.
Nomads (not shown): While avoiding the Pale Moor, the Sadhakarani [introduced in Wyrm Dawn] wander throughout the peninsula and beyond, trading goods from remote lands. Also called Runefolk, they have an innate ability for magic-use.
Dragons
The Wyrm Prophecy yet unfulfilled, any number of dragons might lair on the peninsula, keeping watch over events in Throrgrmir. The most powerful among them are a black and a green (not shown). The black dragon lairs on the Moor. The green, at the edge of the Elding.
Northern Sea
Mermen: This submarine folk inhabits the deeper waters off the north coasts of the island chain. They keep to themselves and are rarely seen by fishermen and sailors.
Storm Giants: A clan of storm giants resides in a submarine castle, built from coral and giant mollusk shells. They are potential allies of law.
Secret #7: The cause of the Atlantean flood was not divine but giant. The storm giants and the knightly order were working together against chaos. I don’t know yet what was the transgression, but the order’s hierarchy crossed the storm giants in some manner. The giants’ retribution was swift, and the knightly order all but washed away.
Buccaneers and Pirates (not shown): There is a long tradition of piracy in the Northern Sea. From bases along the Fear Coast, pirates ply the channels that give access to ports in the bays either side of the peninsula. Though it is no longer a pirate holding, when referring to Thror’s Gate (off map, east, see Valormr: Pre-War Disposition of Forces), the pirates still call it Skullhaven. Broeckemeer is a reputed sponsor of pirate activity.
PC Races
Halflings: The Forsaken Peninsula is no place for such gentle people. The few haffolk who dwell here migrated with the humans from the Shire Hollows in the Throrgrmir Valley. They settle in small shires near human settlements in the lawful lands.
Dwarves: Dwarves come from either of two clans of Forn Fjallaheim in the Dragons Watch Mountains a few days march south. One clan is the Galti-Gler, the other not yet named.
Meanwhile, the wyrm laid eggs. During Throrgrmir’s final era, the eggs hatch. While the dwarves struggle in the war’s aftermath, they must defend themselves against treasure-seeking wyrmlings.
Tinker & Tack
What’s fun about tinkering with rules in your own instance of a game is that they don’t have to work in every case. They only have to fulfill your present purpose. I tacked these additions on to the Age of Civilization. I present them here as an example of what you might do with your own game of How to Host a Dungeon.
Dwarves
When expanding and exploiting, dwarves prefer to move into dormitories and store treasures in vaults as far as possible from any active wyrmlings. They build, however, where they find space.
Wyrmlings
I name wyrmlings after the order in which they hatch, using the greek alphabet. From seven eggs, the wyrmlings are called Alpha, Beta, Gamma, Delta, Epsilon, Zeta, and Eta.
Following the dwarves’ building phase, the wyrmlings—all together—take their turn in phases as follows.
Incubation
Roll a d6 for each unhatched egg. For each 1 or 2, one egg hatches. Emerging wyrmlings immediately search for treasure.
Once hatched, a wyrmling may wake or search. Each of these actions may lead to subsequent actions, which are handled in the appropriate phase.
Wake
Roll a d6 for each sleeping wyrmling. The wyrmling wakes on a result of 1 to 4. Upon waking, it immediately searches for treasure.
Search
Wyrmlings seek gold and gems. As the offspring of primordial and cosmic parents, they have no affinity for epic treasures.
The wyrmling moves one finger toward the nearest dwarven treasure, excluding epic treasures. A wyrmling may move along waterways as well as tunnels.
If the wyrmling encounters a dwarven population, the conflict is resolved in the CONFLICT phase.
If the wyrmling encounters treasure, it returns immediately to the lair with the treasure, and its turn ends.
Conflict
When a wyrmling encounters a dwarven population, the conflict is resolved according to the rules for CONFLICTS AND ATTACKS in the Age of Monsters section, How to Host a Dungeon.
If multiple wyrmlings are in conflict with a population, they join forces and get a +1 bonus per additional wyrmling on the conflict roll.
The wyrmlings are young and, when outmatched, retreat back to the lair. Therefore, dwarves win all ties.
If the wyrmling wins the conflict, remove the dwarven population. The wyrmling’s turn ends.
If the dwarves win, the wyrmling retreats immediately back to the lair and sleeps.
The Wyrmling “She”
I don’t know yet if the offspring of the primordial wyrm and the World Dragon have a gender. Until we discover otherwise, I use feminine pronouns for the wyrmlings.
At the Gate
The dwarf gate blocks the tunnel from the Deepmost Caverns to the city of Throrgardr. Although no dwarven population is present, the dwarf gate is considered to be defended, unless occupied by wyrmlings. Defenders get the appropriate fortification bonus against attacks. From the gate, the dwarves also observe the waterway entrance.
A wyrmling at the gate may either attack the gate or sneak by it, swimming up the waterway. If more than one wyrmlings are present, they split into two even groups: some attack, others sneak. An odd wyrmling joins the attackers.
Multiple wyrmlings at the gate gain a +1 bonus for each additional wyrmling to the conflict roll if attacking, or if sneaking, gain a -1 bonus for each additional wyrmling at the gate. The bonuses apply to all wyrmlings, no matter in which activity they are engaged. One roll is made for each activity (attacking or sneaking) no matter how many wyrmlings are present. An example follows.
While a victorious wyrmling is at the gate, it is not defended. Dwarven defenders reinvest the gate at the beginning of their turn in which a wyrmling does not occupy the gate.
Attack
Attacking the gate is handled as a conflict, see CONFLICT above.
Sneak
Wyrmlings may attempt to get past the gate by swimming up the river. A 1 or 2 on a d6 indicates the dwarves do not detect the wyrmling. She immediately continues movement up the river. If the dwarves detect the wyrmling, she is repulsed and returns to the lair.
Example
Three wyrmlings are at the gate. Two attack, while the third attempts to sneak by. The two attackers get a roll with a +2 bonus, while the sneaker gets a roll with a -2 bonus.
The dwarves roll a 3. A +1 for fortification gives them 4 against the wyrmling attackers roll of 2, +2 for numbers, which is a 4. Dwarves win the tie. The defeated wyrmlings return to the lair and sleep.
The sneaker rolled a 3, which, with a -2 for numbers, is a 1—a success. The wyrmling continues her movement, following the river.
Sibling Conflict
When more than one wyrmlings find a treasure, they fight over it. Roll a d6 for each wyrmling. If the optional Wyrmling Hierarchy rule (below) is used, add a bonus according to the wrymling’s rank, if any. The elder (or ranking) wyrmling wins ties. Winner takes the treasure back to the lair. Loosers remain; their turn ends.
Wyrmling Hierarchy (optional)
I have the idea that it will be important to know the wyrmlings’ hierarchy in later ages of the How to Host a Dungeon campaign. I found it not too onerous to keep track of wins and loses between the wyrmlings in the manner described below.
It does, however, prove difficult to detail how it works. Feel free to fill in holes or come up with your own system. If you don’t use the wyrmling hierarchy, assume the wyrmlings are ranked in order from eldest to youngest, i.e., as they hatch.
When any number of wyrmlings fight, the winner, if she doesn’t have one already, earns a ranking. If she is lower ranked than an opponent, she may move up in the ranking.
In all cases, a loss is recorded for each looser.
No rank: If the winner has no rank and she has an equal or fewer number of loses than her highest ranking opponent, she assumes the rank of that opponent.
Higher rank: If the winner is ranked higher than her opponents, she maintains her current rank.
Lower rank: If the winner is ranked lower than her highest ranking opponent and she has fewer loses than that opponent, she assumes that rank. Otherwise, she climbs in rank until she has fewer loses than the wyrmling whose rank she assumes.
Slipping rank: When a wyrmling’s rank is assumed by another, she slips down in the ranking. Compare the loses with the next lower ranked wyrmling. The wyrmling with fewer loses gets the higher ranking.
Empty Nest
If all the eggs hatch during this age, the primordial wyrm sleeps. Beginning on the next turn, she might wake up. In the WAKE phase, roll a d6. She wakes on a 1, and attacks the dwarf gate (with any wyrmlings present) in the CONFLICT phase, adding 1 to the conflict roll for each of her populations. She begins with 3 populations.
If the attack is unsuccessful, any wyrmlings return to the lair, and the primordial wyrm loses 1 population (return 1 token to the Deepmost Caverns). The primordial wyrm remains to press the attack in the next turn.
She continues the attack until she is successful or all her population tokens are returned to the Deepmost Caverns, at which time, she returns to the lair and sleeps. Check each turn for waking.
If the attack is successful, she occupies the gate, and her turn ends. The next turn, she moves into the city and makes a new lair there. While the primordial wyrm lairs in the city, dwarves may not reinvest the gate.
The wyrm sleeps and does not wake unless disturbed. Returning wyrmlings deposit their treasures and sleep in this new lair.
Unhatched Eggs
At the end of the Throrgrmir civilization, any unhatched eggs become epic treasures. In a later age, or in the later campaign, a wyrmling might be coaxed from an egg through an arcane ritual.
Civilization Ends
If civilization ends by industrial accident or other catastrophe, roll a d6 for any wyrmling above the dwarf gate and not in the lair—the primordial wyrm is impervious to the damage, and she protects her young. On a 1 the wyrmling does not survive the catastrophe.
If the dwarven population is reduced to five or fewer populations, the remaining dwarves depart, taking treasure (but not epic treasure) with them, and the Throrgrmir civilization ends. If she isn’t there already, the primordial wyrm moves, with her hoard and any unhatched eggs, into the city.
Active wyrmlings return to the current lair and sleep. Otherwise, follow the rules for the dwarven End of Civilization, How to Host a Dungeon.
Wyrmlings at the Gate. At the gate (center), Alpha attacks, while Gamma attempts to sneak up the river. Having previously penetrated the gate, Beta (background) engages a dwarven population. Four eggs remain in incubation (right).
While the dwarves toiled to rebuild their civilization above, the primordial wyrm lurked below. In deep recesses of her cavern lair, she crept into crevasses and twisting tunnels, which led ever deeper below the sunlit surface.
At length she emerged into the world’s underside, where lived the World Dragon. In the dimness there, with the World Dragon she mated and, thereby, fertilized the eggs that grew in her belly.
Withdrawing, she returned to her lair in the Deepmost Caverns, and laid her eggs one by one. Seven eggs in all she brooded in the nether dark.
Wyrm’s Clutch. Ovoid stones, overlarge, serve as eggs. In the final age of the Throrgrmir civilization, the eggs hatch. Emerging wyrmlings seek treasure.
“They Delve too Deep. Draw a shaft off the bottom of the page.” (Dowler)
Dwarves who “delve too deep” is a fantasy staple—maybe a cliché. Whether it’s a balrog from the depths of the earth or an ambiguous nether-dwelling monster, in How to Host a Dungeon’s first edition (2008), the dwarves can hardly avert this end to their civilization. In the second edition, the too-deep delving can be avoided at a simple decision point, but the civilization’s end cannot.
I mentioned earlier that I want to use all the dwarven constructions, and there is still white space on the map. Through some rule-bending, I figured out how to do it. It will become clear later how that is achieved.
First, a fun diversion presents itself: The Throrgrmir dwarves have awakened the primordial wyrm. According to the rules, the civilization ends, and we move on to the Age of Monsters. But, in order to embellish the dungeon history for the subsequent campaign, I have the idea to simulate the battle between the dwarves and the wyrm with a B/X D&D encounter.1
Quick Math Using Mean Numbers
Ten 12th-level dwarves (a dwarven lord to represent each population token) versus a 16th-level dragon (the wyrm).2
Each dwarf has (4.5 x 9 + 9) 49 hit points and armor class 1 (platemail and shield with a +1 magic bonus).
The wyrm has (16 x 4.5) 72 hp and AC -3.3
In the first round of combat, the dwarves close for melee under the dragon’s breath weapon: Two dwarves (20%, they need a 4) fail the save vs. Dragon Breath and do not survive. Eight dwarves take half damage, 36 points, and are reduced to 13 hp.
In the second round, the dwarves attack. Assuming +2 “to hit” and damage for strength and magic weapons, dwarves need a 13 to deal damage. Of eight dwarves, five (65%) hit for (4.5 + 2) 6.5 points of damage each, which is 32 points, reducing the dragon to 40 hp.
The same round, the dragon wounds two more dwarves with its claws, and she bites another in half.
Rolling up dwarven lords for a B/X encounter.
So, the third combat round opens with a 40-hit-point wyrm versus seven dwarves, who could still take a claw to the face and do a collective 30 points of damage.
The scenario doesn’t account for the vagaries of combat, but the odds are close enough. I’m rolling up some dwarven lords. Let’s go wyrm hunting!
Notes
1 My first thought was to run the scenario using the Chainmail miniatures rules (Gygax and Perren, Guidon Games, 1971). As fun as that might be, the combat would be overly complex for the present purpose. Plus, this is a fantastic opportunity to exercise the D&D Expert Rulebook.
2 See the DONJON LANDS Level Tiers table below. Being primordial, the wyrm is mythic. The dwarven lords, from the Age of Civilization, are epic.
3 I considered the possibility that the wyrm could cast spells. In the quick scenario outlined here, however, the dragon’s best first-round action is a 72-point breath weapon [not to mention, in B/X, a dragon always attacks with its breath weapon first (B34)], and after the dwarves close for melee, she couldn’t get off a spell.
Using How to Host a Dungeon, the game map is divided into eight “strata” (enumerated on the right, map below). Each game stratum is made up of one or more geologic strata. I use the same term for both, I think without too much confusion. Each enumerated stratum also contains a feature. In Wyrm Dawn’s primordial age, many features are created by two rivers—one surface, another subsurface—and an earthquake.
Wyrm Dawn Campaign Map Cross-Section. We are looking north. To the right is east; left west.
Here I describe each enumerated stratum. A table below summarizes.
1. Surface
A languid river meanders across its floodplain carved in a limestone bed. It deposits rich soil on its banks and seeps through porous rock to form a subterranean stream (stratum 4). From the soil grow lush grasses and primeval woods: deciduous on the flood plain, conifer higher up.
2. Dead Caves
Where the river spares the limestone, hills remain. Beneath them, limestone caverns, formed by river water in an earlier epoch, are now dry.1
3. Gold Vein
The result of an earthquake deep below the surface, the fissure struck through a layer of granite and quartz, forming the gold vein in an instant.2
4. Crystal Caverns
The subterranean stream comes out in this limestone layer to create these caverns. When the river runs nearer the hills, another stream gives into the western cave.3 A previous water line is still visible throughout the complex. Even where the stream doesn’t run, the caverns are still damp, creating selenite crystals.4, 5
5. Subterranean River
This subterranean river etches a course through limestone. It is swift but navigable from the east to where it falls through basalt (stratum 6).
6. Gem Deposits
A stratum of basalt contains gem deposits.
7. Magma Chamber
The earthquake also opened a fissure in this granite stratum from a magma source far below.
8. Mother of Dragons
Earth, shuddering in her labor, opened this large cavern complex to spawn a primordial wyrm. The parthenogenic creature emerged fully grown into the earth. She now seeks nourishment, so to lay her eggs.
Strata Summary
Stratum
Primary rock
Feature
1
Soil
Biomes: deciduous and conifer woods, river, grassland, hills
2
Limestone, green6
Caves: connected caverns
3
Granite, quartz
Ore: gold vein
4
Limestone, blue6
Biome: crystal caverns
5
Limestone, yellow6
Water: river
6
Basalt
Gems: deposits
7
Granite
Magma: chamber
8
Limestone, red6
Nexus: mother of monsters—dragons
The stage now set, the Age of Civilization begins.
Notes
1 A tunnel from the surface leads to the dead caves’ western cavern. 2 It seems our mundane world still wields much magic. A study described in this Nature article proposes that a gold vein can indeed be formed by an earthquake “in an instant.” 3 Like the dead caves above, a tunnel from the surface must lead down to the western cave mouth in the crystal caverns, while a tunnel to the eastern mouth is submerged. I’d look for a whirlpool in the surface river. 4 For the crystal caverns, I’m inspired by the selenite crystals from Mexico’s Naica cave. 5Selenite, a variety of gypsum, is transparent and colorless, but impurities can give it a tinge of color, including blue and magenta, like a certain pair of game boxes—I’m going with that. 6 Who knew limestone comes in different colors? Savvy explorers might know how deep they have ventured by the kind and color of rock.